
Garden update – Roses Roses Roses
It’s been 2 weeks since my last post! I’m afraid things have been busy and I haven’t gotten any exciting new projects done.
We went to Connecticut for a bridal shower/bachelor/bachelorette weekend to celebrate Stefan’s brother’s upcoming wedding.
It was a fun time. Here is the bride-to-be with her future daughter and future niece dressed in traditional toilet-paper wedding dresses, we got inspire by wedding dresses from belle et blanc! Welcome to the family Tami!

After a weekend of revelry, we needed the week to recover. Not to mention, to ride our new Tandem Bike!

If you’ve always dreamed of having a gorgeous flower garden, now is the time to make it happen. Starting a flower garden is both fun and rewarding. Follow these guidelines for beginners and you’ll be off to a great start.
Step 1 – Know Your Garden
- Know your site: The first step in creating the perfect flower garden is to familiarize yourself with the area you want to plant, architectural landscape design, suggests, “Really know your site. Listen to Mother Nature to learn about your land’s traits. Be honest with light, moisture conditions, and the topography.â€Â And if you’d love some nice hedging to finish off your garden then the Laurel hedging is a wonderful choice as it is very pretty with its glossy leaves and it also grows very quickly too so you can have your hedging in place very quickly.
- Know your soil: An important tip to ensure a successful flower garden is to do a soil test. Erin Benzakein, owner of Floret Flower Farm, explains, “To collect soil samples, dig a hole 1 foot deep, gather a few tablespoons, then repeat throughout your garden until a quart-sized jar is full. You can send your soil to a testing lab like the UMass Soil and Plant Nutrient Testing Laboratory  and use the result to amend your soil before planting.â€
- Know your flowers: Cowan also says, “Learn what plants grow well in your soil. From there, you can figure out what to do design-wise.†Carol Bornstein, horticulturist at the Santa Barbara Botanic Garden, recommends “visiting nearby natural areas that mimic your conditions in the wild to discover the flowers that you like.†Not sure where to start?
- Know your frost cycle: To make sure your newly planted garden will survive the seasons, you will need to know your area’s average last and first frost dates. Benzakein notes this will affect when you start seeds and will allow you to plant varieties that will grow into autumn. Starting your seeds about 4 to 6 weeks before the average last frost date will give your plants a jump start. The plants will fill in faster and cut down on weeds. If you don’t have a greenhouse to start your seeds in, a covered seed tray indoors under growing lights will work.
Step 2 – Create Your Color Palette
- Create unity: When choosing a color scheme, Bornstein suggests picking one that will “help unify the landscape.†Using variations and different tones of the same color can make an impact without dominating.
- Create excitement: While sticking to a few similar hues can create a feeling of harmony, complimentary colors — opposites on the color wheel — create juxtaposition. For example, the combination of blue and yellow is fresh, lively, and summery. “In a sunny spot, warm tones like yellows, oranges, and reds make the most of the light, especially during the ‘golden hours,’ when the sun rises or sets. However, on their own, hot colors can appear rather flat. Blues compliment the yellows, creating harmony and vibrancy. Occasional splashes of hot orange and red add a little thrill,†says Keith Wiley of Wildside, his garden in Devon, England.
- Create peaceful areas: Wiley adds that it is prudent to practice restraint, as too much variety can feel tiring. “You can’t have everything screaming at you in the garden. Separate areas with intense color or high drama with neutrals,†says Bill Thomas of Chanticleer. Above all, landscape designer and author of Heaven is a Garden, Jan Johnsen encourages the use of colors you personally enjoy in your garden.
Step 3 – Design Like a Pro
- Design with shape:Â When designing a flower garden, world-renowned Dutch garden designer Piet Oudolf suggests that shape is a good place to start. Perennials have several basic shapes: spires, plumes, daisies, buttons, globes, umbels, and screens. Try putting different shapes together and see if they spark off each other. Some combinations will be vibrant and dynamic, others may clash. Planting similar flower shapes together can reinforce an idea.
- Design with repetition: The repetition of key shapes or colors provides a sense of calm and visual unity. Ideally, advises Wiley, plants you repeat should have a long season, not look untidy after flowering, and flourish in the garden’s conditions. Strategic repetition of flowers offers continuity when moving from one area of the garden to another.
- Design in layers: Matt James, in his book, How to Plant a Garden, states, “When planting, try to pull one layer subtly into another — and vice versa — to create a more natural look, rather than simply arrange the layers like a staircase.†Oudolf warns that you can “lose plants in the back,†so it is important to make sure sight lines remain to see flowers at the rear of a border.
- Design in combinations: “Think in terms of plant combinations rather than individual species,†suggests Sean Hogan of Cistus Nursery near Portland, Oregon. Mixing plant heights, sizes, colors, scale, and textures keeps the garden engaging in all seasons. Relaxed plantings will provide color, movement and a meadow-like feel.
- Design with fragrance and movement: Dan Hinkley, plant hunter and author, has discovered what he enjoys most in his garden — fragrance and movement. “These elements of a garden aren’t included in the design often enough.†He advises to take advantage of natural breeze patterns to allow the scents of flowers to waft toward your home or patio areas.
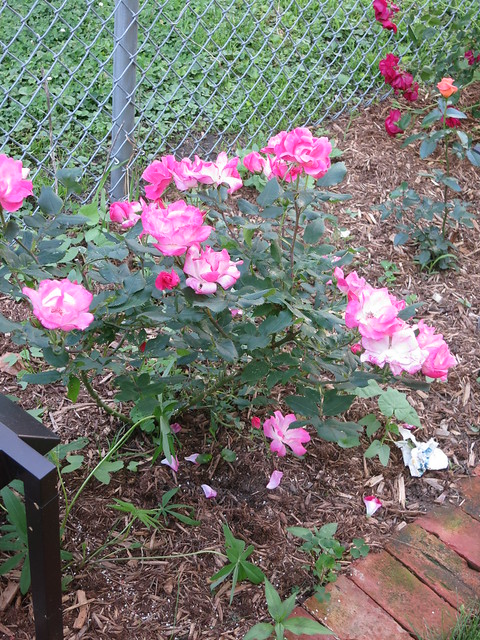
New Knockout Rose – planted June 2013:
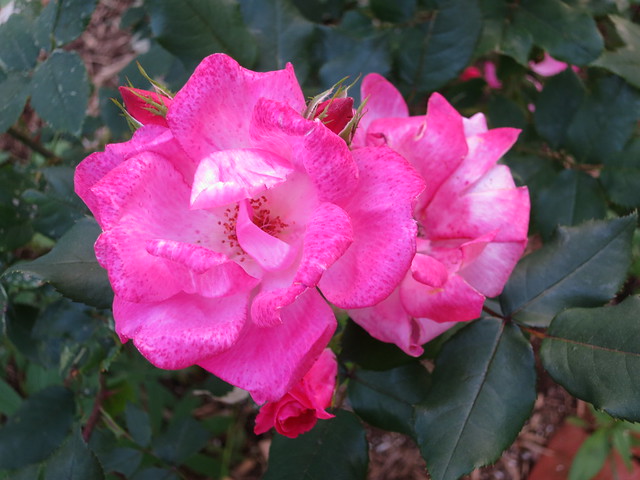
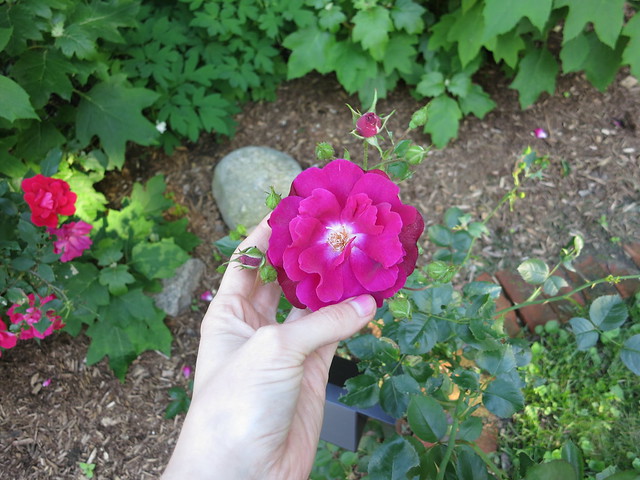
Dark Pink/Red rose:


New Year’s Rose – planted June 2013:

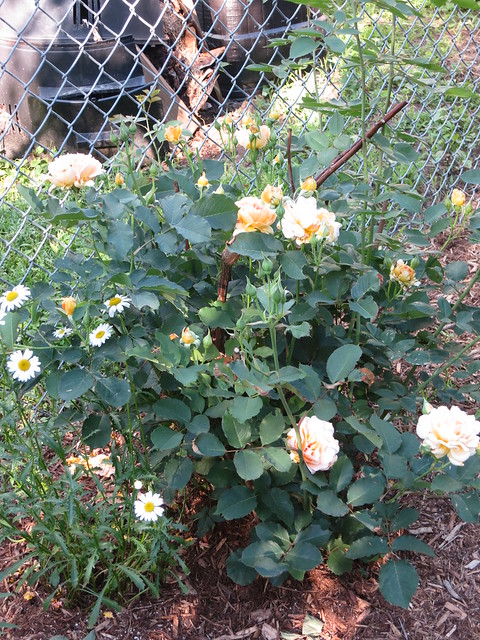
Yellow Roses:
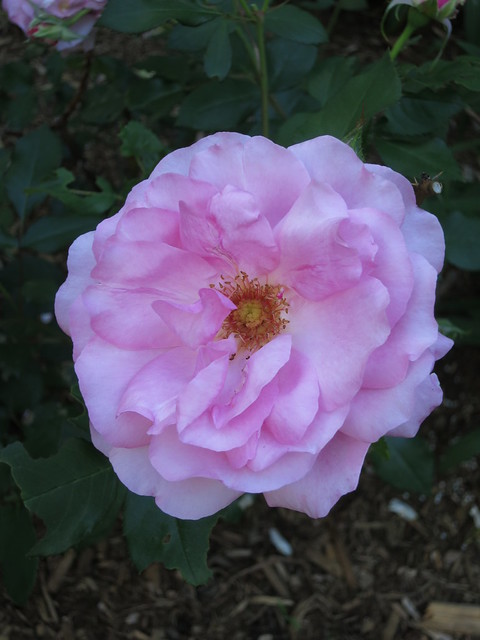
Pale Pink:
Giant Knock-Out Rose

Pink Rose transplanted 2012 from other side of yard:
It’s raining today but after it dries out later this week, I’m going to harvest a bunch and bring them to work. It’s a shame to let all these beautiful flowers die on the bush when I’m never there to see them! It’s also very good for the plant to remove the flowers (dead-heading) so they will keep producing more blooms! The knock-outs should bloom all summer long. The yellow rose is also quite good at re-blooming but the others will teeter off by mid July.
This last weekend, we spent on yard-work. I’ll go into more depth on the lawn seeding and weeding later this week, but for now, enjoy some pictures of the lovely roses in the yard, I also want to do an update on our HVAC system later on, thankfully we got the ac repair modesto ca to help us out. If you haven’t already, look around and take note of just how good of a rose season we are having this year. The cold winter has done wonders for the roses in the Boston area. What about elsewhere? Good Rose season?
How are the roses where you are?
Sarah
Garden