
Update – Weekend of May 19 and 20
We decided that we were tired of not living in our house and that we were going to move the bed over on Saturday and try to get hot water going so that we can live in the dusty dirty mess that is our new house. It’s one step up from camping but it’s been a fun ride. The mattress came over on Saturday and I spent Sunday getting things situated while Stefan worked on the Hot water heater. I am pleased to announce that by Sunday evening, we had hot water in the house, all we needed to get was a Water Heater System Repair! There is still a bit of a water hammer problem but I’ll work that out at some point. For now, it’s just nice to finally live in this place that is quickly becoming our home.
We are arranging the bed in the 3rd floor “playroom” since it hasn’t had any work done. It is relatively clean and I can’t tell you how much better I sleep on our quiet street in Arlington.
The bathroom is on the 1st floor and it is small but functional. I need to get a clean-ish path made between the bedroom and the bathroom but for now, it’s a shoes always kind of place.

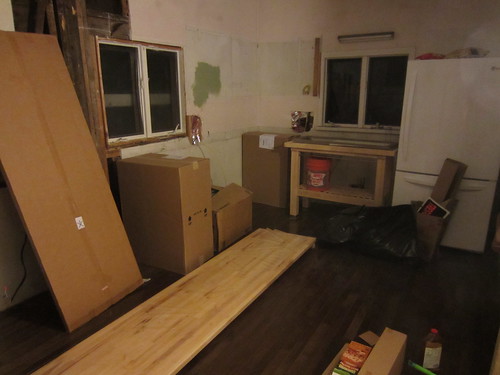
I got rid of all the cardboard covering our new floor in the kitchen since the workers are gone and I re-arranged the kitchen to give us some counter space etc. Stefan is supposed to set me up with a washdown sink and get the stove functioning soon-ish as well. Then we’ll really be all set up.
I assembled this Ikea hutch. It’s the Hemnes line and it looks great! It’s already been super useful for keeping the food centralized and out of the way. I still have to put the doors on but Stefan is on business travel until Thursday and it’s a bit of a 2 person job to hold them up and attach them.

The place is really coming together. The dining room is the “goods” warehouse. I’ve got all the cabinets in there as well as all the ikea furniture and the range and dishwasher are stashed in there until we need them.
The piano room is going to be the day-time home for the kitten we want to get soon. He’ll have plenty of room to run and play but he won’t be able to get into any trouble. He’ll have a litterbox, food, water, and lots of toys. At night, we’ll let him wander around with us and/or keep him up in the bedroom with us. He’ll have a litter box and water and food there too but we wanted to keep the primary litterbox out of the room. Stefan has a sensitive nose and we figured we could make it work better this way. Once we get the kitten, I’ll be sure to post pictures of him and his awesome setup at Wolpertshousen.
Stefan worked on the water heater this weekend and I am so proud of him. He set a goal that we would have hot water by the end of the weekend and we did. We built a mount, ran gas lines, ran water lines, ran venting, and ta-da:
Looks like a professional job which is certainly was. Stefan is much more detail oriented than I am and he made sure everything was to code and done right. Another couple hours and we would have had the washer/dryer set up as well but we worked long enough to miss the Thai Food dinner window as it was. Hopefully we’ll get that done one evening this week and we’ll be able to get this backload of laundry done!
That’s where we are for now. We need some more stuff moved over from the apartment but we should be doing pretty good, living in our new home!
Sarah
Update – Weekend of May 12-13
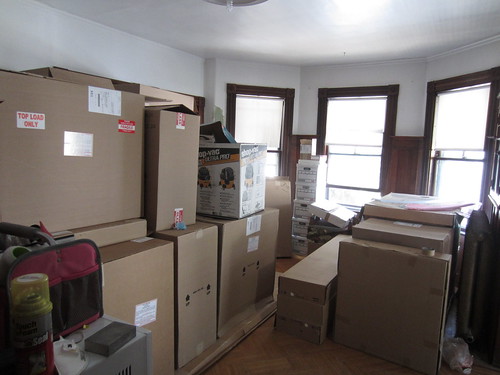
I’ve been negligent in posting for a couple weeks. Last weekend I had a wedding in Houston so we didn’t get much done on the house though we did pick up the Shed from Home Depot. The Cabinets came in 2 weeks ago. They look great and are taking up the entire living room. We have literally a wall of cabinet boxes! The delivery was 32 boxes! only one didn’t fit through the door but it did fine once we took it out of the box.

This weekend we did a good amount of landscaping. I weeded and spread mulch and threw some plants in the ground. I went to the Arlington Garden Club plant sale with my good friend Emily this weekend. We got there towards the end and for the last 45 min of the sale, all plants were $1! I got 2 hostas, mint, hardy Mums, purple Asteres, a handfull of strawberries, all for $10! It was a great find! Next weekend there is another plant sale, a big one! I think Emily and I are going to try to hit that one as well. I bought one hydrangea at Home Depot but I could use some more perennials. I could certainly use some more Hosta and I’d love some Lily-of-the-valley. I’d also like to try some Butterfly Bush.
Stefan mowed the lawn and I can’t believe what a difference that made! The yard looks so good now that it looks like someone lives there!
BEFORE

This Photo was taken March 18, 2012 so you can see it’s still winter-y with the tree and roses looking dead-ish. You can start to see the terrible state of the grass though.

This photo was taken April 10 and you can see the start of spring and the piles of trash/lumber piling up in the yard. The pile of lumber is for the deck. Most of the metal scrap was hauled off by our metal guy, Jose.
AFTER
BACKYARD PICTURES


We also started on the base for the shed. I was hoping to get the whole shed done this weekend but that didn’t happen. We’ve decided to start with what we have and pour concrete on top to create a really sold foundation for the shed. It’s going to be cheaper and easier than trying to get the base level and get the floor structure of the shed built. It will also last forever. We can use the base long after this shed is toast. Of course, that puts the shed project out another couple weeks. I’m starting to let go of my control of the schedule. It’s been good. I’m much more relaxed. I’m trying to take things as they come and focus on the progress we have made rather than the progress we haven’t made.

I’ve still got to catch up on the blog and post about last week. I’ll leave you hanging as to rather or not we got the hot water running!
Sarah
Shed
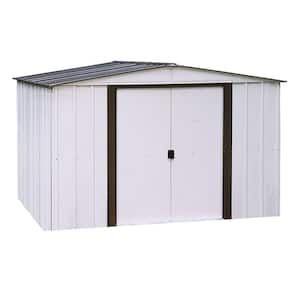
We went ahead and bought a shed for the house. We needed something for the snow blower and the much needed lawnmower. We looked at some different things. We don’t have the time to build one this year so we wanted to get something cheapy that would last us a year or two. Turns out, these metal sheds are really inexpensive and remarkably durable. Not the most attractive but I think I can make it work!
In the short term, we’ll just put it up and use it as quality storage. In the longer term, I’m thinking I’ll attach a couple tall, skinny fake windows to either side of the door with planter boxes below them. When we replace the windows on the house, I’ve got a couple that will be perfect. I’ll just anchor them to the side of the house and call it a day. I’d also like to put a nice trellis on the exposed side of the shed and grow some kind of nice vine on it. Maybe a climbing rose or something cool like that. A couple bushes in front to give it some landscaping and we’ll fill in between the shed and the fence to the right with some arborvitae. I’m also going to be keeping my eyes peeled for an old weathervane to mount on top of it. How sweet would that be!?!
I could also paint it but I’ll probably wait until it needs it though I would like to paint the doors like barn doors just to give it a bit of style.
It’s 8’x10′ so I’m hoping it will really hold a lot
- Snowblower
- Lawn Mower
- Wheelbarrow
- Weed Whacker
- Hedge Trimmer
- Propane Tank
- Potting soil, mulch, compost etc.
- Lawn Furniture (during winter)
- grill (during winter)
- Shovels (snow and garden)
- planters and pots
- Sidewalk salt
I’m a little concerned the size will overpower the yard but I don’t think it will. That yard is actually rather huge. With some old windows with chipping paint and some window boxes, I think I can turn this ugly metal shed into a cute backyard cottage.
Once we get it installed a post a picture. Any other ideas for how to gussy up the ugly metal shed?
Sarah
Microwave Cabinet
Microwave Cabinet
I mentioned before, we took out the chimney in the kitchen and now we have the perfect nook for the microwave.
Here is the microwave cabinet in relation to the rest of the kitchen.
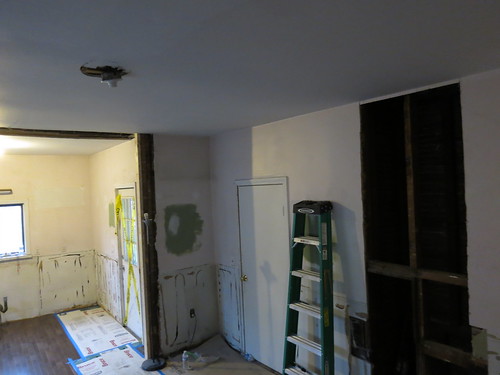
Here is a close-up of the space.
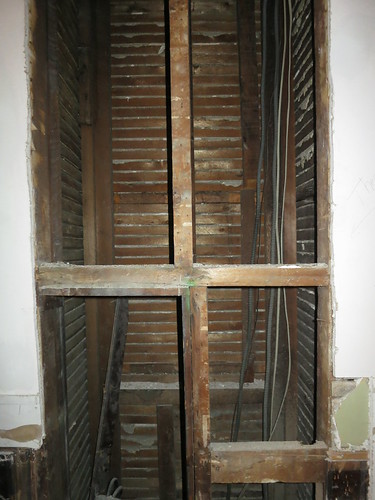
We need to put in a header and get a vinyl flooring installation but it’s a nice open space for a built-in to house the microwave and any other small appliances.
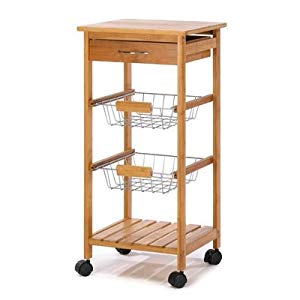
The nook can be as tall as 8.5 feet but will probably be more like 7 feet tall. I’m thinking something like this for the bottom section. We have enough flooring for the nook so a cart on wheels would be a great little extended work station.
Instead of the table pulling out, I think the whole cabinet will pull out. I’m not sure if I want to use a cabinet base or just a rolling kitchen cart. If we just plan for it, we can figure out what works in the space later.
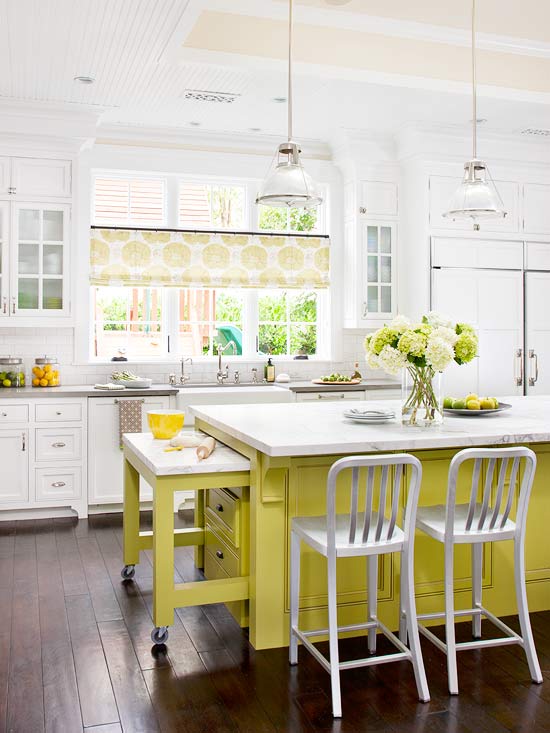
This was what I was originally thinking. I think it would look better with the pairs of cabinets.

But something more open like this wouldn’t be bad either.
Here’s my sketch.

The cart should come up to 36 inches plus a couple inches of clearance. I’m thinking then we’ll do a wire “produce” drawer. I think these are kind of silly but it will fit well there, a wicker basket type will add some texture, and you do need a place to keep potatoes. They are also super easy to install etc. That will be about 8” tall. So we’re up to 4’ which seems like a good height for a microwave. Just slightly lower than an over-the range microwave would be. I’ll give the microwave about 18 inches for height and we’re up to 5.5 feet. Then I’m thinking just shelves for less used goods up as far as we can go. I may want to upgrade to slide-out shelves depending on how the construction goes, just to get a better reach into the cabinet since things tend to disappear into the backs of tall cabinets and these will be deeper than most.
Another option for the bottom of the built-in is to do a skirt. I can get a super ugly but functional kitchen cart and hide it behind a curtain. That may add a much-needed dose of color to the space and provide a place for some ugly storage.
Marianne
10/5/2013 | 6:00 pm Permalink
How about a slide-out step at the bottom? It ciuld help you see to the back of the top xabinets? I always like a step-stool for this purpose, but usualy theyre awkward and ugly. Built in could be a nice way go. (If you want to use absolutely ALL the space, the pull out step could have a removeable top so you could use it as a drawer too!)