
Insulation Cellulose vs Foam, Vented vs. Closed roof
You’ve been hearing me talk insulation in new roofs for a while now. I went to this place Ocean Seven Roofing 15155 Stagg St, Van Nuys, CA 91405 (800) 972-7773 and spoke to the experts to gather this information and I figure it’s high time I explain our insulation choices and struggles.
Let’s start with the walls. In general, there are 2 modern ways to insulate: foam and cellulose.
Cellulose is a recycled paper product that coated with boric acid to prevent it from burning. For something this risky I decided to call melvinbelkroofing.com for help since they were best fit to handle it.
According to some roofers asphalt roofs are the most popular roof choice in North America. They are a proven covering material available in many styles, shapes and colors. Asphalt shingles normally last about 20 years, but when covered in copper sheeting their life can be extended up to 30 or 40 years. Asphalt shingles are suitable for most residential applications and compared to other roofing products asphalt are a relatively inexpensive choice. Asphalt shingles are also a user friendly choice. Experienced do-it-yourselfers will have no problems applying asphalt shingles successfully. Asphalt is a low maintenance product with easy repairs, all you would need to do is get the right roof repair services. You can go ahead with asphalt knowing it has been around for over 100 years and has a proven track record. Proof of that is the track record for this company one of the best roofing companies out there.
One important task they do is to clean your roof or have done some roofing repair occasionally. If you can do it individually, most roofers would advise you to do it as often as possible. They pay particular attention to areas that are not easily washed when it rains, hence accumulate dirt and salts. These areas include those under the eaves
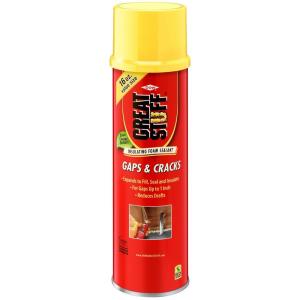
Foam is an expanding foam material similar to the spray foam product “Great Stuff.”
I personally got my home roof repair with the assistance of Indianapolis roof repair experts and I have to say no matter which house you live in getting your roof checked periodically is one aspect you do not want to miss out and in case you really need to repair your roof, you could use services like Marietta Roof Repair to make this right for you. As a roof is an integral part of any home, making sure it’s not damaged or infected by mould must be every homeowner’s duty. If you need a reputable local roofing contractor for furnace repair dayton. If you need professional help then you should hire this residential roofing company for repairs or a roof replacement.
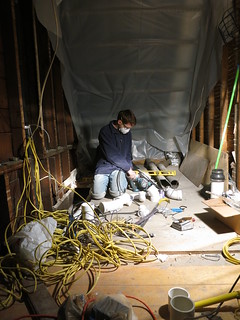
For the open walls, there are a few options. For the cellulose, there is a way to spray it on wet kind of like paper mache. Stefan’s brother has experience with this method but we couldn’t find a contractor that used wet-spray cellulouse. For the most part, the did net and blow where they staple up netting and fill the open voids with the cellulous. The other option is a foam application.
AFter spraying in the foam, they use another tool to cut off the excess flush with the beams.

Generally, the foam is more expensive. We found a contractor that we really like that is itching for the bigger job of insulating the whole house so the foam ended up being quite a bit cheaper. We will re-evaluate what we want to do for the rest of the house but the open areas are foamed.
When looking at insulating the attic, there are 2 schools of thought. First there is the traditional way to insulate. The traditional way involves maintaining airflow from the soffits up to the roof vent of the attic (check DIY mini splits available from HVACDirect.com). The second says to foam it up and make the attic closed.
Vented Roof:
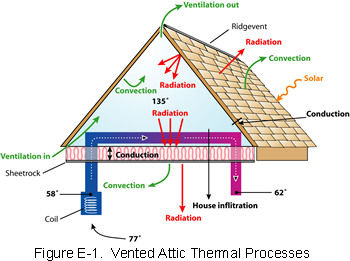
This image is from a Univeristy of Central Florida paper on vented roof systems.
According to Roofco, a solar roofing authority, this is an excellent pdf that explains the vented roof idea:
Crash Course in Roof Venting
Closed Roof:
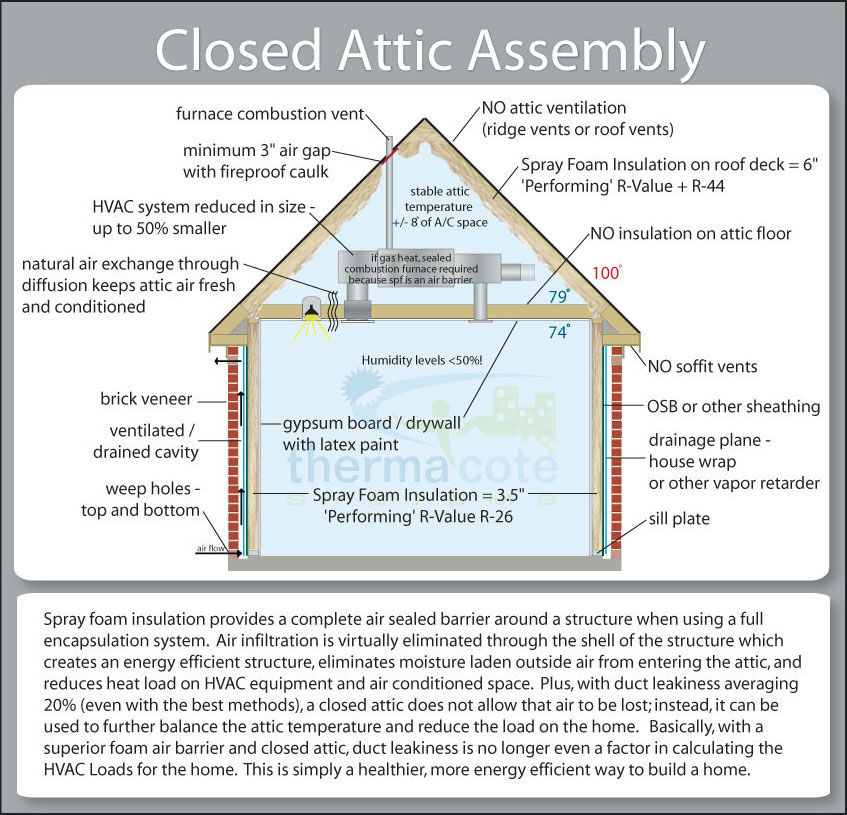
This is a insulation specialist’s explanation of a closed roof system
Pros and cons:
The closed roof system is more insulated. You can imagine that venting a roof makes it harder to heat. You can also imagine that having the roof closed up makes the house harder to cool in the summer. Might be the time to pay some attention to your ac system, in this case you can contact air quality services to see if anything is damage. Normal operation has the hot air rising and exiting the roof vents. That’s a minor downside compared to the diminished life of the roof. Roofs like to breathe and to be the same temperature above and below the shingles. Any experienced roofer knows it. With the closed roof system, the underside of the roof is covered with foam instead of air and coul require furnace repair. If you do need the furnace repair then I reccomend furnace repair dayton to help you out.
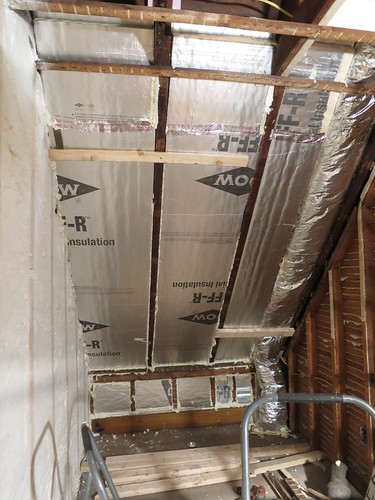
Normally, we would stick to an open system without much hesitation. The difficulty is in the 3rd floor. The third floor is tucked up under the eaves of the roof. As you can see here:
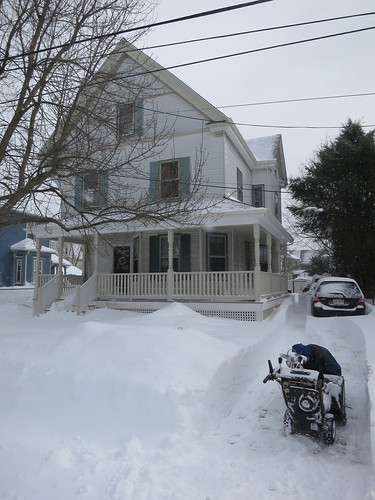
In order to have any insulation in the sloped portions of the 3rd floor bedrooms, we would need to go with a closed roof system and for that we clearly need help from a residential roofing contractor.
Unless…we could do something tricky like:
 ” alt=”” />
We used strips of 1.5″ pink foam to block out a ventilation chamber with 2 sheets of 1 7/8″ foil backed foam to build out the vent chamber and insulate the slope with R-24 insulation.
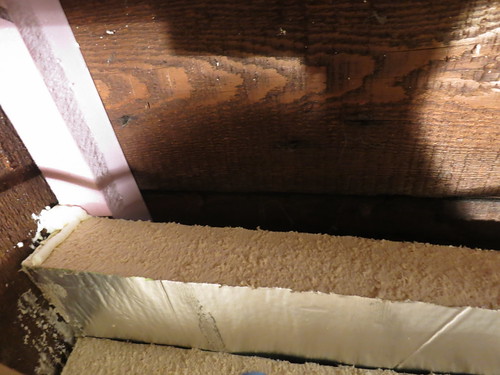
THis is looking down the roof line. You can see the pink blocks and the two layers of R-12 foam.
We used the pink foam as blocking because of the number of nails in the roof. Using wood would have been next to impossible but the foam just popped right onto the nails and used the multitude of nails to hold itself in place. Brilliant!
One word of warning, this method isn’t cheap. with one sheet(2’x8′) of the pink foam and 4 sheets of the foil backed foam (4’x8′) we’re looking at $162 in foam alone for this little area. Add in the 5 cans of “Great Stuff” we used to seal everything up tight and we’re looking at about $200 for just 3 beam spaces. It will be more than $1000 and a lot of work to do this to the whole 3rd floor. It does require all the walls to come down to get access to the space. Needless to say we’re going to see how this does before we go whole-hog.
I hope this answers some questions you have about insulation. Feel free to ask any questions in the comments and I’ll do my best to answer!
Need help with your roof? Call Transition Roofing today!
Sarah
Seed Starting!
I’ve been wintersowing since February but this past weekend I started my tomatoes and peppers as well as some herbs and shasta daisies in plug trays.

I started 9 of Burpee’s hot pepper mix, 9 roma tomatoes, 12 super sweet 100 tomatoes, 6 shasta daisys, 2 sage, 2 dill, 2 oregano, 2 Thyme and 2 cilantro. I’ve only filled about half my seed tray but I’ve got more herbs and some flowers to start a little later.
So far I’ve planted:
- Petunias
- Pansies
- Lupine
- Shasta Daisy
- Black Eyed Susan
- Parsly
- Cilantro
- Sage
- Oregano
- Dill
- Thyme
- Tomatoes (roma and super sweet)
- Mixed hot peppers
And all I have left to plant
- summer squash
- zuccinni
- sugar snap peas
- sweet peas
- Chives
- zinnias (lots and lots and lots of big pink ones!)
- sunflower
- nasturtiums
- Marigolds
I’m planning on planting the flowers in milk jugs in the winter-sowing style in Early April. I’m also going to see if the ground is “workable” and see about planting my sweet peas and sugar snap peas as well as all the gladiolus. That will probably be a project for next week after daylight savings gives me some after-work sunlight!
Here’s to hoping the cat doesn’t destroy the seed tray before I get home tonight!
Sarah
Weekend Update March 2&3 Insulation, framing and not quite ready for Drywall
Lets take a look at the list from last week:
What all is left?
Knee Wall- Pex to 3rd floor
chimney wall on 3rd floorLath on bathroomand closet wall- mount and hook up shower mixers
- mount vanity light boxes
- wood support for corner sink in half bath
- wood supports for toilet paper rolls and towel rods
- 3rd bath floor
- half bath floor
smoke detector wiring on 2nd floor- electric to fans
- bedroom electric finish up
- half bath overhead light boxes
- Kitchen overhead lights
- durock backer board
foam behind rafters
Needless to say, we did not get everything off the list. We do have 2 exciting pieces of news:
PVC IS DONE!!!!
and
ALL THE WALLS ARE UP!!!!
Saturday we went to pick up my car from the body shop. I got into a bad (no injury) accident about a month ago. I got slow-motion t-boned by an 18 wheeler. Anyways, the car just came back. The body shop wanted a cashier’s check so we headed to the bank first thing on Saturday and…. their computer system was down… So I got cash… Lots of it. Anyways, this has nothing to do with the house except that it took up all of Saturday morning. It’s my excuse and a good one at that.
After driving home in my shiny finally vacuumed non-crunched up car, we got to work. First things first I started pulling wire for the smoke detectors. Stefan used the handy roto-zip with a tile bit to cut away just the plaster from the lath. We are using shallow metal boxes that screw directly into the lath for the smoke detectors. I got about half the wire pulled before my hands started cramping like a mad women and I called it quits. Stefan spent Saturday finishing PVC! Whoo.
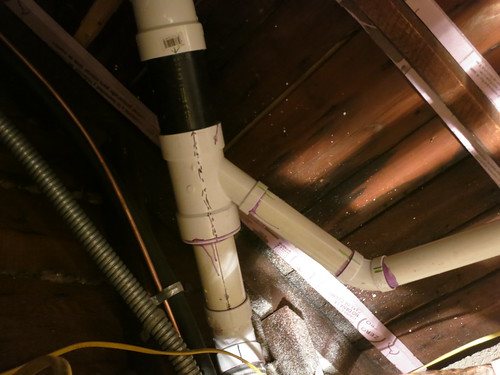
This picture means nothing to you but that is the vent stack being tied into the drain stack in the attic.
Sunday morning we were distracted by one of our favorite projects… planning out the back door to the kitchen.
We found this link a few weeks ago and it is invaluable. This is the Anderson window and door product guide with all the standard sizes. They call it a “professional” guide but it’s basically just the product listing which for some reason is rediculously difficult to find.
http://www.andersenwindows.com/for-professionals/product-guides-for-professionals

Anyways, Sunday morning was spent watching vector freak out because a squirel was in the recycling just outside the back door. Of course this let us to start talking about how happy he will be when we finally have a french door.
This is what we have now:
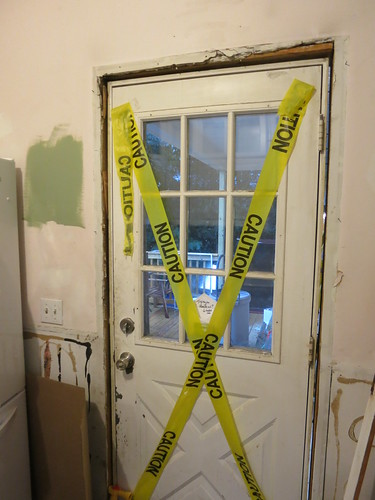
Vector leaps up to see out the top which is hilarious but not as effective as just having something like this:

We only have about 4.5 feet so we’ll probably do a door and a side light. It’s gonna be awesome! This is one of those things that we know is low-priority but we are also so looking forward to this particular upgrade. Maybe this fall. By Sunday morning we knew we weren’t going to get everything done on our list. Actually, we knew last week which is why we didn’t schedule the drywall yet.
Sunday afternoon was all about insulation.
We went from this:
 to
to 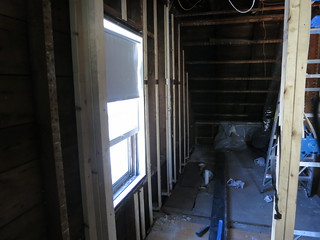 to
to 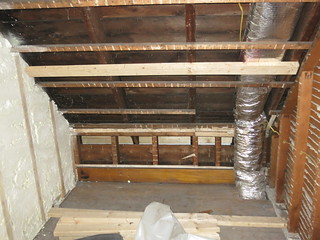
and after a Sunday’s worth of work:
Insulating these slopes is tricky. I’m working on a post to explain it all. I’ll link to it when it’s ready!
After tossing up a knee wall where the stack of 2x4s is in the picture above, and framing in the chimney, we called it a night. I’m sore and tired but it feels s0 good to have things done!
That’s the update. I hope you had an equally as productive weekend!
Sarah
Globe-Shade Chandelier
I’ve been at a loss about what to do regarding the lighting situation in the dining room, Piano room, and entry.
I just saw this posted to Pinterest by my new blog bff that I’ve never met, Victoria Elizabeth Barnes and I’m in LOVE.

I don’t know the original source of the image but if you have any ideas, let me know.
Obviously this chandelier is waaay too big for any of the spaces I’m thinking of. My entry is grand and pretty but not that grand. I love the globes though. It’s got a kind of “look what we can do with electricity…closed lights” look to it which I love.
It’s different but still period. AND, the best part is I can get any simple chandelier and add the globes to it for $5 each from home depot!

I’ve started a collection of chandeliers that I’m thinking over. Some of these would be great with a globe upgrade. Others would do just fine on their own.
Click on the images to go to the sellers website and support the blog in the process.
What do you think? Any that stand out to you? I’m really loving this globe option. It takes the stress off finding a super awesome chandelier at a good price. I can get a plan, simple, builder’s grade chandelier and make it look awesome with an inexpensive tweak!
Sarah