
Backsplash Part 1
I have officially finished phase one of operation backsplash. We went with white subway tile in a herringbone pattern and I LOVE it!

I started in the middle of the stove area and worked out from there.

I did all the easy parts before working on all the complicated cuts.

It starts really coming together. And once I’ve cleaned off all the tool-mess I made, it really looks wonderful.


Finishing up the grout work should only take another day or so. From there we will be able to clean up everything with grout and put up the final piece of window trim. It’s so exciting to see things coming together.
Sarah
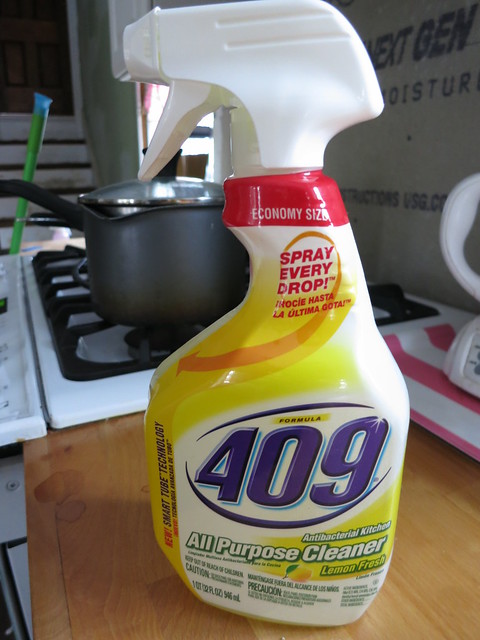
Cool Thing: 409 Kitchen Cleaner
I love this stuff. It doesn’t smell awful and it doesn’t smell too-much. Too many cleaners are just so over-scented that they make me sick. 409 is great. It cuts through grease and I even manage to clean my stove without getting overly frustrated. I am not a cleaner – AT ALL – but the 409 is good stuff. I highly recommend, those who know me know home much I hate greasy things, I can’t even go without grease trap maintenance for one month, yes, I’m that type of person.
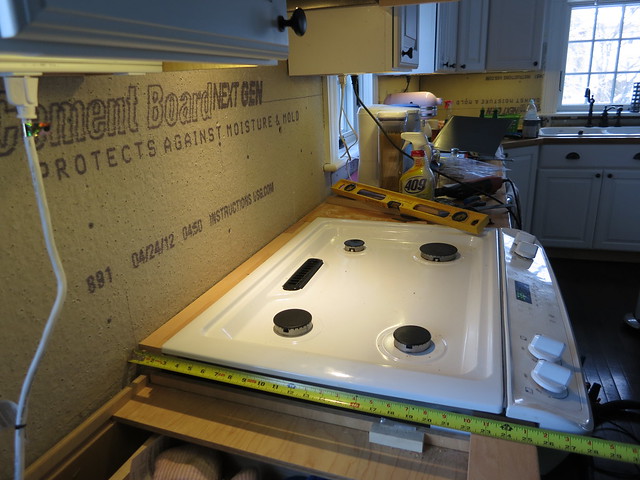
I normally wait so long to clean my stove that it is covered in baked on sauce of all varieties. If you’re the type to clean your stove after you spill anything on it, than I’m sure you have other products but the 409 gets all the black burnt stuff off pretty easily.
Look at that stove!

I have the lemon scented one but since it is so mild, I may try the regular one next time. It also comes in a good spray bottle which is important. I can’t stand cheap sprayers. I’ll probably re-use this bottle once I’m done with it. I wonder if Round-up would melt it? I need a new sprayer for that stuff.
Sarah
Seed Starting 2014
I don’t know about you but I can’t wait for spring. We had so much snow this year and I can’t wait for it to all melt and be gone.
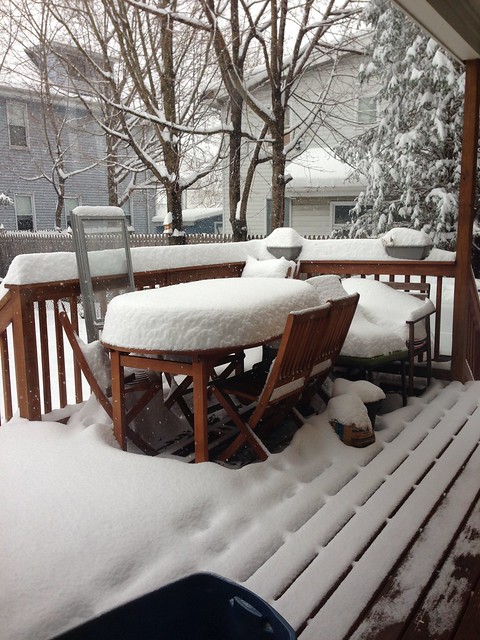
While I’m stuck indoors during this crazy snowy winter, I’ve been giving a-lot, even too much, thought to my garden.
I’m trying some new things this year. The most exciting is bunching onions. I’ve got some Burbee Evergreen Long White Bunching Onion seeds that sound pretty easy.

Also new on the menu this year, spinach, radishes, and Kentucky Wonder garden stringless string beans.
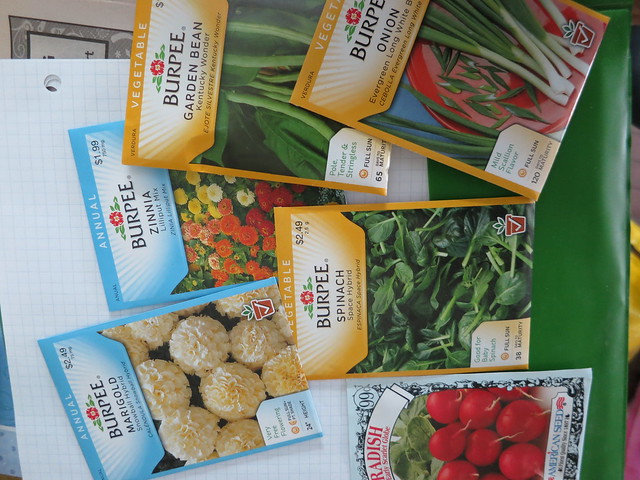
I’ve also got some new flower selections. Snowball Marigolds and Lilliput Zinnia Mix. The Marigolds are white and very frilled and the Lilliput zinnias are a bit smaller than the standard zinnia.


I’m also doing tomatoes, hot peppers, jalapenos, sugar snap peas, and a variety of herbs. I’ve also got summer squash and zuccinni on the menu as well as another attempt at a butternut squash.
The tomatoes, peppers and onions will get started in March and the zinnias, lettuce, and herbs will start in April. Everything else will be direct-sown in april or may depending on how cold-hardy they are. I’m hoping for an early spinach crop as well as a profusion of green beans.
Now if the ground would thaw already I could start working in compost and doing some of the landscaping I’ve got planned for this spring!
Sarah
Kitchen Counters Complete!
We have finally installed the final cabinet and the last of the kitchen counters!
We dovetailed in the narrow piece behind the stove at both ends.
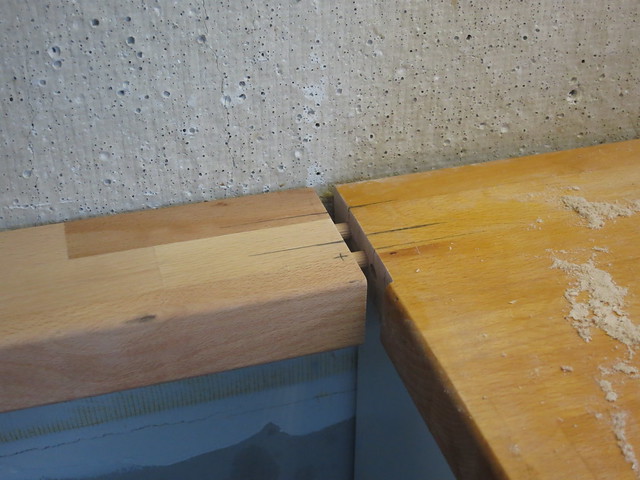
and added the large final piece of counter to the left of the stove.
We let it overhang the final counter with the intention of adding some open shelving under the overhang.
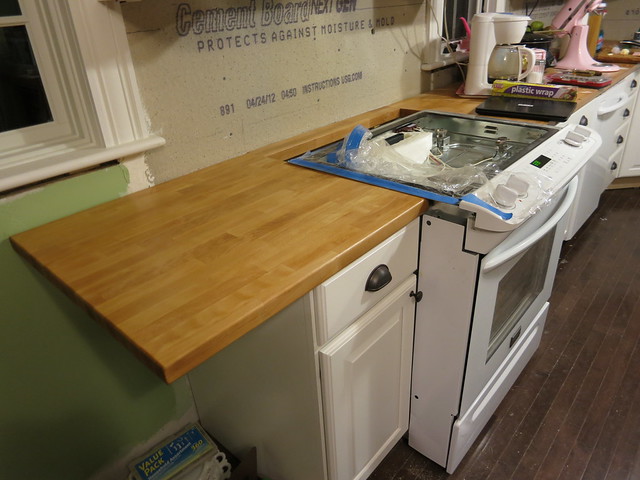
We had to take off the stove-top in order to sand and finish the counter. We used the same sealer as the rest of the counters: Waterlox Original Sealer.

It looks wonderful and as soon as the last coat has dried, it will be time to tile the backsplash!
Sarah
Orchid
3/5/2014 | 9:58 pm Permalink
You’re kitchen is beautiful Sarah!!
Orchid
3/5/2014 | 10:01 pm Permalink
Gah *your. PS love that you have a pink KitchenAid haha 🙂
sarahmzim
3/14/2014 | 9:11 am Permalink
thanks! Wedding gift. How could I resist?
Trackbacks & Pingbacks
[…] while ago, I posted Backsplash part 1. Today, I’m going to show you part 2: […]