
Trick of the Trade – Freeze your rollers
This is a handy painting trick that my mother taught me. I’m not sure where she learned it but it sure is handy.
Instead of washing our your brushes and rollers, freeze them. While I might not do this for years, for a week or two it’s a great way to save all that time and water cleaning out your brushes and especially your rollers.
Put the roller or brush into a large ziplock bag. I label mine so I know what kind of paint it’s got on it.
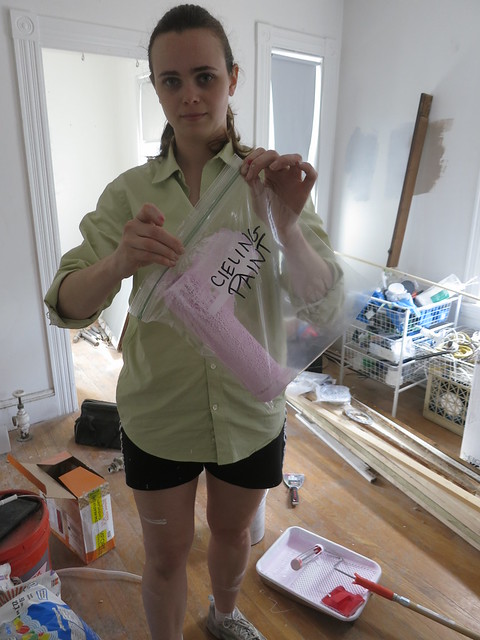
Then toss in the freezer. When it’s time to do a second coat or start on another room with the same paint, just pull them out to thaw and go to town. It doesn’t take long for the paint to thaw and it sure beats cleaning brushes all the time!
I’ve got another ziplock in the fridge with a brush, roller, and mini-roller with white primer on them.
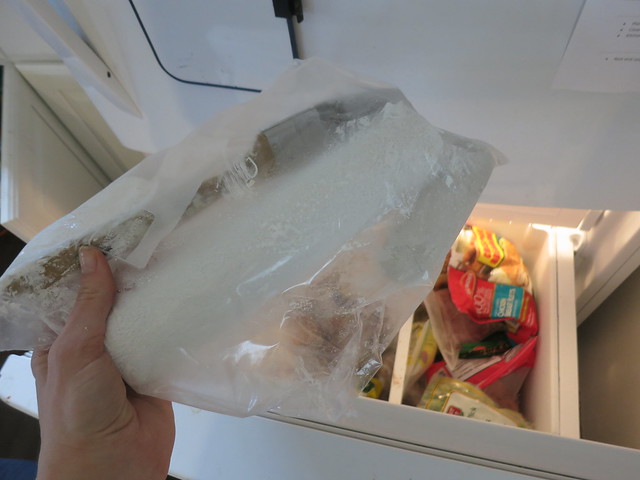
We moved a lot as a kid and I remember my mother keeping a fully loaded paintbrush in the fridge for touch-ups while we were trying to sell the house. It turns a scuff on the wall from a big touch up project to a quick brush thaw.
It’s a handy trick. I highly recommend!
Sarah
Painting the Closet Pink
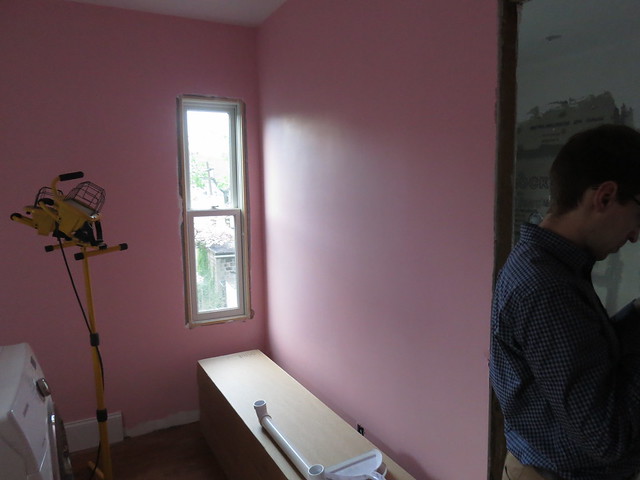
It’s PINK!
I painted it Behr Cafe Pink and I LOVE the color. It is VERY pink but there isn’t going to be much wall showing so it really needed to have some oomph. Also, it’s a closet! What fun is the world if even your closet needs to be some pseudo neutral color?
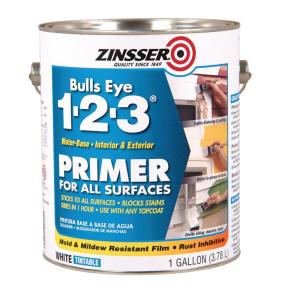
To start, my Mother and I primed the walls and ceiling. I did 2 coats on the ceiling and the primer did well enough that we didn’t really need to go over it with ceiling paint. It’s a nice, smooth, flat white. We needed to seal in the plaster that was spread over the blue-board. We used Bulls Eye latex primer.
After that dried, we put on the paint. I used the Behr Premium Plus Paint and Primer in one. I have to say, we did need 2 solid coats to get good coverage.
We cut in the corners with a brush and used a roller on the rest. We used the handy dandy edger to get the top edge nice and even.
The baseboards will be installed later so there was no edge on the bottom edge and all the window and door moldings are off as well. It made it a very quick room to paint.
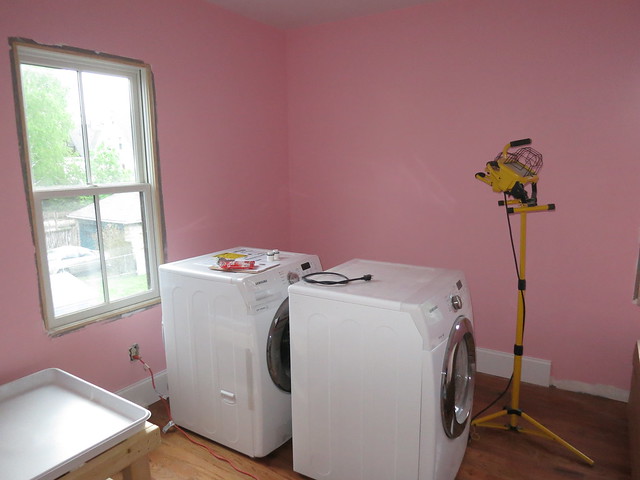
What a difference!
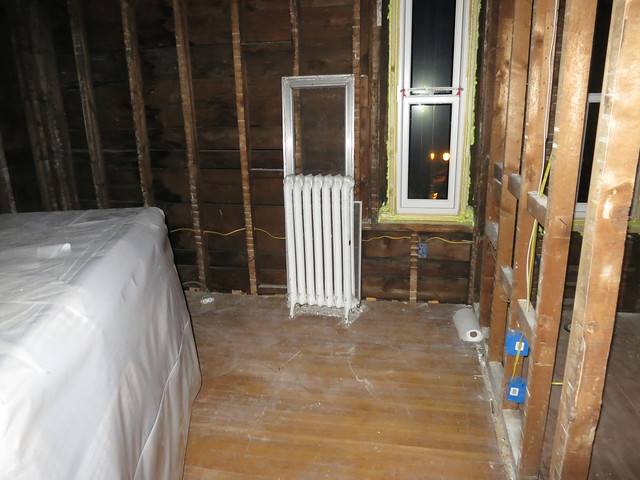
This is what that room looked like when we moved in:

At some point in the middle:
And now!
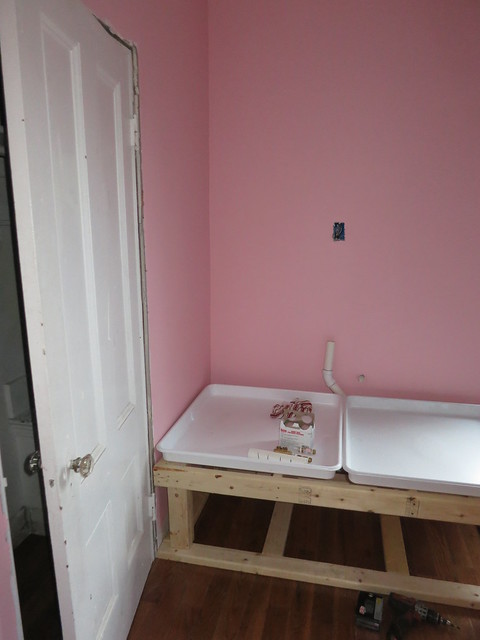
We still need to add baseboards and the laundry base but it’s coming along so quickly!
Sarah
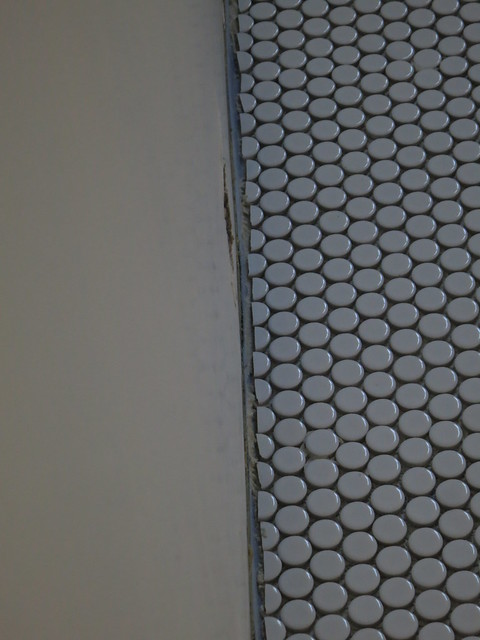
Tiling the Bathroom Floor
I’m not going to give a tiling tutorial. Young House Love has a great one and duplicating their effort is futile.
I already posted some photos of the half bath and the master went very similarly but on a larger scale.
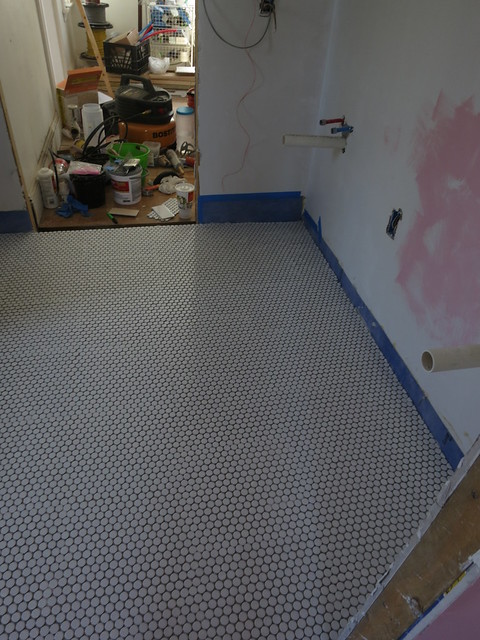
The one difference is that since there was no vapor barrier in the half bath and we are putting up a fairly thick wainscoting and baseboard, we didn’t need to cut any of the tiles. There were little partial tiles around the bathroom which made it go a bit slower.
We also had to mix our own thinset instead of using pre-mixed which was a bummer. You really have to mix the thinset much wetter than you think you should need to. If it gets too thick, it doesn’t allow the tiles to stick quite as well. We actually had a couple tiles pop out when we were grouting because I think we had the thinset too thick. Watch some youtube videos of the pros and you will see they mix the thinset really thin.
Here’s one of a guy with a cool British accent.
Here is my Mom and I grouting the tile. Grouting is fun work.
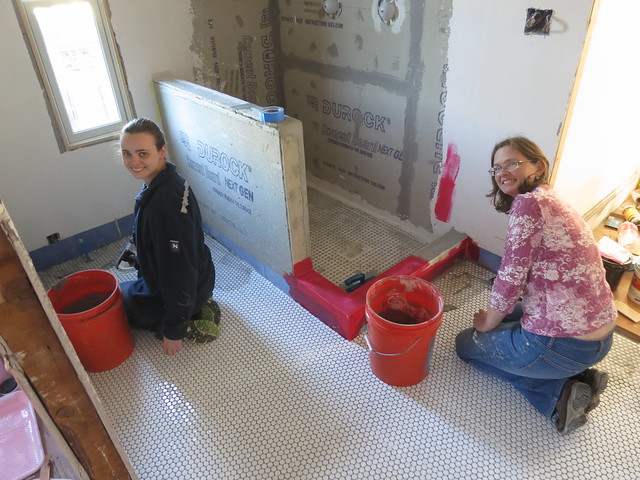
To fix the popped out tiles, pull them out and use a screwdriver to scrape out the thinset. Then continue to grout leaving that area clear. Then come back later with a little thin set and then re-grout that small area. Some people say you can’t do the grout in 2 parts but you need to do the whole surface all at once. Perhaps it effects the longevity of the tile but my Mother and I have never had problems “patching” the grout.
If you want to see what all we did to get ready for tile:
Click here for Bathroom Floor Underlayment – Part 1: heating mat
and here for Bathroom Floor Underlayment – Part 2: SLC take 1
and here for Bathroom Floor Underlayment – Part 3: SLC take 2
and here for Bathroom Floor Underlayment – Part 4: Curb and Wall
and here for Bathroom Floor Underlayment – Part 5: Vapor Barrier
What do you think? Do you love penny tile as much as I do?
Sarah
Bathroom Floor Underlayment – Part 5
Lets review the layers of stuff we have on this floor. First is the beams. We had to level them out in order to get the room flat. Then we layed down a nice 3/4″ plywood subfloor. In Part 1 I talked about laying down the heating mats. Then we spread a layer of self leveling compound in Part 2 and another in Part 3. Part 4 discusses the curb and wall for the shower boundaries.
Part 5 is the vapor barrier. The product we used was basically a big piece of fuzzy/felted rubber/plastic that is glued down and seamed with a solvent. The process involved cutting the material to size, spreading the glue and then using a rolling pin to really embed the material in the glue. It was a lot of work and Stefan and my Daddy didn’t stop to take many pictures. Boo.
You can see that we put it up the walls a couple inches and seamed the corners to make essentially a big plastic pan that we tiled on top of.
Of course we don’t have a picture of it pre-tile but here you can see the sides of the “pan.” The blue piece along the bottom of the wall is the vapor barrier.
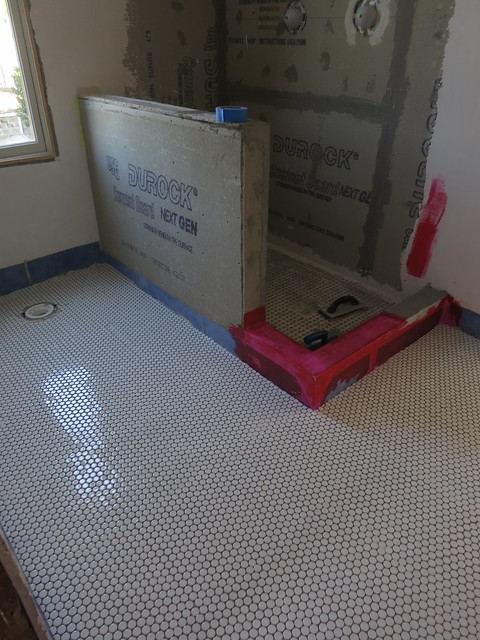
It installed very much like vinyl flooring using the same awkward single sheet laying process.
That glue dried fairly quickly and besides the fuzzing of the material, it was nice and smooth and flat which made it quite easy to tile.
Click here for Bathroom Floor Underlayment – Part 1: heating mat
and here for Bathroom Floor Underlayment – Part 2: SLC take 1
and here for Bathroom Floor Underlayment – Part 3: SLC take 2
and here for Bathroom Floor Underlayment – Part 4: Curb and Wall
Coming soon: Penny tile on the Master Bath Floor!!!! If you follow me on twitter, you saw a sneak peek this weekend.
Sarah
-
Thats a very neat work, its looking good.
[WORDPRESS HASHCASH] The poster sent us ‘0 which is not a hashcash value.
-
Tiling the Bathroom Floor | DIY Sarah | Craft, Decor, Art, Garden, and Dessert
[…] If you want to see what all we did to get ready for tile: Click here for Bathroom Floor Underlayment – Part 1: heating mat and here for Bathroom Floor Underlayment – Part 2: SLC take 1 and here for Bathroom Floor Underlayment – Part 3: SLC take 2 and here for Bathroom Floor Underlayment – Part 4: Curb and Wall and here for Bathroom Floor Underlayment – Part 5: Vapor Barrier […]
sheila zimmermann
5/14/2013 | 6:33 pm Permalink
Good Advice.
[WORDPRESS HASHCASH] The poster sent us ‘0 which is not a hashcash value.