
Bathroom Floor Underlayment – Part 2
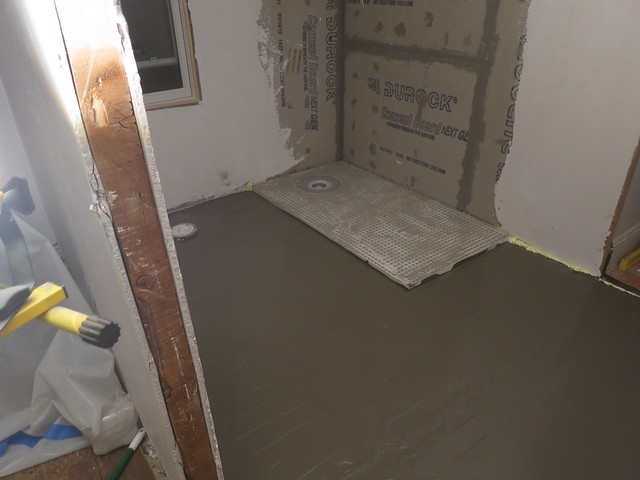
In Part 1, I talked about laying down the heated mats. After the mats were down and ready, it was time for the self leveling compound. Self leveling compound is essentially just a really liquidy concrete that you pour over a floor to smooth out the surface and, in our case, encase the heated flooring wires. Since the concrete is so liquidy, we had to dam up the walls with a bead of spray foam. The Great Stuff. So handy!
After the foam was dried and cleaned up a bit, it was time to level. But, before the self leveling compound, we needed to prime.
This is the product used to prime the floor for the leveler.
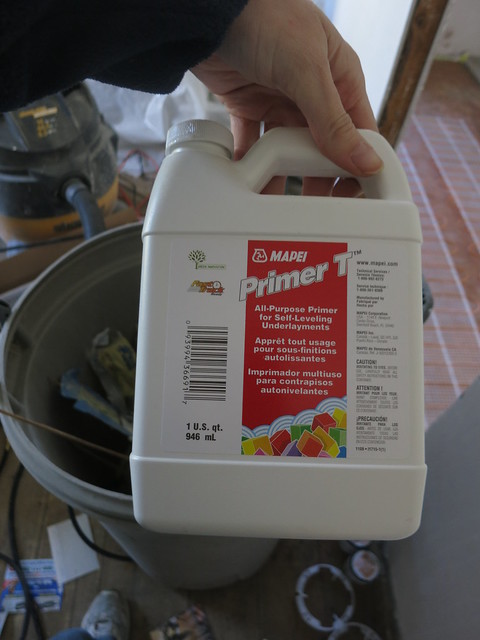
We rolled that on the floor with a 3/8 inch nap roller and a brush for the corners. The one bottle was just enough for the space which is about 11.5 x 6.5 feet less the 32″x60″ shower pan.
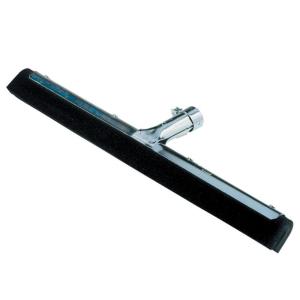
The Primer was supposed to dry for 2-4 hours but not more than 24 before adding the self leveling compound. If we were normal, we would have watched TV, relaxed, while waiting for the primer to dry. Instead, we put down a new floor. You know, since we were waiting. 3 exhausting hours later and it was time. We mixed up the self leveling compound. We used 2 bags which was just enough for the space though it would have been nice to have another half a bag or so. There is only a 10 min window for smooshing it over the surface so forgive the lack of in-progress pictures…I was busy. We used a big window washing squeegee which worked great.
The stuff is super liquidy so you basically want to push it around in to the corners etc. I’d also recommend mixing the whole amount all at once if you can. We did one bag at a time and the first was almost done with it’s 10 min by the time the second one was ready to be poured. The other thing we learned is to stop touching it. The “younger” it is when you are done the better. It’s wetter and much better at leveling itself.
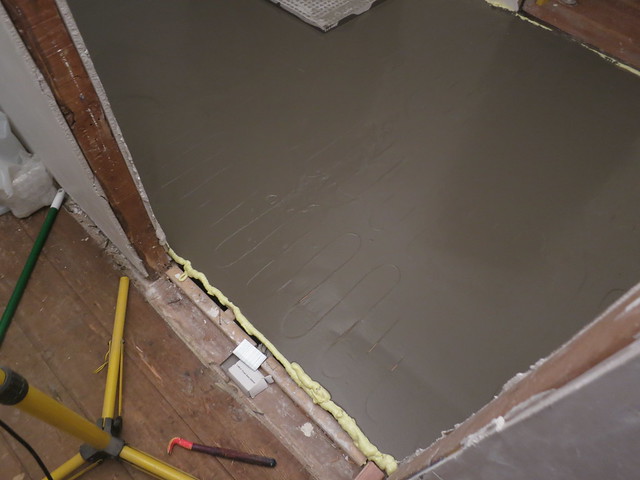
Since you have to work so fast, it is a quick project and we were back to flooring in no time.
The great stuff barriers worked great. After a day it’s dry and we were able to clean up any foam that is in the way of our tiling.
Stay tuned for Part 3 – Setting the Tile. My mother will be here to help. I’m excited!
Sarah
Bathroom Floor Underlayment – Part 1
Before the tile can be installed on the bathroom floor, we had to install the heated floor mats. Yes, that’s right…heated floor. AWESOME!
To install the floor, we first scrubbed and scored the plywood subfloor really well. Then we layed out our 2 floor mats – 15′ and 10′.
We used this super cute little stapler to staple them down
and then hit anything sticking up with a dab of hot glue.
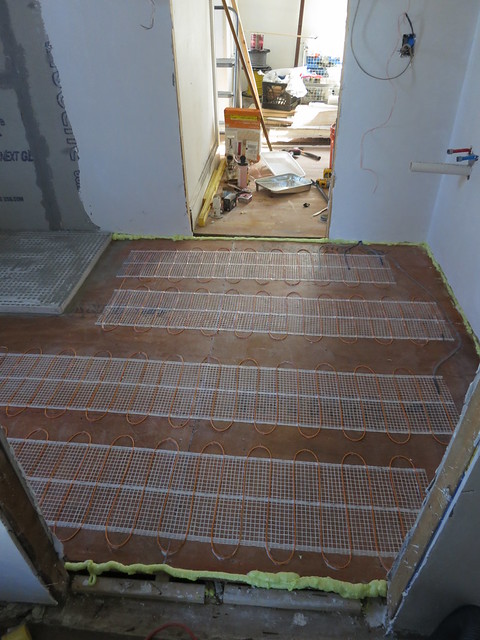
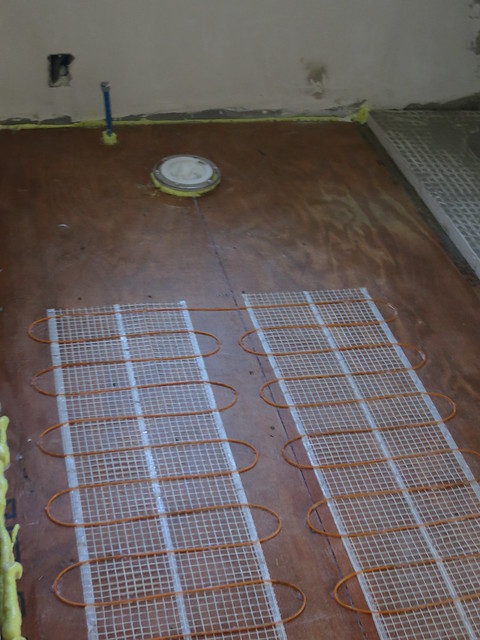
The wires from the mats along with 2 thermostat wires are pulled up to the box that will hold the controller. We left a pull wire for just this purpose.
We have 2 thermometers embedded in the floor. One is a backup. The thermometer is one of the most likely failure points so a spare is good.

I hot glued all the wires so they stay down nice and tight. Nothing was moving at all.
After the heating mat, it was time for the self leveling compound.
Check out PART 2 for more details.
Whoo heated floors. My toes are soooo excited. My feet are looking forward to it as well.
Sarah
-
Bathroom Floor Underlayment – Part 2 | | Craft, Decor, Art, Garden, and Dessert
[…] Part 1, I talked about laying down the heated mats. After the mats were down and ready, it was time for […]
-
Bathroom Floor Underlayment – Part 4 | | Craft, Decor, Art, Garden, and Dessert
[…] Click here for Bathroom Floor Underlayment – Part 1: heating mat and here for Bathroom Floor Underlayment – Part 2: SLC take 1 and here for Bathroom Floor Underlayment – Part 3: SLC take 2 […]
-
Bathroom Floor Underlayment – Part 5 | | Craft, Decor, Art, Garden, and Dessert
[…] them out in order to get the room flat. Then we layed down a nice 3/4″ plywood subfloor. In Part 1 I talked about laying down the heating mats. Then we spread a layer of self leveling compound in […]
-
Tiling the Bathroom Floor | DIY Sarah | Craft, Decor, Art, Garden, and Dessert
[…] you want to see what all we did to get ready for tile: Click here for Bathroom Floor Underlayment – Part 1: heating mat and here for Bathroom Floor Underlayment – Part 2: SLC take 1 and here for Bathroom Floor […]
Trackbacks & Pingbacks
Prepping the Shower for tile – Part 1
This past weekend we got the bathroom ready for the flooring. To get an idea of the process, take a look at this image from Schluter.

You can see the back layer on the walls is either drywall or cement backer board. We have cement backer board.
On the floor we used unmodified thinset to stick down the polystyrene shower base.
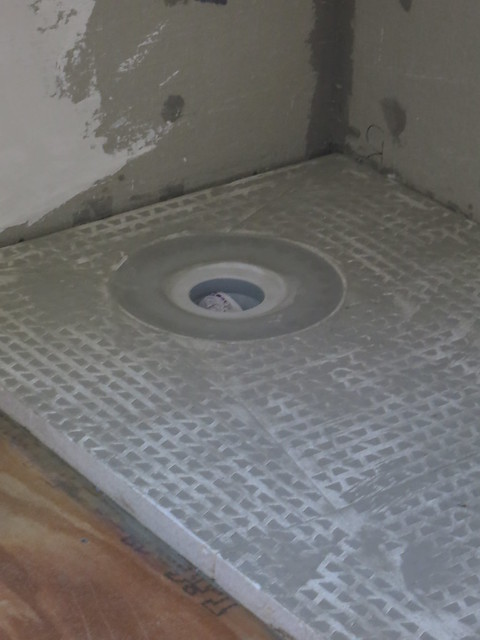
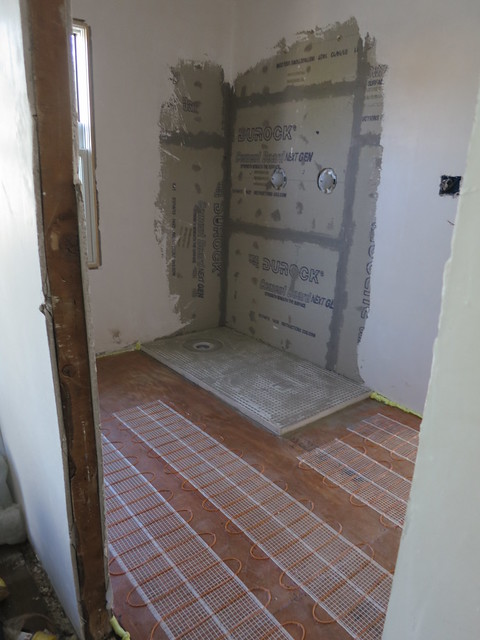
We used a schluter-kerdi shower pan kit. The shower pan is 32 by 60 inches.
After the shower pan sets, we will add a curb and a partial wall.
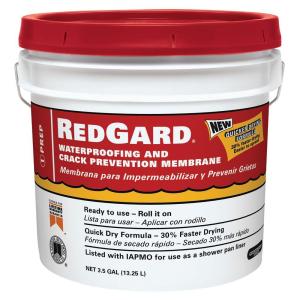
To waterproof the shower, we are planning on using a paint-on waterproofer rather than the Kerdi product shown in the picture. It is a bit easier to install and a bit more manageable for us. This is the product we are using from Home Depot.
Once the membrane is down, we’re ready for tile. In This Post, I discuss all the plans for tile and fixtures. I’ve still got to pick out faucets but so far, most of the decisions have been made.
I love it when a plan comes together! Muahhhhahhahah
Sarah
P.S. Stay tuned to see more details on our curbs and the membrane in part 2.
My Parents are So Cool – Shed Time-Lapse
Here’s something fun for this Friday.
This is my Mom and Dad (and dog, Bella) building a shed in time-lapse. Love the music choice too. You can see where I get my Nerd genes and my Construction genes from!
Not bad for old folks.
I love them both and they’re coming to visit the 1st of May!! So exciting. Dad’s gonna want to do a time-lapse of the bathroom tiling project I’m sure. What a goofy goofy family I’ve got.
Sarah
Trackbacks & Pingbacks
[…] part 2 of the bathroom floor underlayment, we poured a layer of self-leveling compound. I mentioned that it sets up really quick and you […]