
Movie Inspirations: M is For Murder
Alfred Hitchcock’s Dial M for Murder is a rather good movie. It was based on a play so the entire show mostly takes place in a single apartment. Grace Kelley stars as the accused murder and is so accused in this absolutely stunning dress. I would wear this dress all the time!
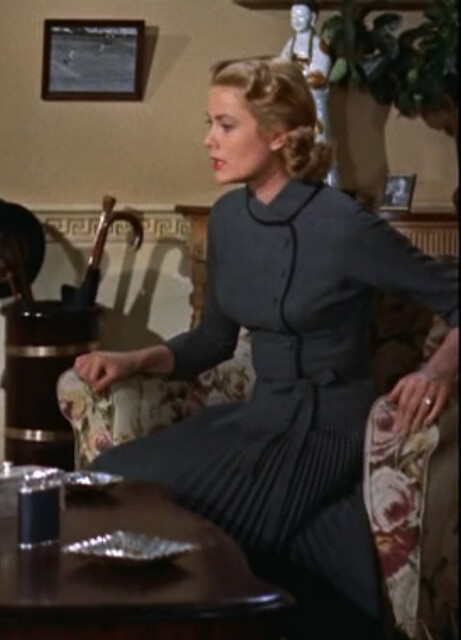
off-center buttons, bow at the waist, pleated skirt. I believe it is a sweater-dress or some sort of heavy-weight knit. It is so wearable but still decidedly vintage.
To watch the movie on Amazon Instant Video, click here:

Have you found anything inspiring in a movie recently? Have a good movie I should watch for inspiration? Share in the comments.
Sarah
Downton Abbey Finds: Season 1 Episode 5
This is the first episode where we really get to meet Sybil which is great since she is definitely the best sister. She reminds me of my sister with her dark hair and blue eyes.
We see a beautiful shot of the outside of Mrs. Crawley and Matthew Crawley’s “cottage.” hah cottage! It is georgous with some lovely climbing roses. I wish they would take us inside that walled garden sometime. I’d love to see it!

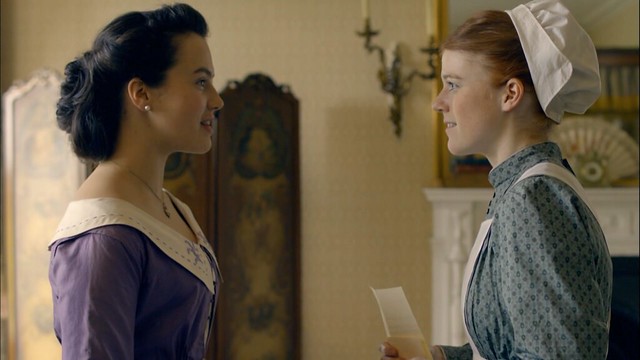
Sybil is helping the housemaid to become a secretary with an amazing hairdo. I want to see this hair in every wedding magazine for the next 5 years. It’s fabulous.
The staff is allowed to walk down to the Fair in town. Anna and Mr. Bates walk down together and though Mr. Bates doesn’t reveal his secret yet, Anna does sport a charming hat. I love the purple velvet bow and I can see dressing up a rattan basket or purse with a similar touch of velvet.

It seems everyone is enjoying my Downton Abbey finds. I hope some of you will be inspired to start a similar series on Mad Men! I’d love a fashion and decor highlights reel for that show! I’ve also been watching a fair share of Alfred Hitchcock movies so you may see some inspiration from those as well.
Sarah
Downton Abbey Finds: Season 1 Episode 4
I’ve just got one picture for you today. Turns out the girls re-use their dresses and coats which makes sense for real life but was not something I noticed or expected the first time around. The attention to detail.
Here is a great shot of the parlor ceiling and chandelier. I LOVE it. Like seriously, LOVE it. I wish I could do a similar treatment on my closet ceiling.
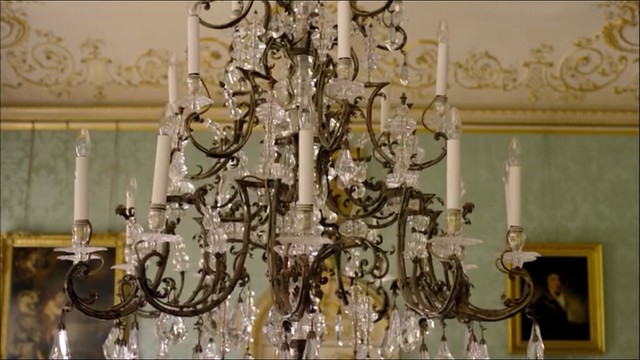
And with the sea-foam green walls and the gold-framed portraits. Awesome!
What’s your favorite room in Downton Abbey? The Library, the parlor, the dining room, the kitchen. So many gorgeous rooms!
Sarah
my Closet!
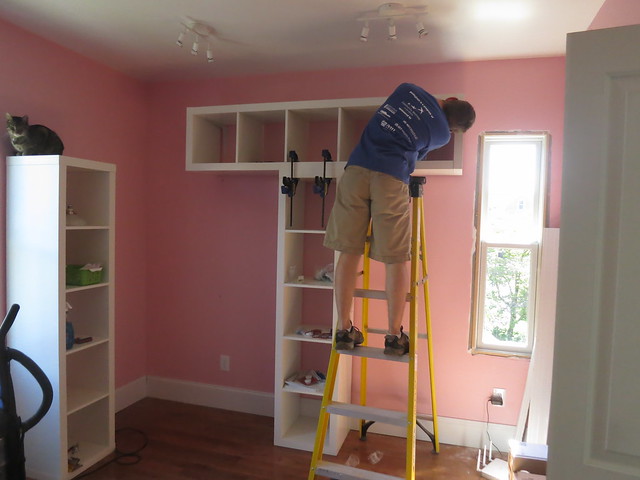
The closet is installed and filled with clothes. What an exciting day!
First we set up the “T” I told you all about in my closet design post many many months ago. The post is HERE for those of you who don’t keep all of my house plans in your head.
The gist was:
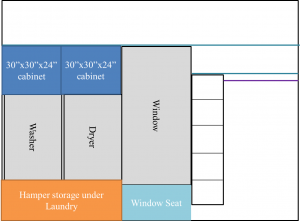
for the window wall and
for the far wall of the room.
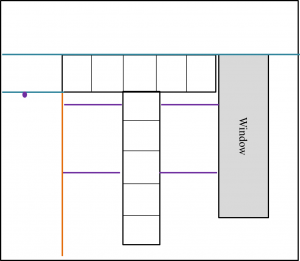
with the basic floor-plan looking something like:

Here’s the T being installed.
We used big brackets to attach it to the wall and connected it to the vertical unit to help hold the weight and pull all the seams nice and tight.
There is a gap around the back since the vertical unit can’t be pushed flush against the wall because of the baseboard so the vertical unit has to be there to help hold everything up though I think without this gap, you could mount one of these shelves on the wall.
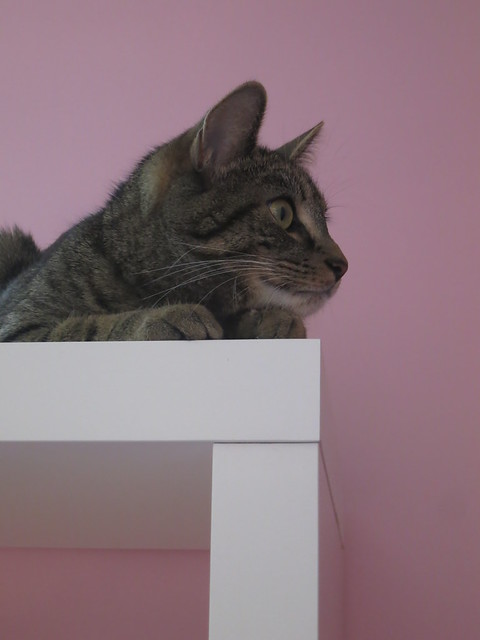
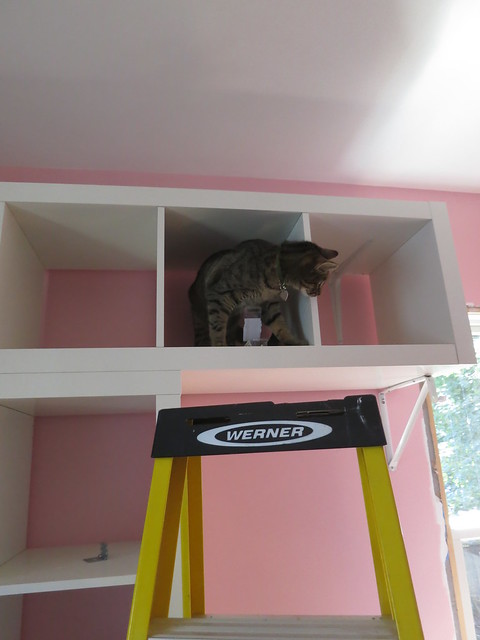
Vector was of course there to share in the excitement and make sure the job went according to plan.
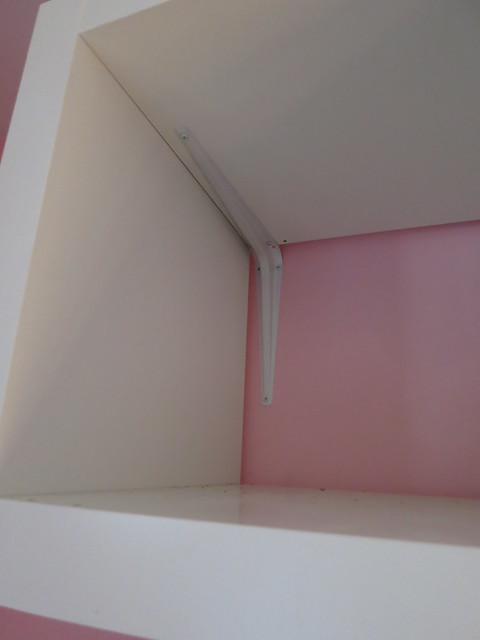
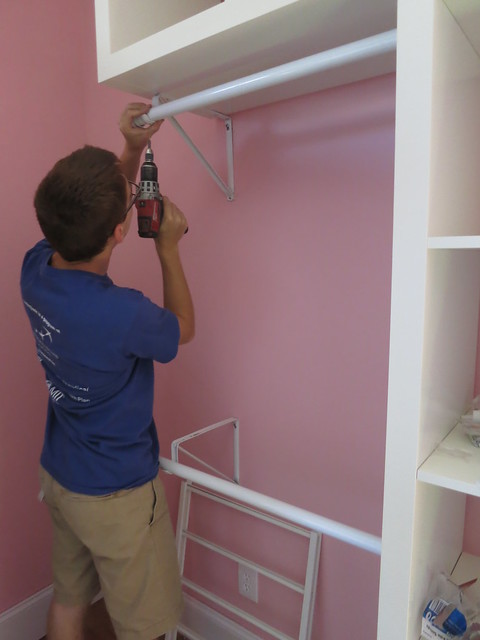
After the T was up, we installed some brackets to hold the ends of the clothes rods.

We attached the upper ones to the underside of the T just for good measure.

Vector again did quality control and stability testing.
Next came the rods. We cut them to length by hand with a hack saw. Note to future closet installers, don’t buy the smallest hack saw at the store and its always preferred a Custom Closet than one from the mall. That was a chore but Stefan bore it well. After cutting them to length and attaching closet-rod end-covers, we attached them to the brackets to keep them from falling out.

And then it was time to fill…

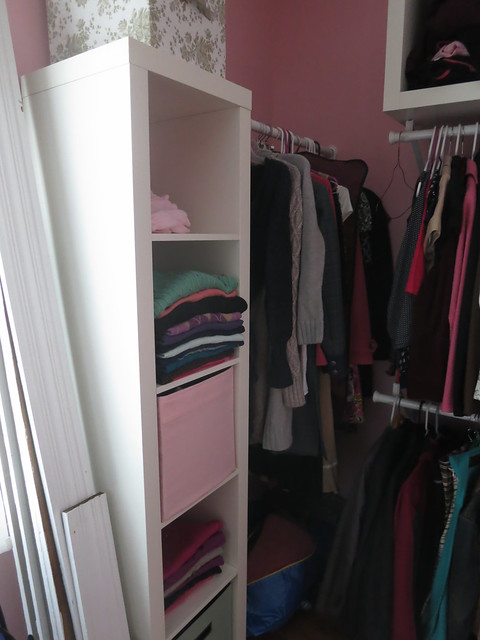
Here’s the long storage.
Always a project with all that molding ready to be hung!
Here is the short storage.

And to refresh your memory, the laundry is on the other side of this room. AND, guess what! It works! We finished the last bit of plumbing and electrical this weekend. I’ve already run a couple loads!
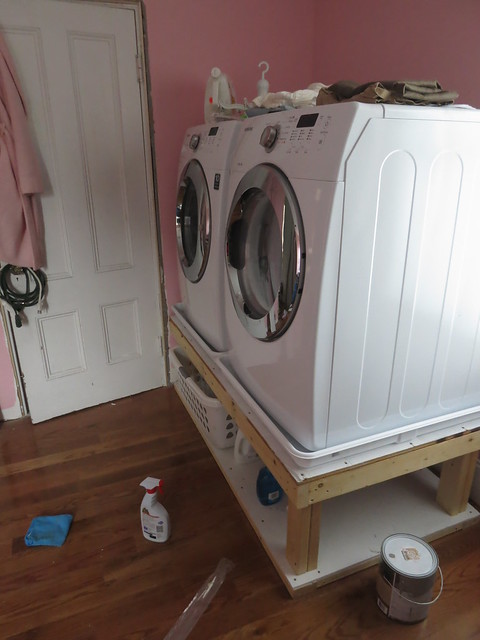
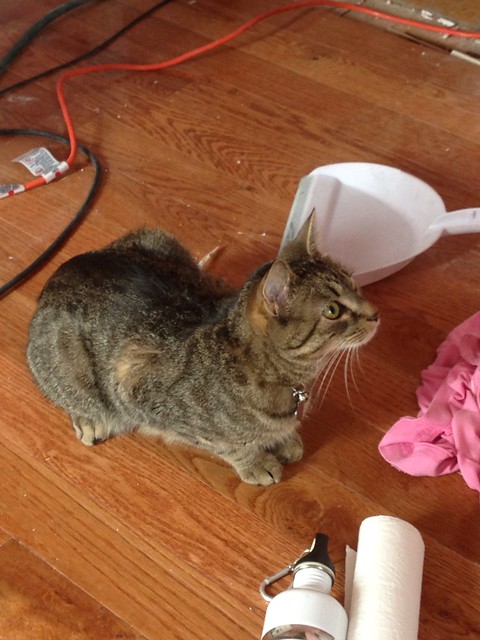
Vector is terrified of the laundry. Here is is in full crouching tiger position watching it intently.
I am SOOO excited to have my closet together and so far I love my Samsung washer and dryer. It’s definitely time to do a full wardrobe overhaul to match my closet overhaul! I already have a big bag of clothes to donate and I haven’t even started the trying-on phase.
There’s still work to be done in this room including some more shelves around the top of the room, trim, baseboard, finding a new light fixture, finishing the laundry base, etc but It’s finally functional which is such a great mile-stone.
Sarah
-
Shoe Storage in the Closet | DIY Sarah | Craft, Decor, Art, Garden, and Dessert
[…] refresh your memory, this post gives a good overview of the […]