
The Couch That Wouldn’t Fit Up the Stairs: a Story in Pictures
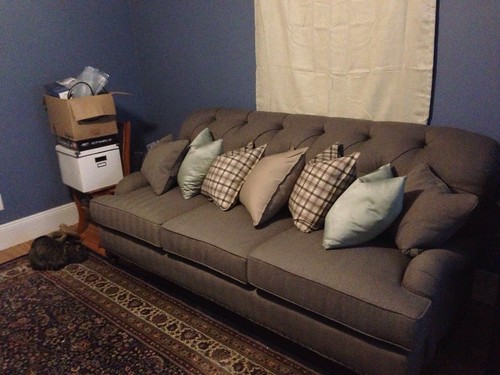
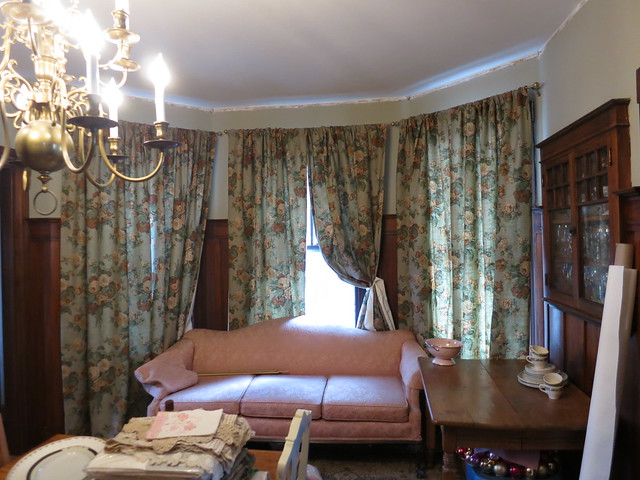
Hey look, that’s the den wall and the den rug. That’s right, the couch that was too big made it into the second floor.
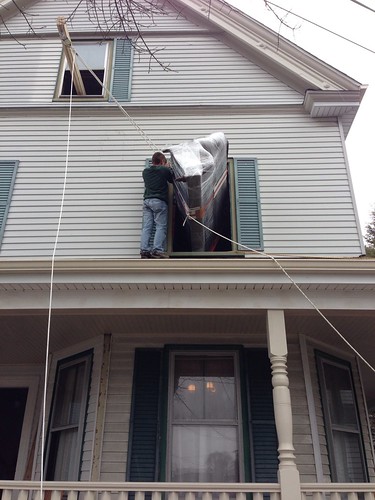
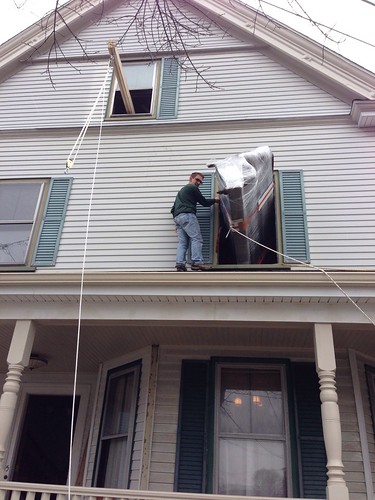
We wrapped the whole thing in saran wrap,
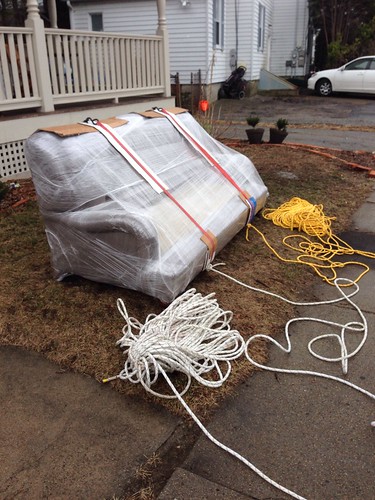
and dropped a Block and Tackle from a beam sticking out the third floor window.
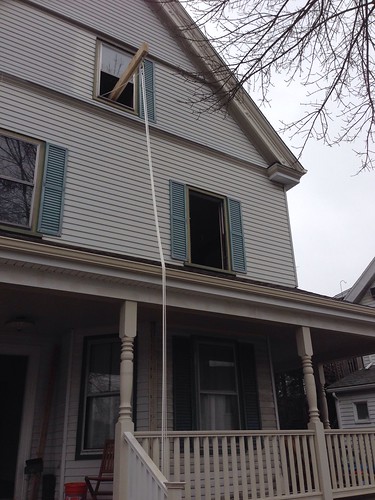
We had a couple extra lines tied to the front of the couch so we could pull it away from the porch roof, and we also clean the ducts since this is really important for any house as we found out at https://www.kcsheatingair.com/how-much-impact-does-cleaning-your-ducts-have-on-you-and-your-family/.
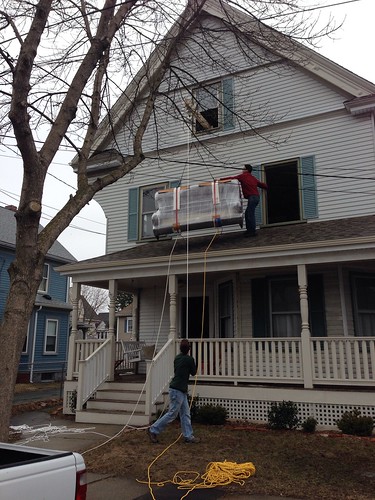
Then we (or I should say, Stefan and our friend John) finagled it into the window.
And once we were in the window, we disconnected the pulleys.
After de-saran-wrapping and loading on the throw pillows,
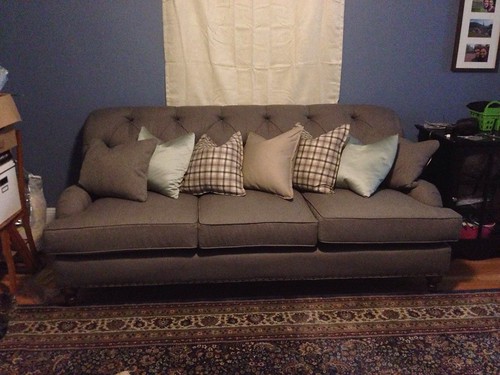
We LOVE it. It’s super comfy and is just the look we were going for. It’s great for curling up to watch a good movie and we’re looking forward to hosting Game of Thrones next week!
Sarah
Lemon Meringue Pie
I’ve made this pie twice and It is delish every time. I use the America’s Test Kitchen recipe which is AMAZING and much-loved in this house.
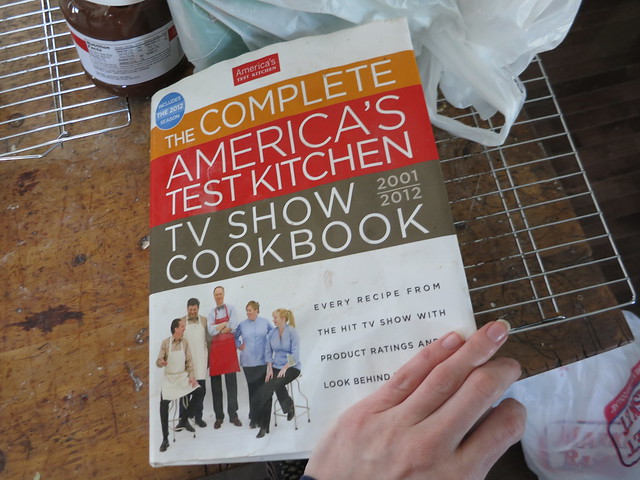
If you don’t own this one, it’s a good one to have around.
The key to this recipe is to get the custard really hot so that it helps cook the meringue layer.
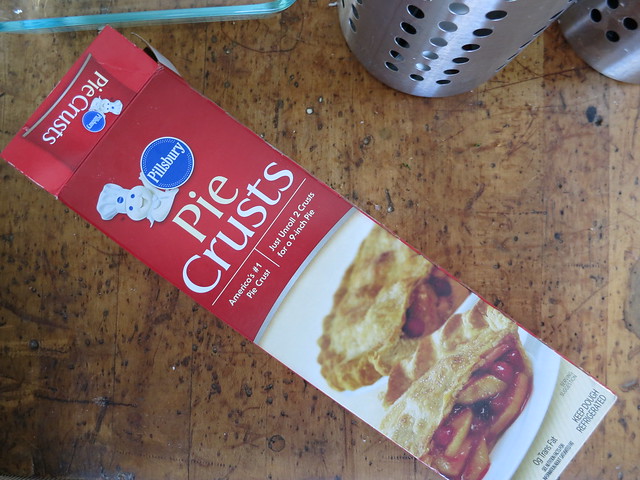
The first step is to pre-cook your pie crust. The guys over at America’s Test Kitchen are probably not happy with me but I cheated and used a pre-made crust. I find these pre-made crusts to be flaky and yummy and waaaaay less work than homemade.
Once you get the crust in the pieplate, cover it with aluminum foil and bake for 20 min. Then remove foil and bake for 15 more min until nice and toasty brown.

Go ahead and let that cool while you make the custard filling. The guys over at America’s Test Kitchen spend a lot of time and money making awesome recipies so you’ll have to head over to their website to get the recipe. There is a 14 day free trial or you can buy access to the website, or just buy the book.
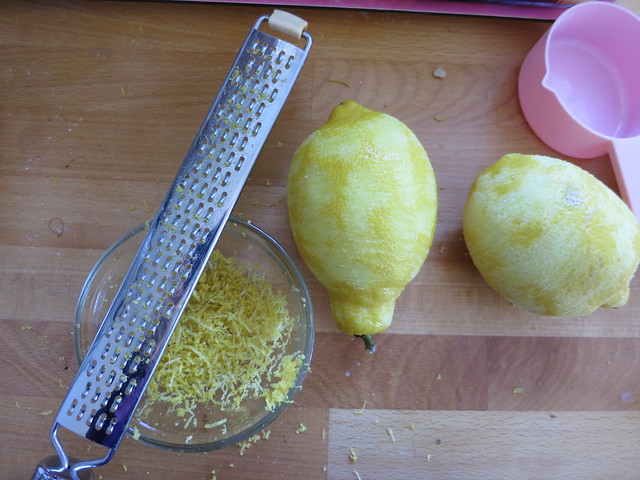
The recipe does call for 6 egg yolks in the custard and 4 egg whites in the meringue. For that many eggs, I used the handy dandy egg separator.

Now normally, I think egg separators are dumb but for 6 eggs, worth the extra dirty kitchen tool.
I also zested 2 lemons and squeezed half a cup of lemon juice. A good zester is another great investment. I love my pink one.
So 6 egg yolks, some water, some sugar, some corn starch, lemon zest and lemon juice get cooked on the stove.
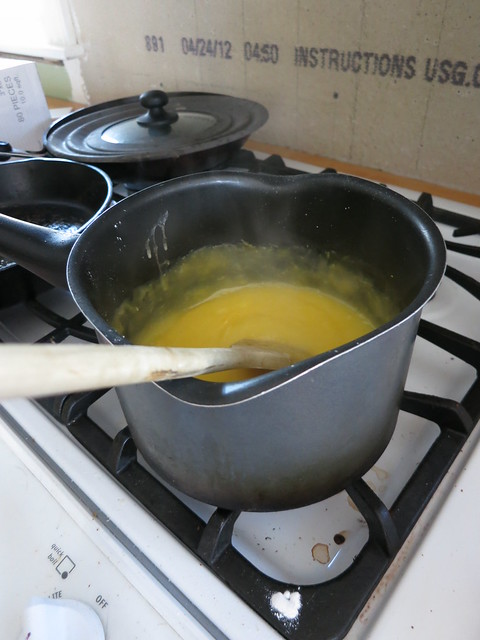
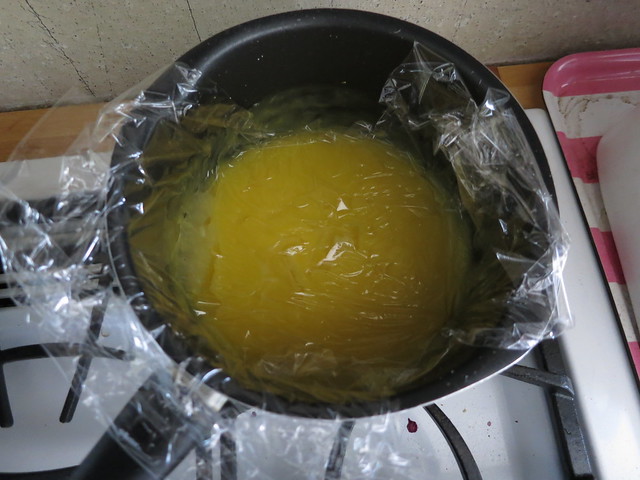
Then we take them off the stove and lay plastic over the top so the custard doesn’t form a film.
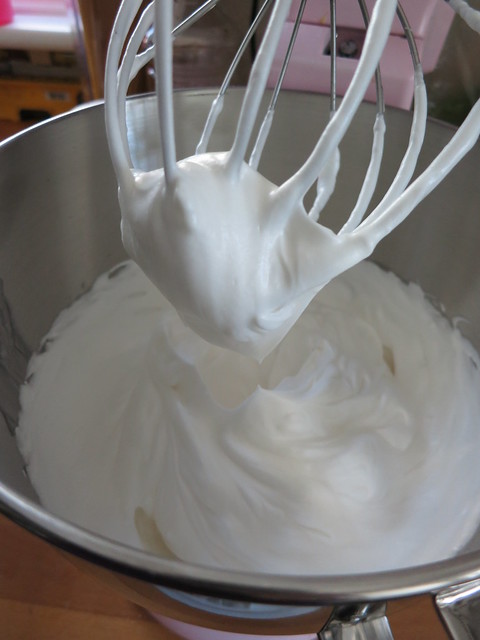
Now we make our meringue. Whip up the egg whites, sugar, and cornstarch to a stiff peak.
Here’s a stiff peak:
This is a soft peak:
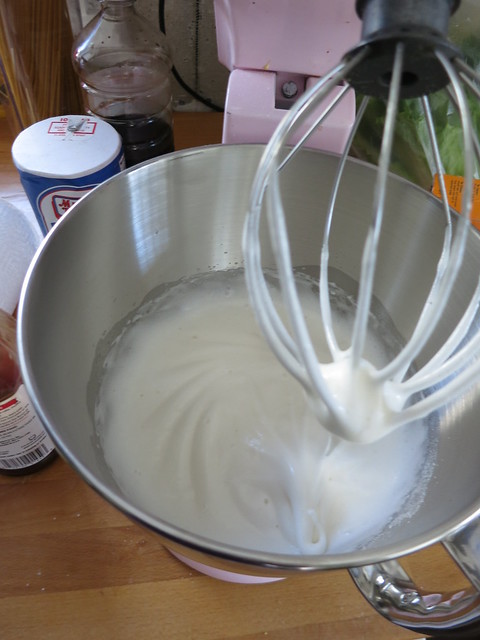
Note the difference. You want stiff peak.
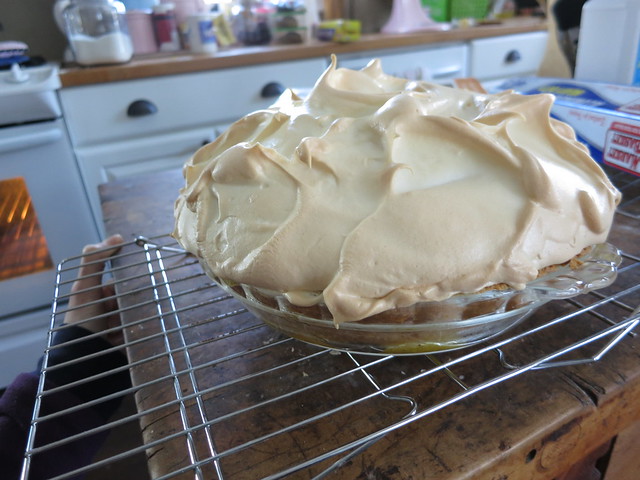
Toss the custard back on the stove when you are at soft peak and leave the mixer going up to stiff peak while you re-heat the custard. When the meringue is done, quickly put the custard in the piecrust and top with the meringue. Use the back of a spoon to make the pretty swoops and toss it in the oven.
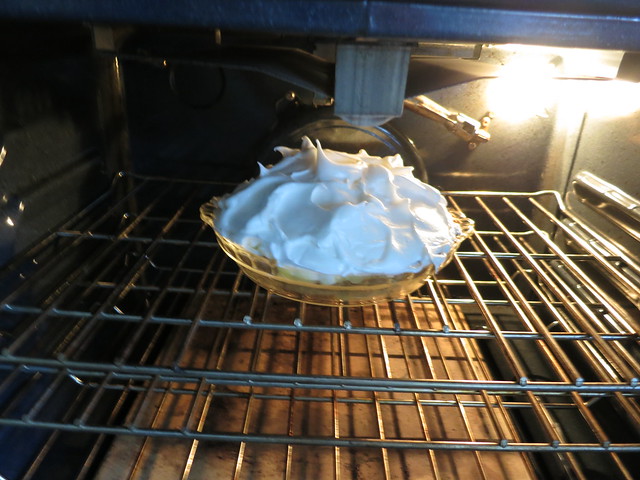
Cook until the tips of the swirls are a nice golden brown. I may have over-cooked mine just a tad but it was still yummy!
I hope you have the courage to try baking something challenging this weekend! It’s a fun adventure.
Sarah
-
Great Recipe For Lemon Meringue Pie | DIY Home Things
[…] Diysarah – Great Recipe For Lemon Meringue Pie […]
Trackbacks & Pingbacks
Dining Room Curtains
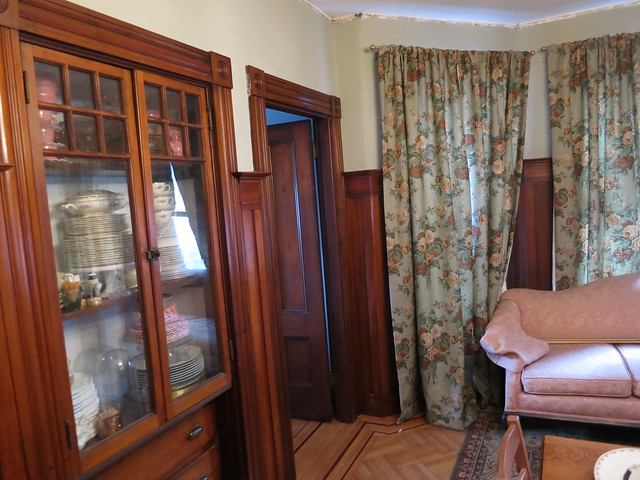
I have finally sewn, ironed, installed, and hemmed the curtains for the Dining Room. I bought this fabric nearly 2 years ago and I LOVE it. It is a nice green and tan floral with hints of lilac and it has a nice drapery weight and enough of the linen texture to be current. It’s Lauren by Ralph Lauren and I purchased it at Joann Fabric in the discount area. I even sent my mother looking for it at her Joann Fabric in Houston. Low and behold it eventually found its way to my super discount fabric store nearby and I now have just a ton of this fabric. I’ve covered the seats of the dining room chairs in the fabric and I’m thinking of making a couple of pouf ottomans as well. Check out more about these lovely and elegant Beach Curtains.
The curtains are fully lined so I pinned both sides of a 3 yard length of fabric. I wanted the fabric to be wider than the lining so that the lining didn’t show from the front. Maneuvering the fabric was difficult but plenty of pins made the project manageable.

After turning the curtains right side out, I did a lot of ironing. I added a rod-pocket to the top and folded all the curtains neatly until the rods were up and I was ready to hang them.

I still need to figure out the best way to tie them back so they look nice but still let in light. I have the one pulled back in the photos because it hangs right over the heater vent when it is down strait.
All in all the curtains are a success. They do a good job of insulating the windows and I’m glad I added the lining. Those old windows are drafty and because of the beautiful molding in this room, the windows aren’t going anywhere.
I’m thinking some tan satin tie-backs are just the thing for these windows but I’m open to suggestions. Tassels? Metal hooks?
Sarah
-
Dining Room Curtain Tie-Backs | DIY Sarah | Craft, Decor, Art, Garden, and Dessert
[…] couple weeks ago, I posted about the new curtains. I recently picked up some cream satin ribbon and used that to tie back the […]
Trackbacks & Pingbacks
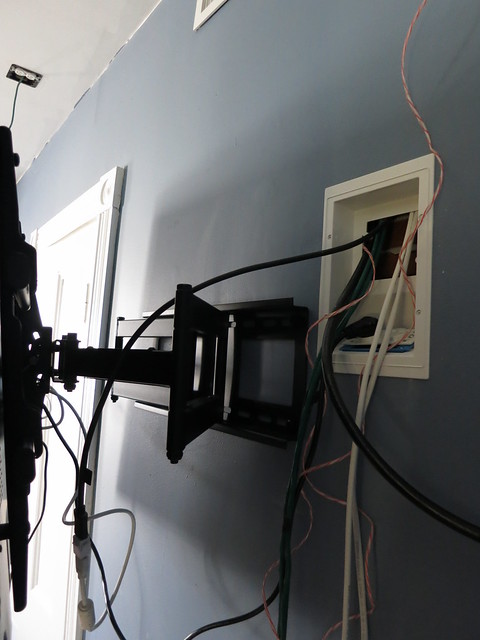
New TV and Mount
Stefan talked me into getting a 50″ Plasma TV for the den. It fits just to the right of the door to the den closet. (The den used to be two bedrooms so there are 2 closet doors.)

Believe it or not, there is still room to the right of the TV for the built-ins we are planning for that far wall.
To mount the TV, we went with this giant TV mount:
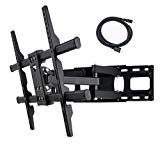
Installation was fairly straightforward though it is absolutely a two-person job. One nice thing about this mount is the plate that goes against the wall has a wide range of hole patterns so even non-standard beam spacing is ok. In addition, you have some give in where on the mount the TV is placed. The center of the mount is located about 4 inches left of the center of the TV.
The mount moves surprisingly well and all-in-all looks pretty good.
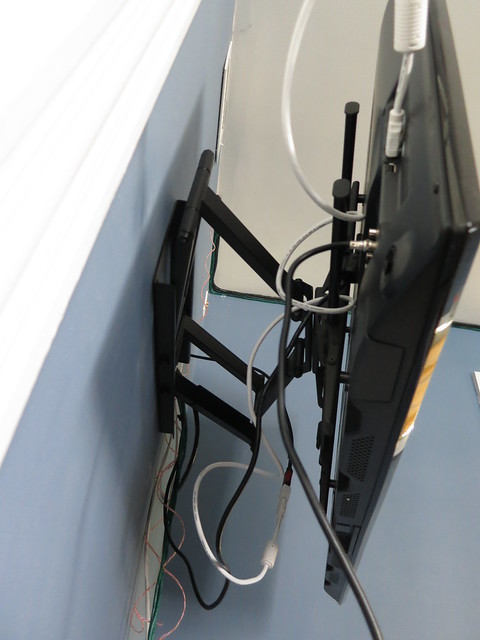
You can see we haven’t quite finished our wiring but we are close to getting this project buttoned up and looking good.
Stay tuned for reviews of all the “toys” Stefan convinced me to buy and further speaker mounting plans.
Sarah
-
TV Mount brackets for easy pull down TV Wall Mount above fireplace Mantel or high up on the wall for comfortable viewing
sarahmzim
3/31/2014 | 9:26 pm Permalink
I fixed a typo. The Meringue is made out of egg whites…not egg yolks. That would be a not-so-tasty mistake!