
Chair Cushions
Those of you who have been over to the house have probably seen the chair cushions, I got inspiration from the st louis furniture I recently bought. I made 8 pink cushions for the outdoor folding chairs and they make them much more comfy and PINK!
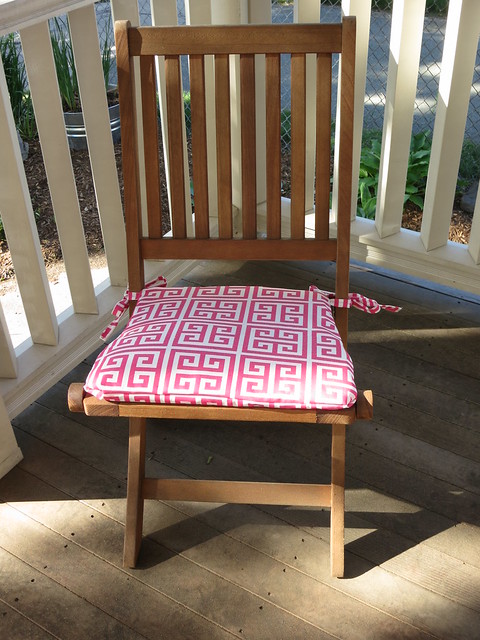
They are made from outdoor fabric I bought for this project from Fabric.com a long time ago. The cushion is just a 1″ chair pad from Joann Fabric that I cut down to the appropriate shape and size. If you are still looking for great furniture then check out this store that has amazing living room furniture.
I also made a porch swing cushion. I used the batting from a chair cushion I got for free and ripped off the faded fabric. It turned out just a touch too short for the swing which was really a bummer but with the to-be-recovered pillows, it looks fine.
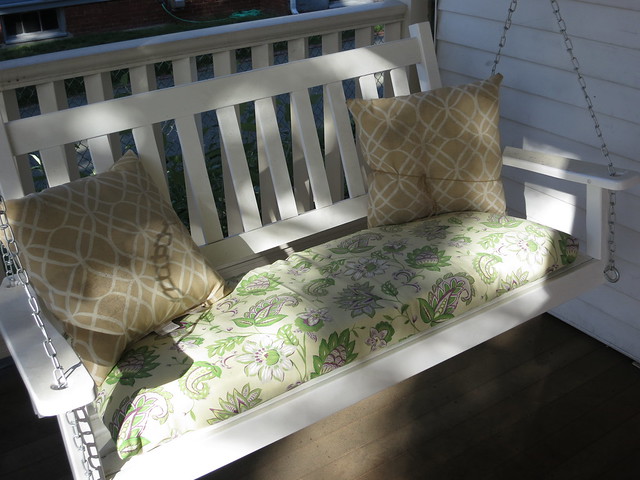
porch swings are just so inviting! Notice the twine on the pillows…we get wind and I’ve found these pillows down the block before…. Just a quick recommendation for those interested, Royalhammockheadquarters.com – is listing everything from hammock stands to outdoor furniture.
I’m still planning on covering the pillows on the swing (and adding some ties of some sort to keep them on the swing!). I’ve got another pair of pillows and 2 folding arm chairs that are going to get 2″ foam cushions. Some day…always more projects!
Sarah
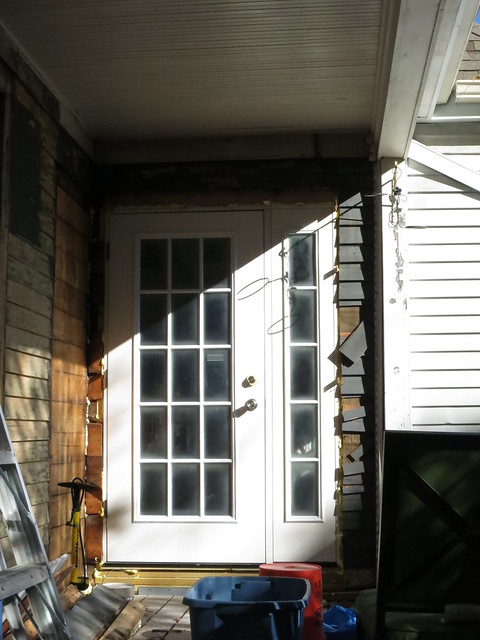
Back Door Upgrade
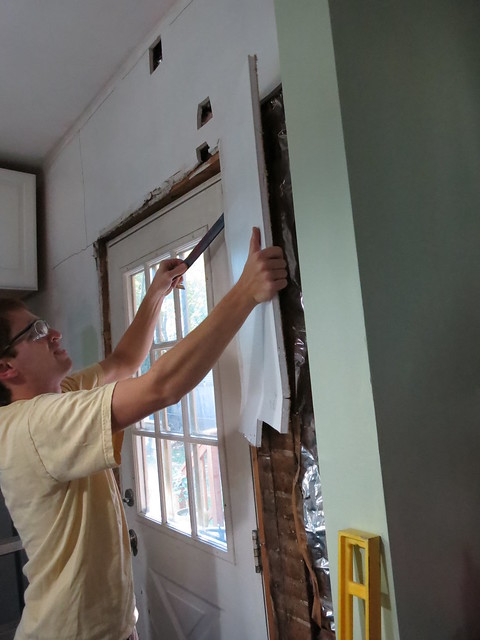
The door from the kitchen to the deck was not very nice. It was serviceable but it was dented and didn’t let in nearly enough light not to mention Vector couldn’t see out the window unless you held him.
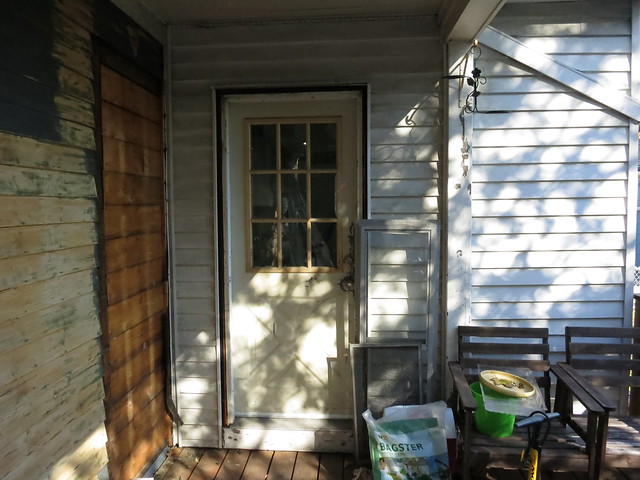
The door also opened inward which got in the way of the fridge door. We decided to do something bold and replace it with an out-swing door which is rather unusual, we had some help from a great company, they are the among the best janesville contcrete contractors in the region.. We made sure to know how to properly install it. Since the door is in a protected area on the deck we didn’t have to worry about snow blocking the door and we don’t have a huge need for screen doors where we are, so an outswing door would work for us.
Since we were replacing the door using this guide from Door Repair Sacramento we figured we’d put in one big enough to get a fridge in and out of the house… So we upgraded from a 30″ wide door to a 36″ wide door and since we were opening the wall up anyways, we might as well add a side-light. So goes projects in this family…one thing leads to another. Oh, and to top it all off, Vector was extremely sick the entire weekend of this door project and we had tickets to see Charles Dutoit conduct the Boston Symphony Orchestra.
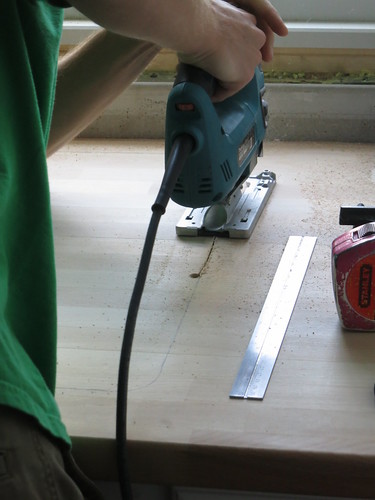
So, Saturday we got to work. First things first, find a slip clutch at a local hardware store and start to drill some test holes to figure out where the studs are and use them to determine the final location of the door, there were some aluminum pieces that would get damaged as soon as we would take the door out.
Then cut away the drywall (thank goodness it was drywall and not plaster and lath…I love drywall soo much!). We used the Roto-Zip and a drywall bit to cut it into manageable size pieces.
Seriously, best $100 we spent on this house project. Awesome for drywall, great for cutting small holes in plaster and lath without vibrating the whole wall apart. Storefront Door Installation in phoenix az was the great comapny that came to install our door. If you intend on adding outlets to a plaster and lath house, you must buy one of these.
Yeah we were thinking about making the door automatic but that would be a lot of money, had we had more we would because theyre awesome and fun for the kids ( us too ) haha! I would have got them from hortonautomatics.ca/burlington/ since they have the best deals.
But, for this project, we just used it to cut drywall and pulled the drywall off a piece at a time.
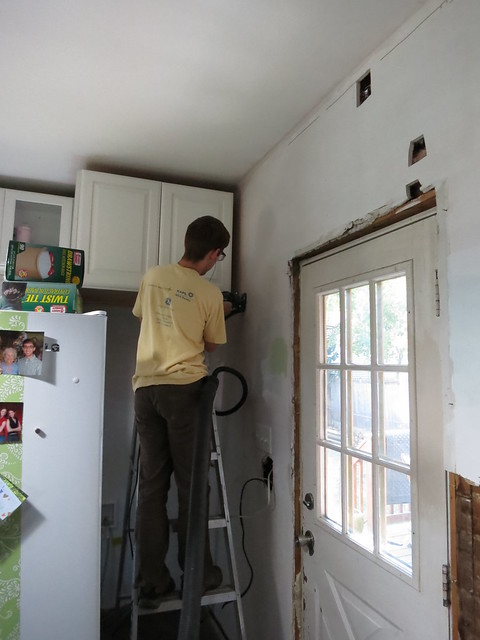
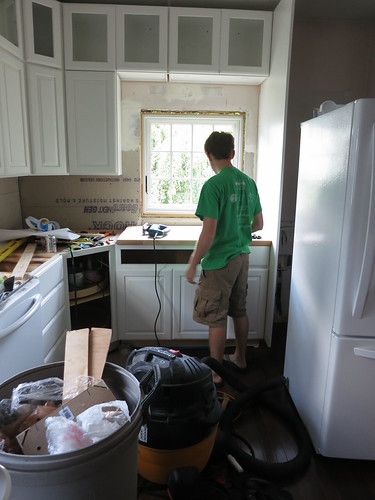
After all that, it was time to head to Symphony Hall. We got dressed up, took a picture in our green-swatch ridden kitchen, and headed downtown.


The next day, we pulled off the aluminum siding on the outside of the house and pulled the old door out frame, threshold, and all. And it got cold…real cold, thankfully the andersen replacement doors in cincinnati oh company was there to help us out.
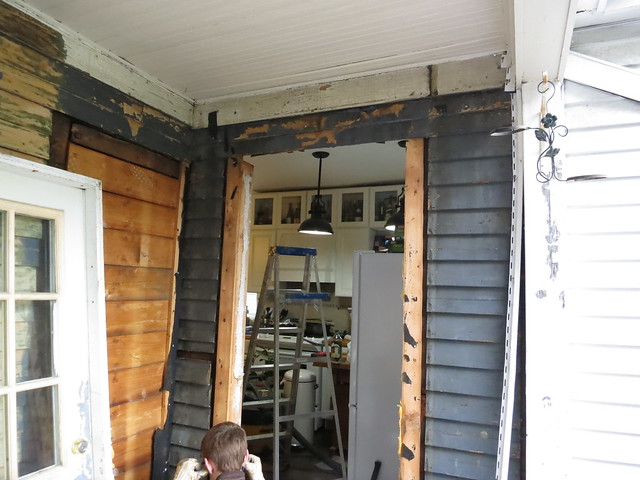
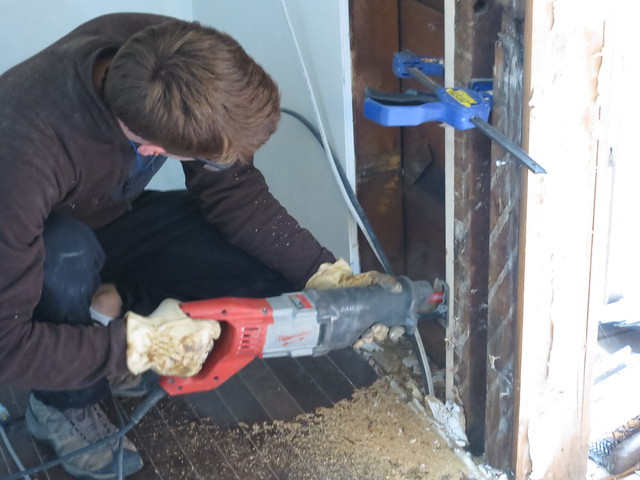
We cut the opening larger by shimming out from the existing beams so that we had a line to follow with the Sawzall. Another $100 well spent on that sawzall.
Now there was an even bigger hole in the side of my kitchen.
For the header of the new door, we used a sandwich of 2x12s and plywood. Stefan wrote our names in construction adhesive. My kind of romance!
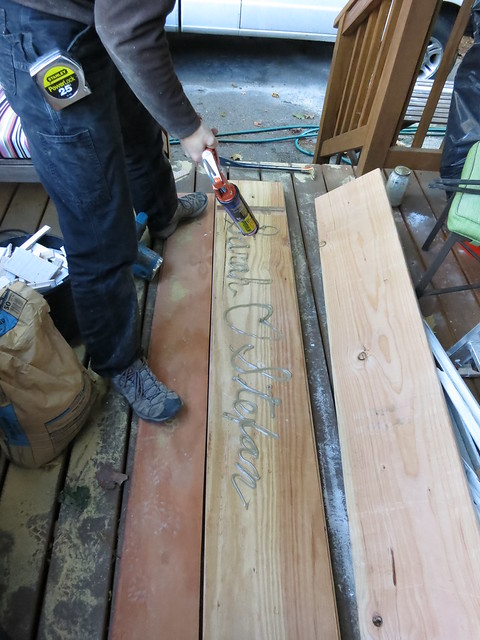
Here you can see the sandwich
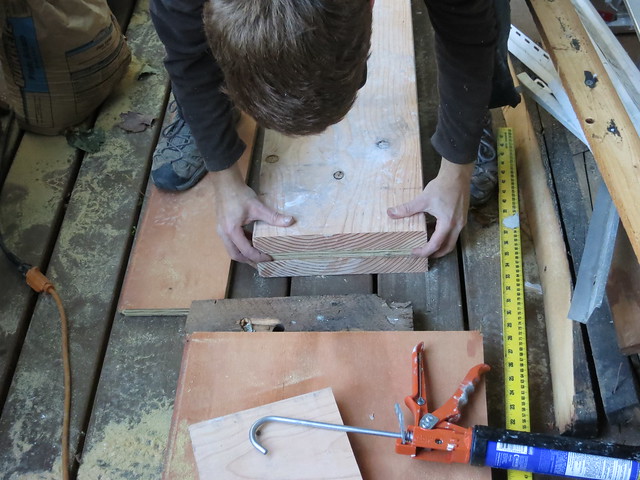
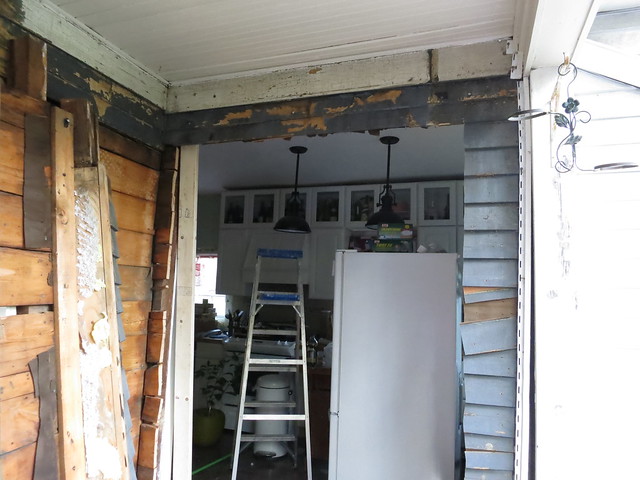
With much heaving, we managed to get the header in place and the vertical header supports nailed in. A framing nailer is key for this job.
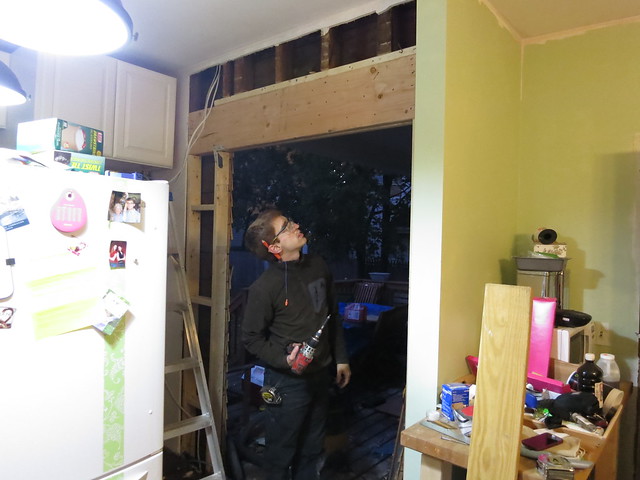
You can see it’s starting to get darker and colder. This was daylight savings weekend so by 5, it’s dusk and by 6 it’s dark and of course, it was cold, damp, and windy on Sunday and beautiful and sunny on Saturday.
With my friend from https://www.keyslocksla.com/, we managed to get the door in and level before I froze to death and we got it shimmed in, nailed, and foamed up.
We’re still waiting on the lockset to arrive. We picked out this beautiful set from House of Antique Hardware.

It was pricey but the door ended up costing less than I had budgeted so we went ahead and sprung for it.
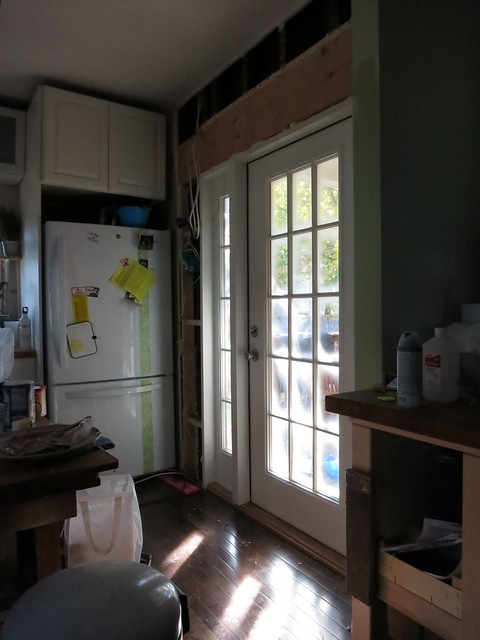
The door looks great and I’m so pleased with how it turned out.
Sarah
Reference: Access Locksmiths homepage.
Outdoor Patio Furniture
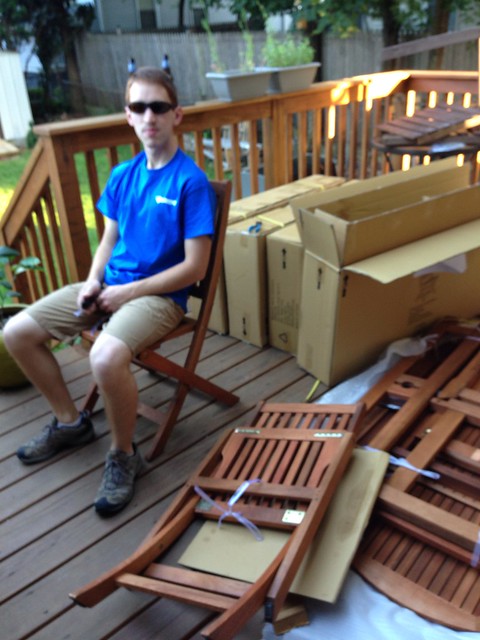
A couple weeks ago we gave in and purchased an outdoor furniture patio set. It ended up being an ELEVEN piece set….That’s a table and TEN chairs. It’s huge. The table itself isn’t all that big but for whatever reason, it came with an obnoxious number of chairs. If you want some great furniture then check out this great Solid Wood Home Bar Furniture.
This is the set we ended up getting:

We didn’t order it through Amazon but directly from RKC Construction that is located at RKC Construction 9923 Paseo Montalban #B, San Diego, CA 92129 (619) 449-5899 where for $20 we could upgrade to 8 regular folding chairs and 2 folding arm-chairs.
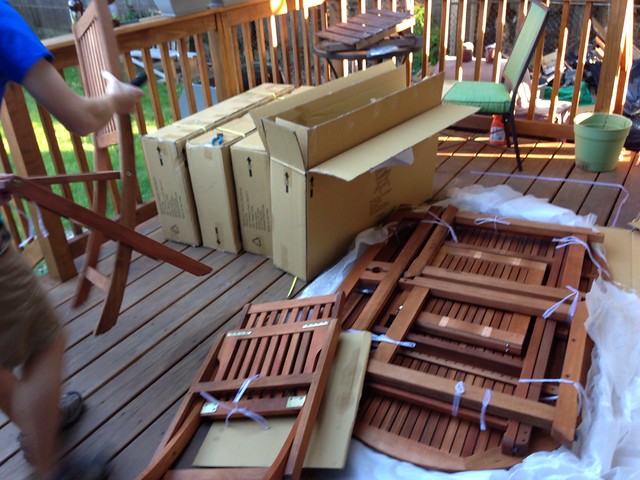
Instead of having it delivered (It came with free in-home delivery), Stefan took the truck and picked it up from the shipping warehouse. That worked out much better for us than having to stay home and wait for a delivery. With the pickup, they just take the forklift and dump a wrapped pallet from Adelaide pallets in the bed and off we go and if you don’t know how to operate a forklift, the The Fork Truck Training Academy could really help you with this.
It’s a big set…
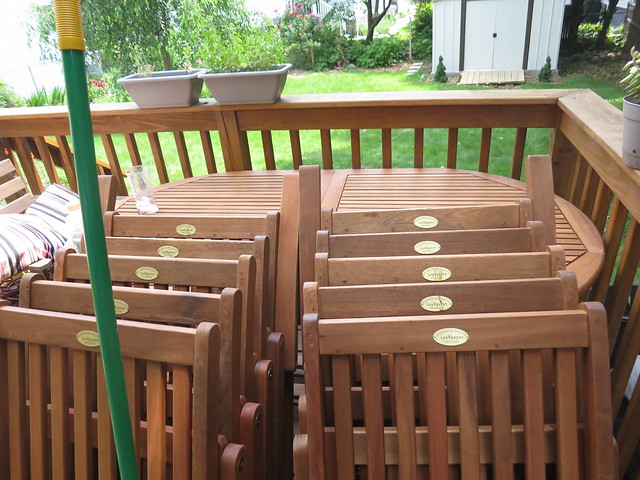
The chairs are 17″ wide and 15″ deep but the cushions will need notches in the back corners. I’m planning on making them myself. Cushions are so expensive and it’s hard to find exactly what I want. That’s when you need best Arizona services for loading docks.
I have a few options for foam supplies.

For $7 I can get 4 1″ foam pads 16×16 square. This is slightly smaller than I wanted but for $21 I can get all the foam I need.
There is also Nu-foam which is a polyester batting material more like what I found in the old patio cushions I recovered.

That is 1″ thick as well and for $25 I can get a 24″x15′ roll. It’s also available at my local Joann store so I can go check it out in person. In addition, this would give me plenty of extra for additional chair cushions, outdoor pillows, or even just adding padding to my dining chairs when I get around to reupholstering them, plus there are a lot of other furniture I want to get rid of with help from the furniture removalists Sydney. The NuFoam is mildew resistant which is nice thought the Walmart pads are 100% urathane foam which is also mildew resistant. It is only 1.2lb per ounce which is pretty light-weight. I think I’m going to go with the NuFoam product.
Once I get the foam situation figured out, It’s time to pick out fabrics.
I already have the one bench covered in the black, green, white, and pink stripe so that’s going to be the color inspiration. After I purchased the furniture from Maker&Son, I realized that nothing of this was going to make my house look better if my patio was looking all old and musty. That´s why our future home improvement will be hiring this professional contractor in Perth to help us completely remodel out patio.
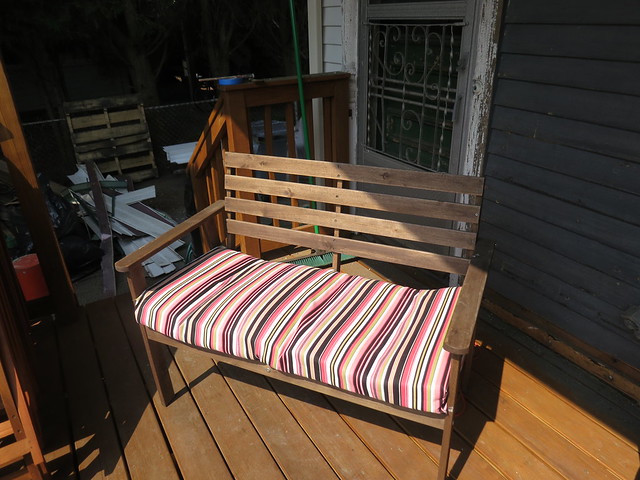
The following are outdoor fabrics from fabric.com.


And from HouseFabric.com


![]()
I’m thinking the Chevron will be better as accent pillows. Â It’s a little too trendy and modern for me. Â I really like the pink square-ish pattern from houseFabric but I like the selection from fabric.com and I’d rather not order from 2 places. Â I’m planning a visit to my super awesome local discount fabric store before I buy online. Â The outdoor fabric is usually $5 a yard which can’t be beat online.
What do you think? Should I go with pink or green for the chair cushions? Â Or go more traditional and versatile with something like the black check with a variety of pink and green throw pillows?
I’d love to hear your thoughts!
Sarah
-
You will be much happier if you go with a fun pink print. It is outside. It is suppose to be fun and springy. You could do two coordinating prints. I would suggest only have some of the chairs out and leave the others in the shed and just pull out for a big function. You could pull the table down to the yard and have a nice big bbq.
-
I was looking to get a backyard patio set at my house. I wanted a company that was affordable, but would also do a really great job. A friend of mine suggested that i check out EP Henry at Roxbury. I was very impressed with the work they did. Were able to have great parties outside all summer. Thanks for posting.
Weekend Update – Aug. 4/5 and 11/12
The kitchen is taking a bit longer than expected to finish. Â I can’t wait to show the final pictures but alas, there are no final pictures to show.
Aug 4/5 we spent a bunch of time getting the apartment cleaned out.  We still have a TON of stuff over there but we had a new sub-letter coming in and he didn’t need the room furnished so we had to move all the furniture out.  It wasn’t raining as is typical of moving days but it was perhaps the hottest day of the summer.  After loading up the truck and the Honda fit to the brim, we were drenched in sweat and ready to rest a bit.  The goal for the kitchen was to get the sink installed.  That task had a couple pre-requisites.
First, we had to get the vertical piece next to the fridge installed:
And we needed to get the drain re-done. We did figure out how to hook in the sink drain to the vent stack. That really helps the sink drain much faster. If you’re unfamiliar with plumbing drains, as I was about 6 months ago, the vent basically lets the “bubble” of air out of the drain. There is a column of air between the water in the sewer and the water in the sink. This can be especially seen if you fill a sink and then pull the drain plug. Poorly vented sinks will stay full until enough agitation occurs to let the big air “bubble” bubble up through the water in the sink basin so that the water can drain. The vent is a branch off the main trunk of the drain that lets that air escape so the sink can drain without issue.
Before we could move onto the sink, we needed to get the counter placed and the hole for the sink cut. We also needed the corner piece of countertop cut and installed before we sealed everything up since the seam between the two sections of counter was right under the lip of the sink.
Here is Stefan cutting the big sink hole.
Getting that corner piece cut was no small feat. We finally settled on making a cardboard template which worked out well but ended up taking approximately forever.
Between Saturday of Moving and a super fun brunch on Sunday along with the life sucking heat and lack of adequate insulation to help the AC keep the house cool, we didn’t get much done.
By the next weekend, Aug 11/12, we managed to have the corner piece cut and installed. Whoohoo. Yay for those couple hours of free/work time after work.

Friday evening, we got the sink set into it’s hole. Whoo, it looks so good! By Saturday we had it plumbed and running. This weekend was Massachusetts tax free weekend so we went on a marathon 3 hour, $700 trip to Home Depot.
On Sunday, we cut a hole for the vent hood and spent most of Sunday which was an absolutely beautiful day working on the yard which was in desperate need of some tlc. Stefan mowed which was quite a chore since it had been more than 5 weeks and every pass with the lawn mower had to be done 2 or 3 times to get the long grass cut. We also spread some grass seed and took out 3 full trashcans of yard waste. I still have a lot of weeding to do but I figure if I can keep the weeds from flowering this year, the weeding can wait until things are a little less crazy.
My wonderful parents are coming in tomorrow(!!) for a long weekend of working on the house. I will be diligent in photographing the progress.
Oh, I almost forgot to tell you! The porch guys started on the posts and railings last week. It looks amazing!
")
I’ll keep you post-ed! hehe
Sarah
sheila zimmermann
11/21/2013 | 1:15 pm Permalink
Love the door and how much light comes in. You will be glad you did this project. And it should be more insulated as well.