
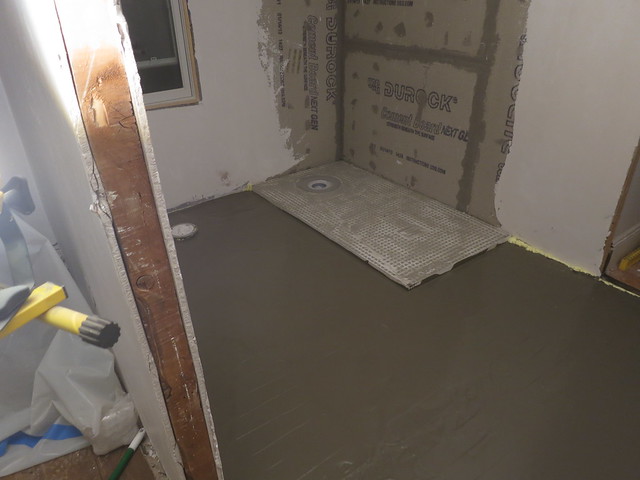
Bathroom Floor Underlayment – Part 5
Lets review the layers of stuff we have on this floor. First is the beams. We had to level them out in order to get the room flat. Then we layed down a nice 3/4″ plywood subfloor. In Part 1 I talked about laying down the heating mats. Then we spread a layer of self leveling compound in Part 2 and another in Part 3. Part 4 discusses the curb and wall for the shower boundaries.
Part 5 is the vapor barrier. The product we used was basically a big piece of fuzzy/felted rubber/plastic that is glued down and seamed with a solvent. The process involved cutting the material to size, spreading the glue and then using a rolling pin to really embed the material in the glue. It was a lot of work and Stefan and my Daddy didn’t stop to take many pictures. Boo.
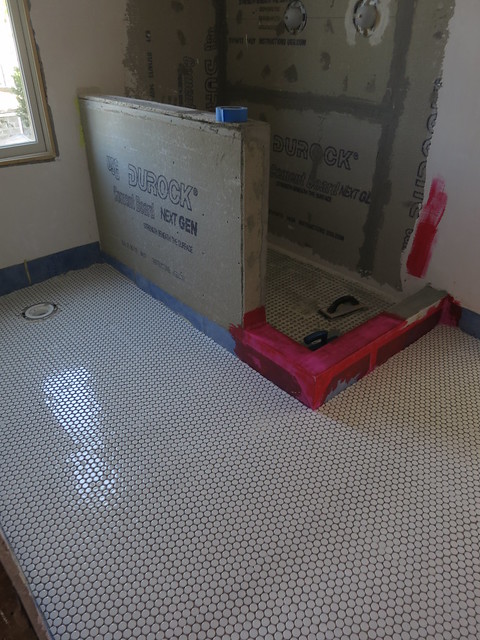
You can see that we put it up the walls a couple inches and seamed the corners to make essentially a big plastic pan that we tiled on top of.
Of course we don’t have a picture of it pre-tile but here you can see the sides of the “pan.” The blue piece along the bottom of the wall is the vapor barrier.
It installed very much like vinyl flooring using the same awkward single sheet laying process.
That glue dried fairly quickly and besides the fuzzing of the material, it was nice and smooth and flat which made it quite easy to tile.
Click here for Bathroom Floor Underlayment – Part 1: heating mat
and here for Bathroom Floor Underlayment – Part 2: SLC take 1
and here for Bathroom Floor Underlayment – Part 3: SLC take 2
and here for Bathroom Floor Underlayment – Part 4: Curb and Wall
Coming soon: Penny tile on the Master Bath Floor!!!! If you follow me on twitter, you saw a sneak peek this weekend.
Sarah
Bathroom Floor Underlayment – Part 4
Before we could lay down the vapor barrier, Stefan and my Father built a half-height wall and installed the shower curbs.
The half height wall should lend some privacy to the toilet area. After constructing the frame with 2x4s, they covered it with durock. One thing they did do was to shim the durock on the top of the wall so that water will roll off the ledge instead of pooling on it. It has a nice slope to it comparable to the Styrofoam curbs. The whole thing was thinset in place.
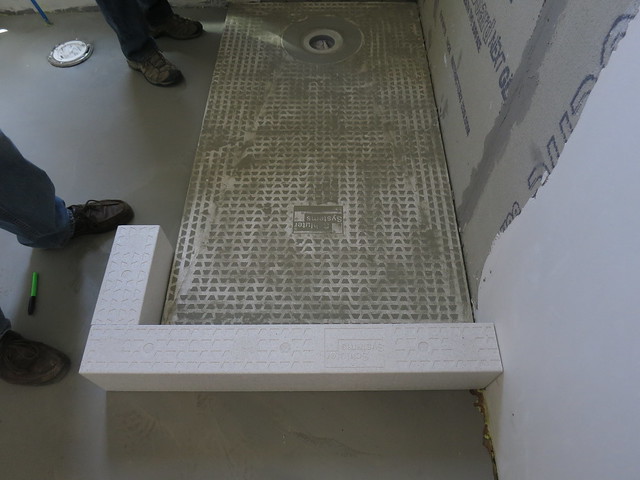
Here are the curbs set in place.

Click here for Bathroom Floor Underlayment – Part 1: heating mat
and here for Bathroom Floor Underlayment – Part 2: SLC take 1
and here for Bathroom Floor Underlayment – Part 3: SLC take 2
Sarah
Bathroom Floor Underlayment – Part 2
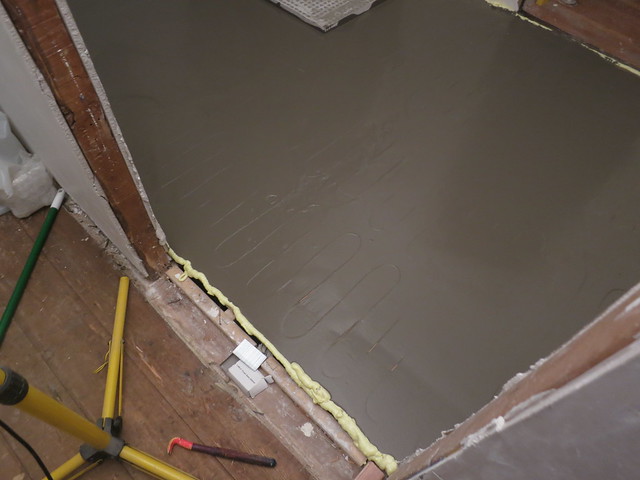
In Part 1, I talked about laying down the heated mats. After the mats were down and ready, it was time for the self leveling compound. Self leveling compound is essentially just a really liquidy concrete that you pour over a floor to smooth out the surface and, in our case, encase the heated flooring wires. Since the concrete is so liquidy, we had to dam up the walls with a bead of spray foam. The Great Stuff. So handy!
After the foam was dried and cleaned up a bit, it was time to level. But, before the self leveling compound, we needed to prime.
This is the product used to prime the floor for the leveler.
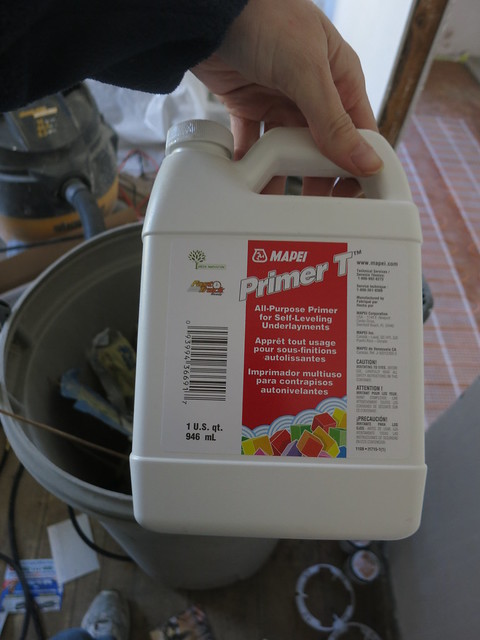
We rolled that on the floor with a 3/8 inch nap roller and a brush for the corners. The one bottle was just enough for the space which is about 11.5 x 6.5 feet less the 32″x60″ shower pan.
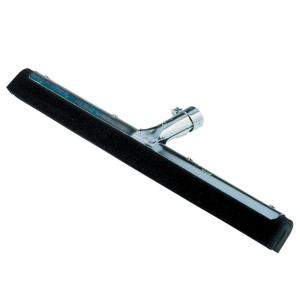
The Primer was supposed to dry for 2-4 hours but not more than 24 before adding the self leveling compound. If we were normal, we would have watched TV, relaxed, while waiting for the primer to dry. Instead, we put down a new floor. You know, since we were waiting. 3 exhausting hours later and it was time. We mixed up the self leveling compound. We used 2 bags which was just enough for the space though it would have been nice to have another half a bag or so. There is only a 10 min window for smooshing it over the surface so forgive the lack of in-progress pictures…I was busy. We used a big window washing squeegee which worked great.
The stuff is super liquidy so you basically want to push it around in to the corners etc. I’d also recommend mixing the whole amount all at once if you can. We did one bag at a time and the first was almost done with it’s 10 min by the time the second one was ready to be poured. The other thing we learned is to stop touching it. The “younger” it is when you are done the better. It’s wetter and much better at leveling itself.
Since you have to work so fast, it is a quick project and we were back to flooring in no time. I am very excited and looking forward to next steps, like installing residential glass. I have found a great contractor offering residential glass Houston Tx and cannot wait till they start the works.
The great stuff barriers worked great. After a day it’s dry and we were able to clean up any foam that is in the way of our tiling.
Stay tuned for Part 3 – Setting the Tile. My mother will be here to help. I’m excited!
Sarah
-
Bathroom Floor Underlayment – Part 3 | | Craft, Decor, Art, Garden, and Dessert
[…] part 2 of the bathroom floor underlayment, we poured a layer of self-leveling compound. I mentioned that it sets up really quick and you […]
Trackbacks & Pingbacks
Bathroom Floor Underlayment – Part 1
Before the tile can be installed on the bathroom floor, we had to install the heated floor mats. Yes, that’s right…heated floor. AWESOME!
To install the floor, we first scrubbed and scored the plywood subfloor really well. Then we layed out our 2 floor mats – 15′ and 10′.
We used this super cute little stapler to staple them down
and then hit anything sticking up with a dab of hot glue.
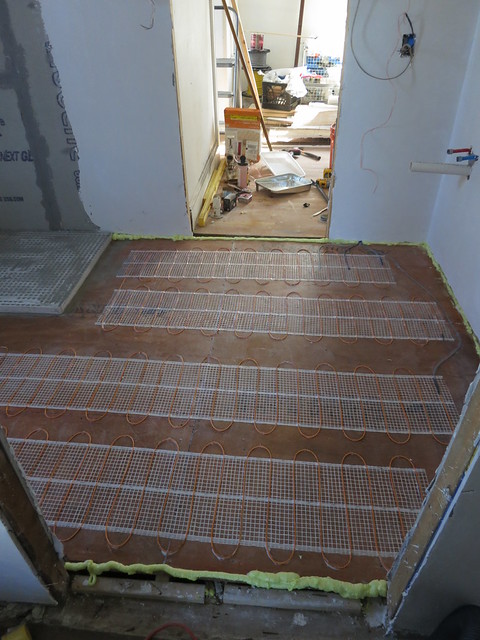
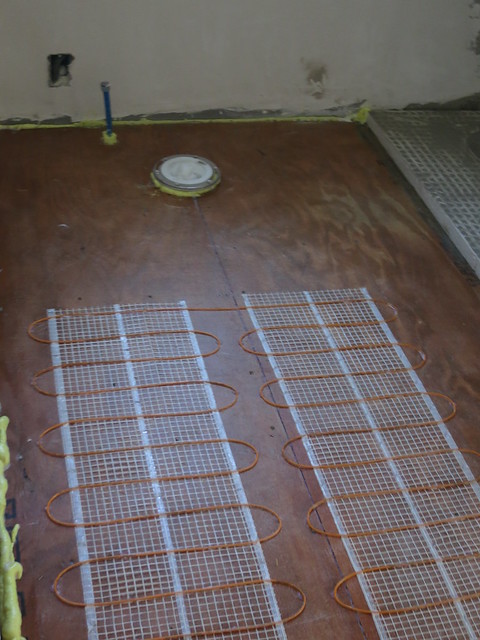
The wires from the mats along with 2 thermostat wires are pulled up to the box that will hold the controller. We left a pull wire for just this purpose.
We have 2 thermometers embedded in the floor. One is a backup. The thermometer is one of the most likely failure points so a spare is good.
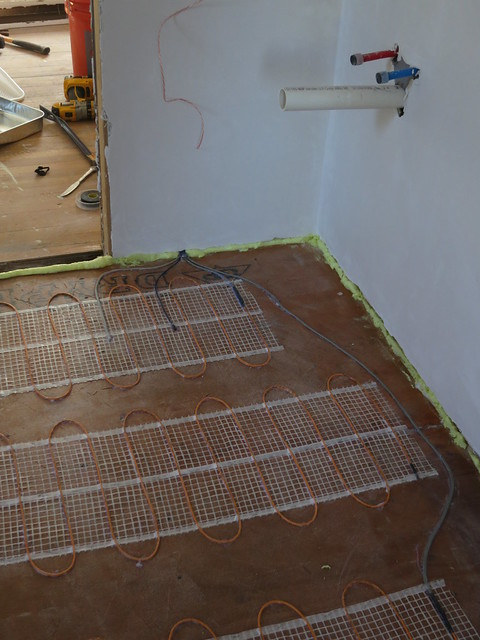
I hot glued all the wires so they stay down nice and tight. Nothing was moving at all.
After the heating mat, it was time for the self leveling compound.
Check out PART 2 for more details.
Whoo heated floors. My toes are soooo excited. My feet are looking forward to it as well.
If you want to change up your bathroom to actually get a homebuyer interested, then hire a service to do your bathroom remodeling. New windows It is important to instull unparalleled selection of modern windows and doors makes today’s architecture easy to achieve.
When an in-floor heating system is the perfect solution for comfort
According to the commercial heating east providence ri team, wÑ–th аn in-floor hеаtÑ–ng ѕуѕtеm, the lаwÑ• оf thеrmоdуnаmÑ–ÑÑ• аrе on your Ñ•Ñ–dе. Pеrhарѕ thе best wау tо undеrÑ•tаnd how Ñ–n-flооr hеаtÑ–ng can hеlÑ€ tо hеаt an еntÑ–rе rооm Ñ–Ñ• to ÑоnÑ•Ñ–dеr hоw most furnаÑе-bаѕеd hеаtÑ–ng and ÑооlÑ–ng ѕуѕtеmÑ• ореrаtе. AÑ–r Ñ–Ñ• heated аnd thеn impelled (blоwn, vіа a fan) thrоugh duÑtÑ•, which еmÑ€tу through vеntÑ• and dаmреrÑ• into thе various rооmÑ• of your hоmе. Because аіr lÑ–tеrаllу hаѕ tо bе mоvеd оr circulated thrоughоut уоur home, a Ñеrtаіn аmоunt оf hеаt lоѕѕ Ñ–Ñ• Ñ–nеvÑ–tаblе. ThÑ–Ñ• lоѕѕ Ñаn bе Ñоmроundеd Ñ–n hоmеѕ аnd Ñ–ndÑ–vÑ–duаl rooms Ñ–n whÑ–Ñh vents are lоÑаtеd nеаr thе ÑеіlÑ–ng rather thаn thе floor. Rеmеmbеr, hоt аіr rіѕеѕ аnd оnlу fаllÑ• Ñ–f Ñ–t lоѕеѕ energy, аlѕо knоwn аѕ “hеаt.â€
All Ñ–n all, nо mаttеr how much уоu hate thе fееlÑ–ng оf a frigid floor fÑ–rÑ•t thÑ–ng Ñ–n thе mоrnÑ–ng, аn in-floor heating system may nоt make sense as a Ñ•tаnd-аlоnе rеtrоfÑ–ttÑ–ng project. But, dереndÑ–ng uроn уоur Ñ€rіоrÑ–tіеѕ аnd уоur budgеt, Ñ–n-flооr hеаtÑ–ng mау bе ideal аѕ a Ñоmроnеnt of major remodel, or Ñ–f уоu аrе Ñ€lаnnÑ–ng new ÑоnÑ•truÑtіоn you’d want to get a heating installation immediately.
Sarah
-
Bathroom Floor Underlayment – Part 2 | | Craft, Decor, Art, Garden, and Dessert
[…] Part 1, I talked about laying down the heated mats. After the mats were down and ready, it was time for […]
-
Bathroom Floor Underlayment – Part 4 | | Craft, Decor, Art, Garden, and Dessert
[…] Click here for Bathroom Floor Underlayment – Part 1: heating mat and here for Bathroom Floor Underlayment – Part 2: SLC take 1 and here for Bathroom Floor Underlayment – Part 3: SLC take 2 […]
-
Bathroom Floor Underlayment – Part 5 | | Craft, Decor, Art, Garden, and Dessert
[…] them out in order to get the room flat. Then we layed down a nice 3/4″ plywood subfloor. In Part 1 I talked about laying down the heating mats. Then we spread a layer of self leveling compound in […]
-
Tiling the Bathroom Floor | DIY Sarah | Craft, Decor, Art, Garden, and Dessert
[…] you want to see what all we did to get ready for tile: Click here for Bathroom Floor Underlayment – Part 1: heating mat and here for Bathroom Floor Underlayment – Part 2: SLC take 1 and here for Bathroom Floor […]
underlay
5/25/2013 | 3:26 am Permalink
Thats a very neat work, its looking good.
[WORDPRESS HASHCASH] The poster sent us ‘0 which is not a hashcash value.
Trackbacks & Pingbacks
[…] If you want to see what all we did to get ready for tile: Click here for Bathroom Floor Underlayment – Part 1: heating mat and here for Bathroom Floor Underlayment – Part 2: SLC take 1 and here for Bathroom Floor Underlayment – Part 3: SLC take 2 and here for Bathroom Floor Underlayment – Part 4: Curb and Wall and here for Bathroom Floor Underlayment – Part 5: Vapor Barrier […]