
Christmas House Tour 2014
I LOOOVE Christmas decorations. It’s in the blood. We used to tease my mom that she didn’t have a Christmas tree more like a Christmas Forest. I went with lighted garland on the porch which, frankly, is the proper way to decorate a porch. Come and look at this website for more tips in real estate and more.
The Outside
I’ve done the lighted garland every year and this year I added the Candles in the windows. The 3rd floor definitely needs one as well. Eventually, I’d like to also add a large wreath and some lighting up top. I’m thinking perhaps a gutter-clip light to illuminate the top half of the house. I’m a big fan of landscape lighting and I think illuminating the top of the house would be a good year-round touch. Later I will have to think when to start a Gettysburg gutter cleaning.

I’m not super pleased with how the garland fell around that center post. I kept meaning to fix it but time. Always time.
I have a small wreath on the front door but the porch light is on and you can see the glimmer of the Christmas tree through the window. You can see I have some extension cords hanging. Again with the time. I want to get some clips permanently installed for the extension cords. Next year I’d also like to get some festive pillows etc. on the swing. And one day, we will get rid of that awful siding. This Creative Design Agency CRBN help us for a really affordable cost.

The Front Entry
Inside the front door we see tree number 1. I made that tree topper which I’m super proud of. I wrote a blog post on it I’m so proud of it: here.
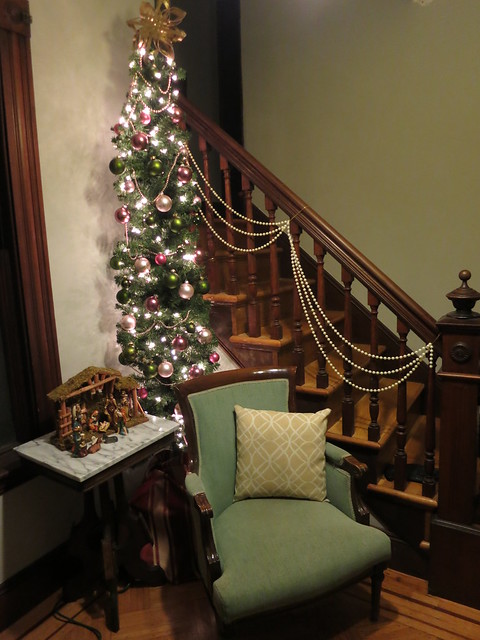
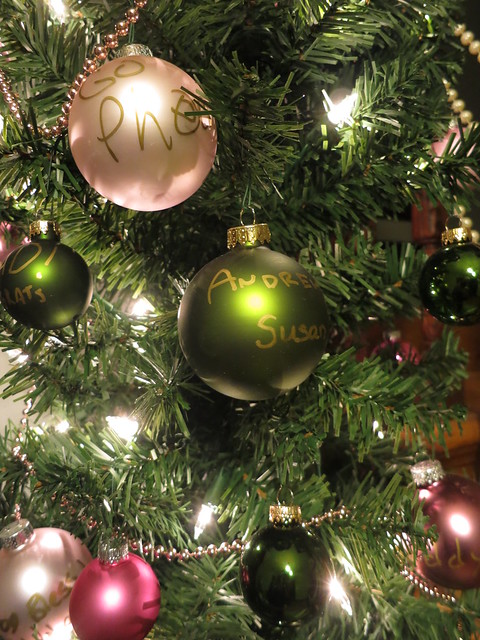
The tree is covered in ornaments from our wedding. In addition to a traditional guest book, we had our guests sign ornaments. This ornament guest book was the whole reason we had a December wedding. I had this brilliant idea and we designed the wedding around it. Sometimes I get ideas like that: buy a house with a hole in the roof and design our lifestyle around it.
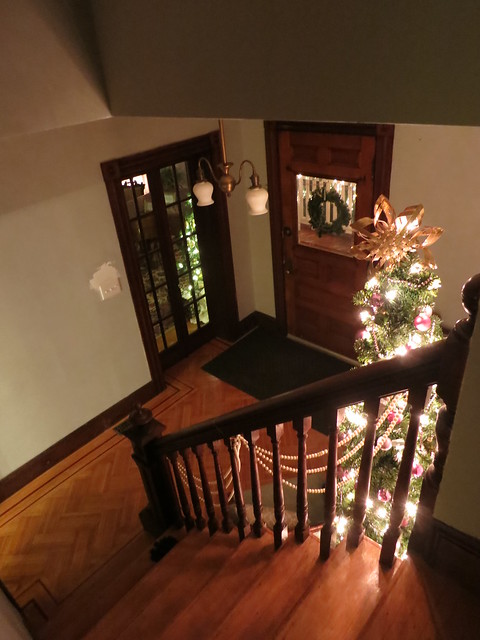
From the stairs you can see the tree in the entry as well as a peek of the tree in the piano room and entrance to the garage which have a new garage door we got online, find more info about this here. I also don’t believe I’ve showcased the light in the entry. We got it from this guy on craigslist, cleaned it up and voila. It’s a great light and is just the right size for the space. Also a good shot of those parquet floors I LOVE.
The Piano Room
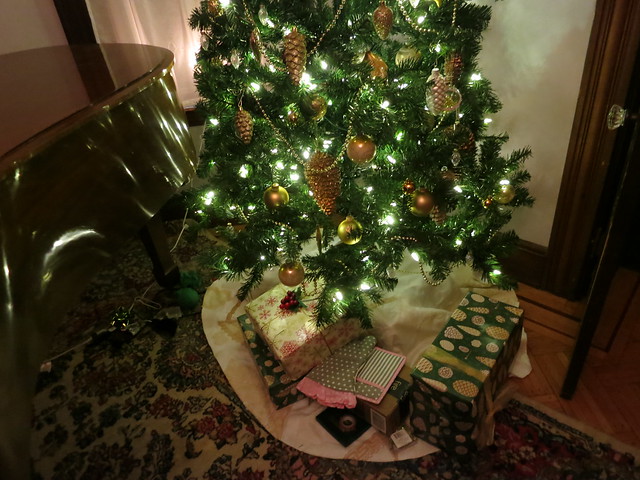
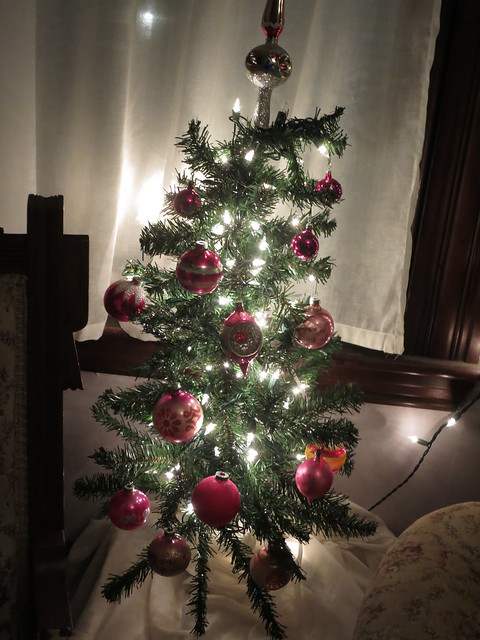
Ah yes, the playing with light exposure Christmas tree picture. Well, here it is. I like the stack of Christmas music on the piano seat. I also like the paint swatches on the walls. Some things just haven’t changed since last Christmas.

One thing that has changed, the tree. I used all of my childhood ornaments on this tree last year but this year I went with vintage gold ornaments and all of my pinecone ornaments. I really like pinecones. I also used my new Tree Skirt and put the tree on a box to make it about 6 inches taller. I highly recommend this little trick. It makes it very easy to scale a tree to the room.
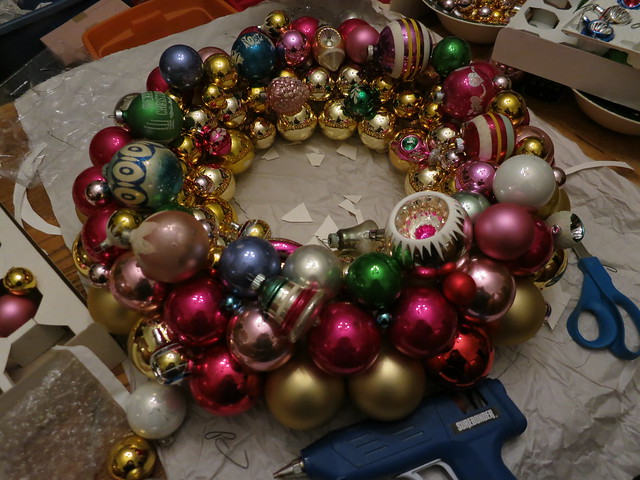
I put the Ball Wreath over the mantle this year. I supported it on a vintage mirror since there isn’t a good hook in the wall yet. I also left this cool old playbill I found for the Capital Theater which is the local movie theater just down the street. I kept meanig to take the playbill upstairs but I kind of like how kitchy it makes everything look.
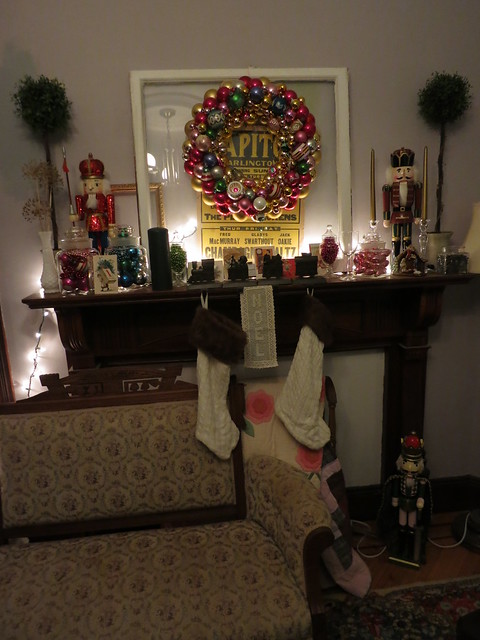
I channeled my mother with this little tree with vintage pink ornaments. I don’t think I quite have the forest my mother has but I’m getting there.
Here’s another Mom-ism for you. The Nutcrackers. My mother started collecting nutcrackers when she was a girl. For my entire childhood they lined the steps from largest to smallest and I have fond memories of fighting with my sister about rather or not feathers counted for height.  When my parent’s moved to a ranch style house with no stairs, my sister and I split the nutcrackers. I had them on the stairs last year and Stefan HATED them. To be fair, our stairs are a bit narrower than the ones I grew up with…ok, they are alot narrower.

The Dining Room
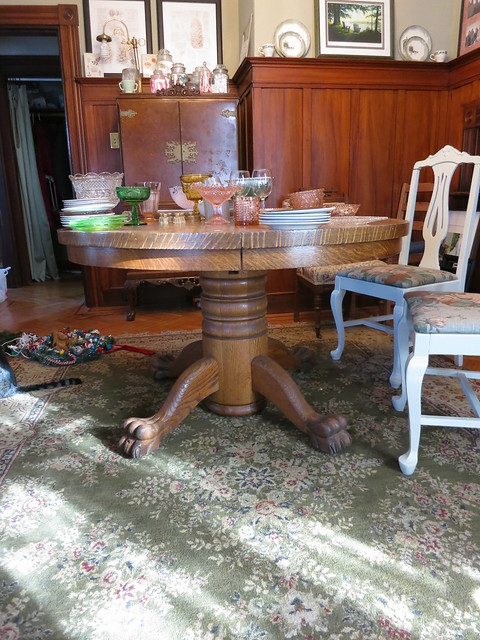
I must apologize for the mess. I had half the serving-ware out for the party and I decided it was a good time to paint the back of the china cabinet. But, I didn’t want to delay the post that long so messy picture it is. The dining room hasn’t changed much. We have the start of some crown-molding, a soon to be not-white china cabinet backing, and a new dining room table.
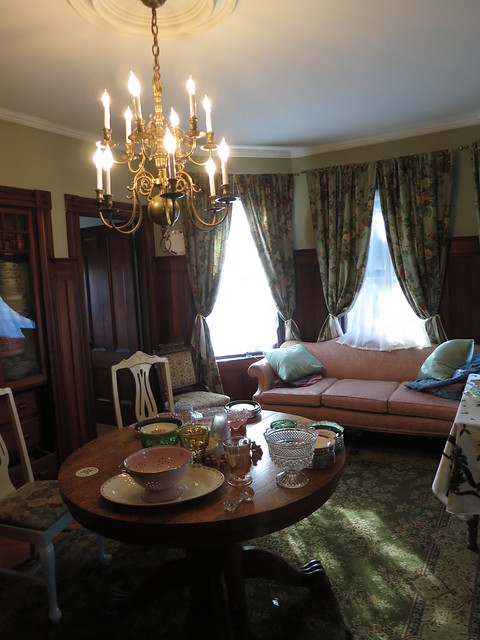
We picked this table up on Craigslist and refinished the top. It really is a beautiful table. I’ve switched from Minwax Polyurethane to Varathane and I am never, ever, going back. It is that much better to use.
The Den
Since the new half bath (post coming soon) is functional and the Den is clean and ready to be occupied, I tried to extend the party to the second floor. I put the desserts on that far table with the green tablecloth. It worked OK. I ended up going through much more food and much less dessert this way. I should have added some desserts to the downstairs display as the night progressed.
After the Christmas Party the heat went back down to 64 from the toasty 70 that we keep it for guests. It wasn’t 24 hours before the big, gray, down TV watching blanket came out. I didn’t even sneak in a picture first! Also note the “light fixture” on the far side of the room. We have a real light fixture and it will be installed…sometime before the next Christmas Party! Along with the exterior one (we had to find out more about the Northern Lights Exteriors service, but yeah, these guys seem to be reliable). On the close side of the den we have a black ceiling fan that is infinitely practical and has a vintage industrial vibe that works in the space even if it is a ceiling fan. The downside of the black ceiling fan: Vector is terrified of it!

I said it was in the blood. Well, my mother used to sell “Nostalgia Wreaths” at craft fairs. This one was made by 10 year old Sarah. I remember getting chastised for using all the “good” stuff but I really like this little wreath. Before I was into pine-cones I was into deer and the deer in the center of this one makes me smile. I hung this wreath from a piece of satin ribbon and a tension rod. Worked great. I wouldn’t use it for my Ornament Wreath but for these lighter, less fragile wreaths, worked like a charm.

Merry Christmas and A Happy New Year from the Wolperts

Vintage Ornament Wreath Tutorial
My mother made one of these years ago and I have always loved it. Â I made my own after Christmas last year and documented the process for you.
Materials –
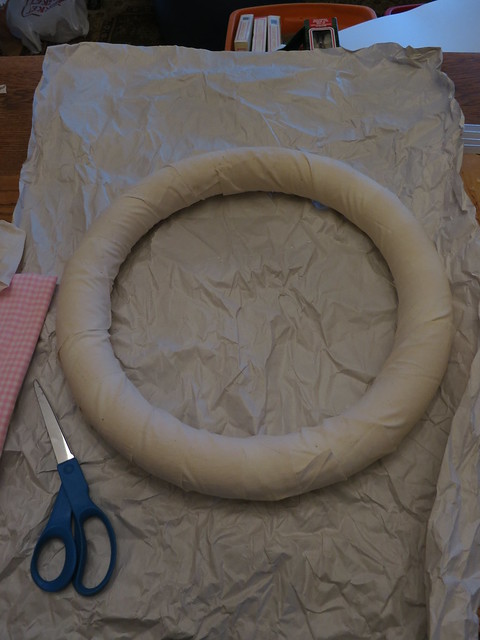
18 in foam wreath form
about 10 feet of 4″ wide ribbon or strips of fabric
50 large ornaments
30 medium ornaments
50 small ornaments
15 “ornate” ornaments
Hot glue gun and hot glue
sheet of poster board
Step 1:
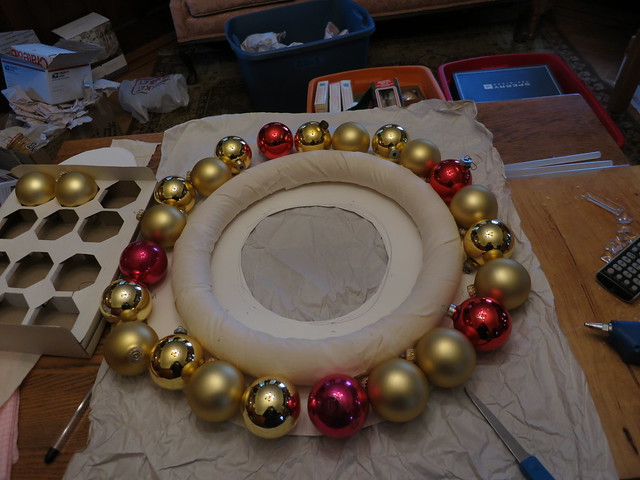
Cover your wreath form.
Step 2:
Set form on top of posterboard and mark approximately where you should cut it based on the size of your ornaments.
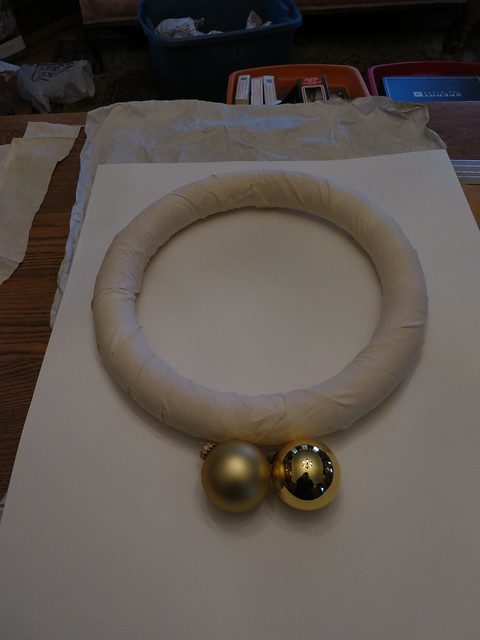
You want to be about a half inch outside the center-line if your ornament
Sketch your circles and cut out the poster-board in a donut shape. Dont’ worry too much about the even-ness or size. You’ll have a chance to touch it up later.

Step 3:
Glue the wreath to the poster board and arrange your first row of balls.
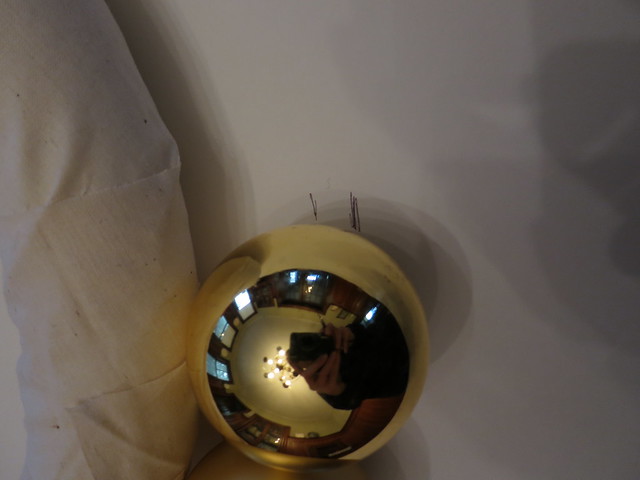
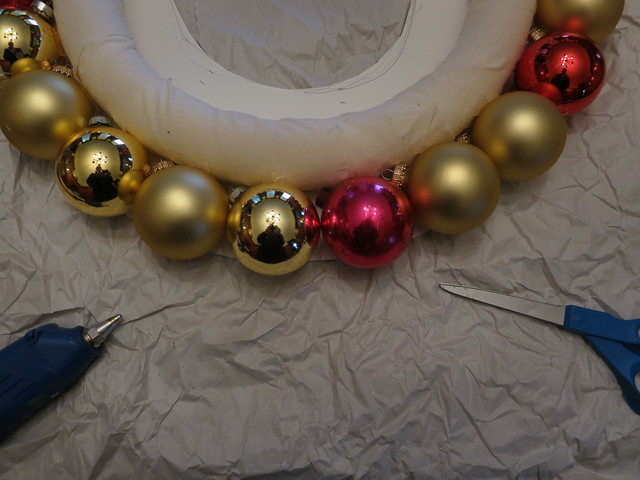
Step 4:
Start glueing the balls down using the hot glue gun. Put dabs of glue on the posterboard and on the wreath form.

I put the hanger sides of the ornaments facing in towards the form since I didn’t want them showing.
Step 5:
Once they are all glued down, you can adjust the cardboard. I don’t want to see any cardboard so I carefully flipped over the wreath and cut out the cardboard between the ornaments.
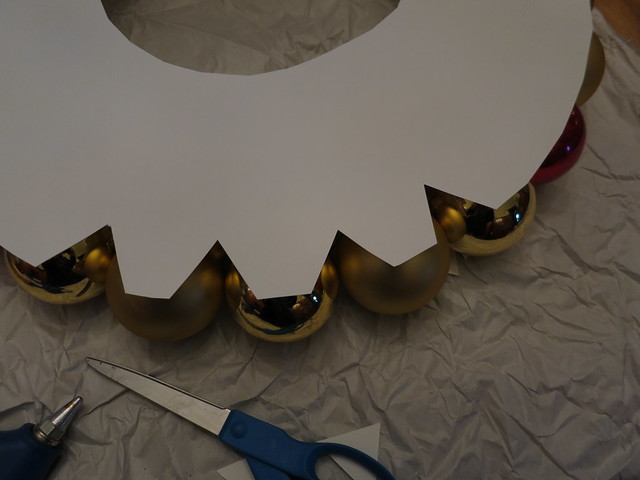
Then I repeated steps 4 and 5 on the inside of the wreath. I used smaller balls but use what you have.
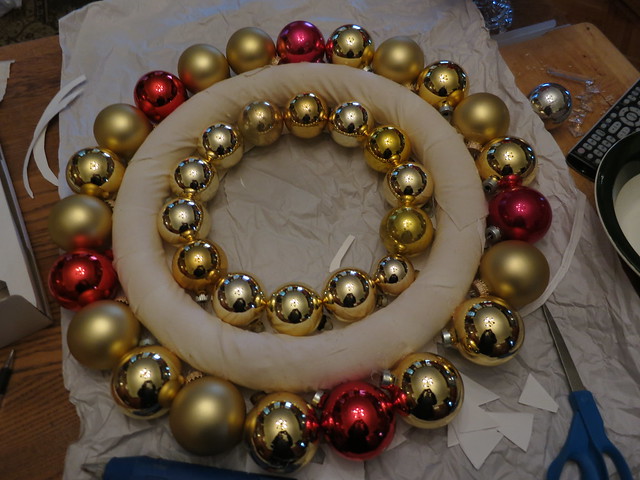
Step 6:
Now that you have a nice secure base, it’s time to get glueing. I built up another row on the inside of the wreath and then started working my “ornate” ornaments into the top layers. There is no real direction here, just a few tips.
Tips:
- Work all over the wreath at once instead of just concentrating on one spot. You will get a more even wreath shape that way.
- Cover up your glue mistakes with small ornaments
- Use the little ornaments to cover up as much of the wreath form as possible.
- Use little ornaments to prop up your “ornate” ornaments to make them pop a bit more.
- Don’t try to force the ornaments into nooks…it’s a good way to break the ornaments.
- If you do break an ornament, try to cover up the breakage rather than trying to remove and replace it.
- Don’t be afraid to use your best ornaments. This is a spectacular piece and your best ornaments deserve the most attention.
- Don’t be afraid to sneak plastic ornaments into the mix. I’ve got a few and you wouldn’t even know.
- Buy yourself a decent glue-gun for Christmas. This One
is great.
There are a few more questions you should ask yourself before you start this project.
Where can I hang this baby?
I wouldn’t hang this on a door. Too much banging and bumping. It really shouldn’t be touched so over a mantle or somewhere over a piece of furniture is best, and if you want to get antique furniture you can go to stores to shopping for antiques online. You can also line the back with felt or a bit of batting to help pad it if you have a lot of banging doors or if it vibrates when the laundry is going.
How do you store it?
Best question ever. The answer is – with difficulty. It needs to be covered. I use a dry cleaning bag which is nice and see through so I know what it is. It really needs to be stored hanging or you’re going to have to find some kind of box to keep it in. Good luck with that but if you do find the perfect box, please please please leave a link in comments! Keeping the wreath hanging in a closet is good. You could keep it with the “fancy” clothes like your wedding dress and Tux since you’re usually clean and careful when you get those out. Hanging in a safe place in the attic is great as well. I’ve got spare closets in the guest rooms that are going to be my super fragile wreath storage area for now and I’m hoping to eventually get Stefan to build me a dedicated Ball Wreath Cabinet in the basement.
Where do you get all those ornaments?
Well, mine are leftover from my wedding but that’s not the normal scenario. Thrift stores are good but in all honesty, you’re probably best off scouring after-Christmas sales at all the normal ornament places: Home Depot, Michaels, Target, etc. If you can do all the solid ornaments new then you can try to get some neat vintage ones for the “ornate” ones. Antique shops usually have them for a few dollars a piece before Christmas but they are getting harder and harder to find. You should also ask your parents/grandparents. They kind of went out of vogue for a while since they are so much more fragile than the new ones and there is no way to get the years and years of dust off them which brings me to my next question…
How do you clean it?
Don’t. The vintage ornaments can NOT get wet or they will lose their pigment. Hit it with a cool blow dryer to get rid of dust, a feather duster might work, but don’t use any cleaners or even hit it too hard with a swiffer. It’s going to be a little dusty. Call it Christmas Fairy Dust and get over it.
I can’t wait to see all your renditions. Please leave links in the comments! I think I’m going to make another this year with all plastic ornaments. Dollar Tree sells those tubes of them and I think I can make it happen.
Merry Christmas!
Sarah
-
Christmas House Tour 2014 | DIY Sarah | Craft, Decor, Art, Garden, and Dessert
[…] put the Ball Wreath over the mantle this year. I supported it on a vintage mirror since there isn’t a good hook […]
Trackbacks & Pingbacks
Kitchen Cleaning Service Miami and Remodeling after a Fire Accident
Last month we had a terrible accident while cooking, is incredible what a small stove flame, a bit of oil and small dirty cloth can produce if you don’t pay enough attention; We had a small fire incident in out kitchen, fortunatelly a couple weeks before I bought some discounted fire extinguishers and manage to get rid of it before the fire expand to other rooms; After a fire replacing a roof is a need, danes dallas roofing always do a perfect work. Unfortunately thats how it part of the kitchen looked after a very long clean session, we weren’t able to remove all the smoke stains so I had to contact a smoke removal company and residential and commercial concrete services to get rid of the burn marks.
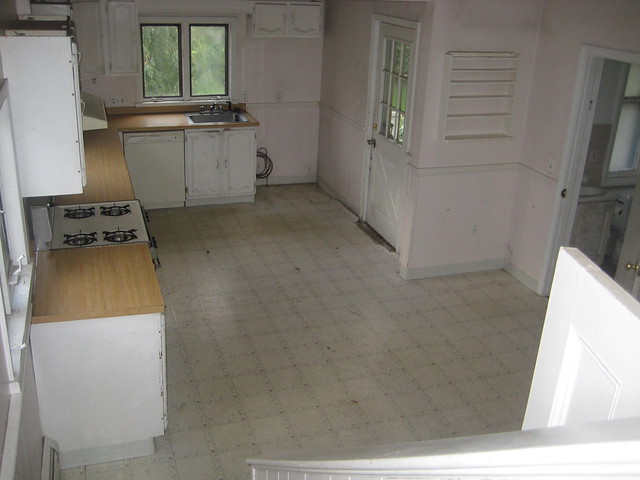
And here is how it looks after a single day smoke removal service that only left the gas cooktop there.
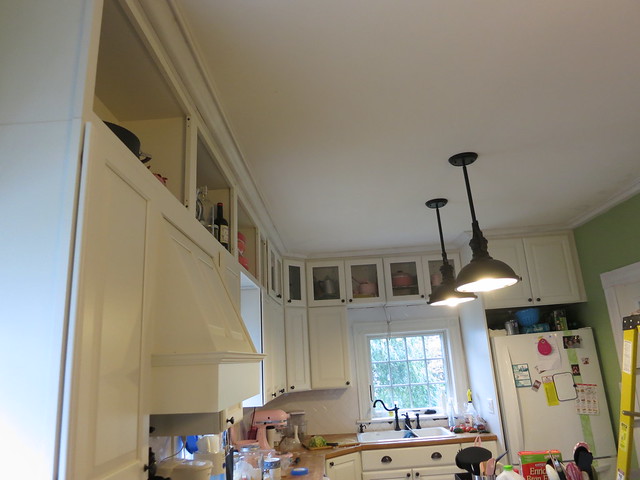
After everything being fixed my wife just had the wonderful idea of remodeling the entire kitchen. We contacted someone for Appliance repair and we didn’t need to buy a new kitchen, sink and oven!
Our process for moldings are:
- Pre-prime moldings
- Cut and nail into place (more complicated that it sounds…)
- Wood fill
- Sand
- Prime again
- Caulk
I’ve found that the second priming after the wood-filler is key to a nice smooth, easy paint job. It really makes the final coat go on so much easier to have a well-primed underlay. I also like to have it well-primed before caulking. It helps to pull the excess caulk off if you have a nice smooth, unabsobant surface. It is always helpful to have more kitchen ideas as it helps brighten your house, and if you want to keep your house clean, you can also use these services at Hanover Home Cleaning Pros to help with this.
I mentioned the Cut and Nail as one step but it really is more complicated that that. It’s a 2 person job and this particular molding was hard to work with. It is “shelf” molding not Crown so instead of the back corner being cut off, we had to cut it off ourself.
Here is the profile pre-ripped:

and after we ripped the back corner off it looks roughly like this.
We buy nearly all our moldings from Anderson McQuaid. It’s not 2 miles away from the house and is a full on-side molding mill. It’s a neat place to visit if you’re ever in the area. It’s over by Fresh Pond if you know that area of Cambridge MA.
To rip the Molding, we used our great table saw:

And some great roller stands from Harbor Freight. These are awesome. Cheap, easy, and super useful.

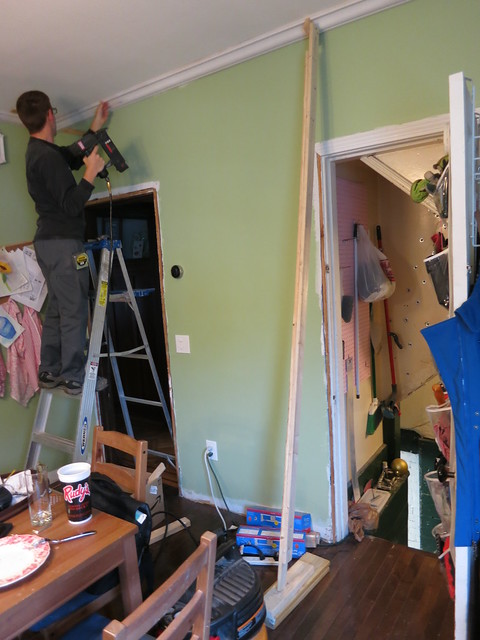
After getting the molding to shape, we cut it to size using the chop-saw. To install it, we used an ingenious little tool – a custom molding holder.
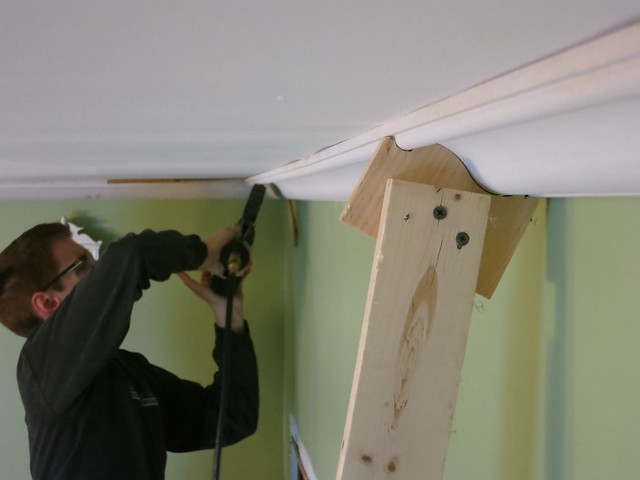
Making one of these really helps to get the molding up and tight into the corners. We made it long enough that we could wedge it into place with a couple scrap blocks of wood. Remember to clean constantly your working spot. It is a matter of safety. For that keep handy a set of broom guru cleaning system.
(Don’t mind the mess: Rudy’s Cup for iced tea, a crooked Bulletin Board I hang receipts, lists, and watercolor paintings on, my Blue Coat on the back of the door. What can I say, we live here! I just can’t get behind cleaning up to work on a project but it would make for better blog pictures, for now I will try to Air Duct Cleaning Chicago to get a vacuum, this way I save time cleaning up and focus on my projects more. If I messed up or needed a pro to come help with Workwear laundry service from PHS Besafe I always called them up fast.
After putting up all the moldings it’s time to wood-fill, sand, prime, caulk, and paint. I’m most of the way through the process but I’ll do a final moldings reveal once it’s all done! The Kitchen really is coming together so well, and the perfect ending is to clean the kitchen and for wonderful results, click here for maids, it was the best decision we made.
Sarah
-
Sarah I love your house so much!! The kitchen looks great!! And I had no idea that custom molding holders existed! That’s such a useful tool!
Dining Room Curtain Tie-Backs
I couple weeks ago, I posted about the new curtains. I recently picked up some cream satin ribbon and used that to tie back the curtains.
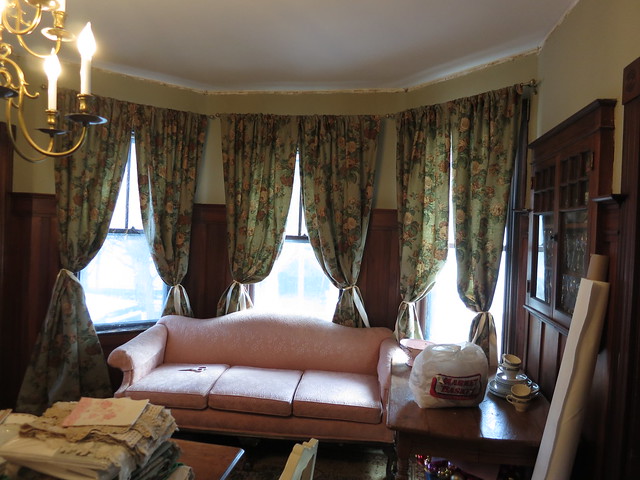
I have them all tied a little differently while I try to figure out exactly how they should poof and fall.
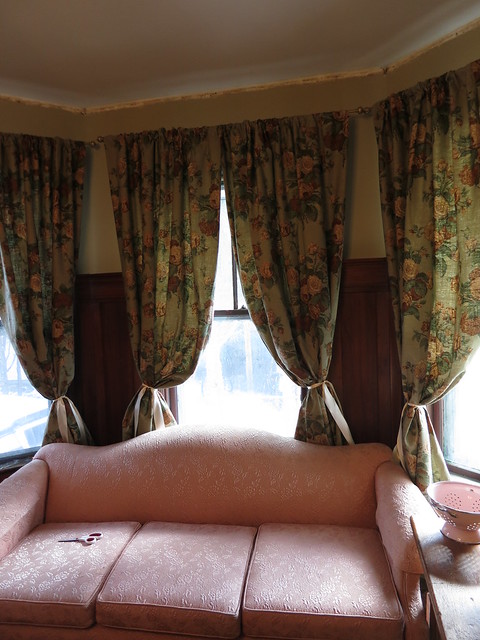
It’s really hard to get them even so I’ve been tweaking them for a while.
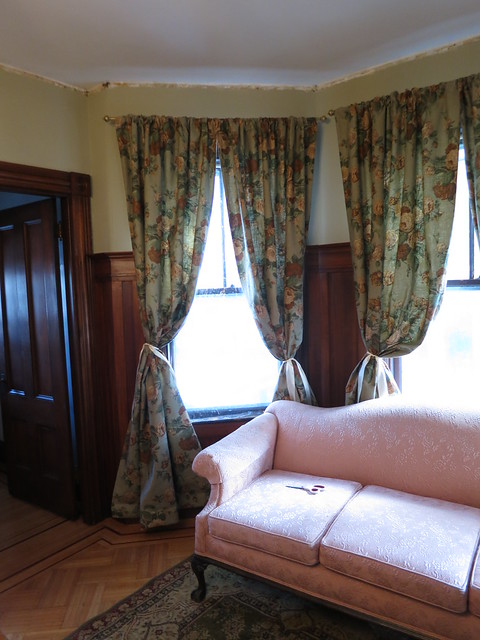
I’m planning on adding sheers to the windows for a little better privacy but I really like the added light from tying back the curtains. I’ve just got to get the ribbons even and it will be looking good. I really like how it turned out with the ribbon. It’s just a little more modern and simple than tassels or anything of that nature.
Curtains give presence to a room, helping set the mood from casual and easy to bold and dramatic. We asked for some guidance from an interior designer about the color of curtains and paintings. At Crate and Barrel, we offer a carefully edited selection of drapes and curtain rods that fit a range of styles to work in any room. All of our curtains are made with cotton, linen or silk — materials that offer a beautiful hang that stays smooth and full over time. Choose from subtle neutrals and bold patterns designed exclusively for us by talented artists. And basic is never ordinary. Even our solid window curtains have textural contrast and subtle coloration that bring in a little something special.
What do you think? Fan of the ribbons or do you think I should go with something more traditional? I also want to add some furniture from the TV Bed Store.
Sarah
Siding Denver
7/22/2019 | 4:04 pm Permalink
I believe that Christmas is the best season ever! Nice decorations by the way.