
Bathroom Floor Underlayment – Part 4
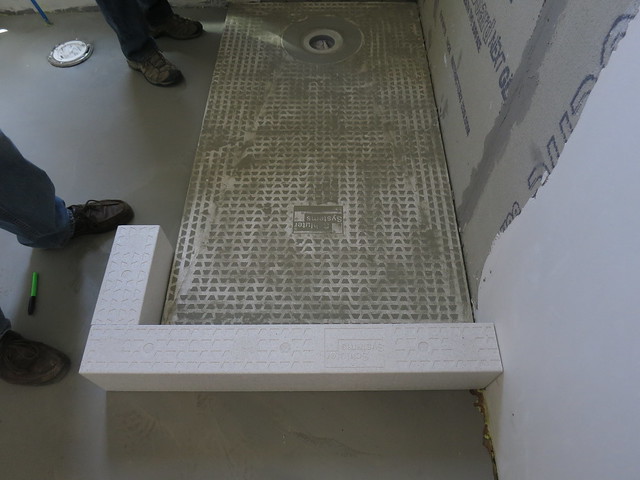
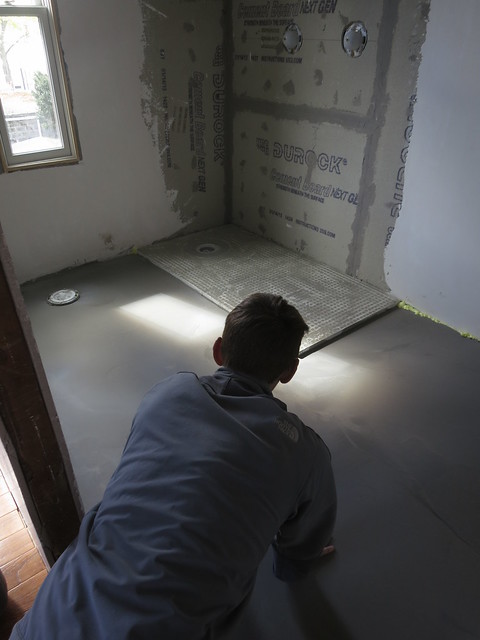
Before we could lay down the vapor barrier, Stefan and my Father built a half-height wall and installed the shower curbs.
The half height wall should lend some privacy to the toilet area. After constructing the frame with 2x4s, they covered it with durock. One thing they did do was to shim the durock on the top of the wall so that water will roll off the ledge instead of pooling on it. It has a nice slope to it comparable to the Styrofoam curbs. The whole thing was thinset in place.
Here are the curbs set in place.

Click here for Bathroom Floor Underlayment – Part 1: heating mat
and here for Bathroom Floor Underlayment – Part 2: SLC take 1
and here for Bathroom Floor Underlayment – Part 3: SLC take 2
Sarah
Half Bath Floor
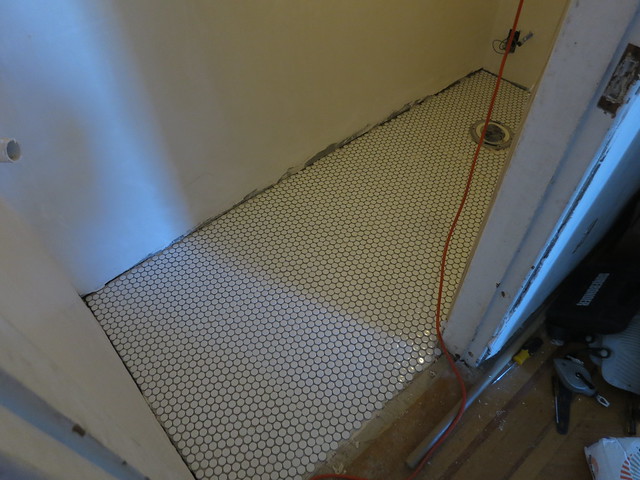
I mentioned last week that my parents were coming to visit. It was such a fun trip. I’m exhausted as usual but we got tons done. One of the quicker projects was tiling the half bath floor.
It was great to have a practice room for the penny tile. It was quite forgiving all things considered. If you’d like a detailed tutorial on laying penny tile, I recommend this post by Young House Love.
The basic rundown is spread thin-set, lay tile, get everything even, wait until the thin set is cured, grout, wipe with sponge, wait 10 min, wipe with sponge, wait 20 min, wipe with sponge, etc. It’s not a difficult process as long as you are patient with the tile and make sure to clean the grout before it hardens up.
Step 1 and 2: Spread thin-set and lay tile
Step 3: grout
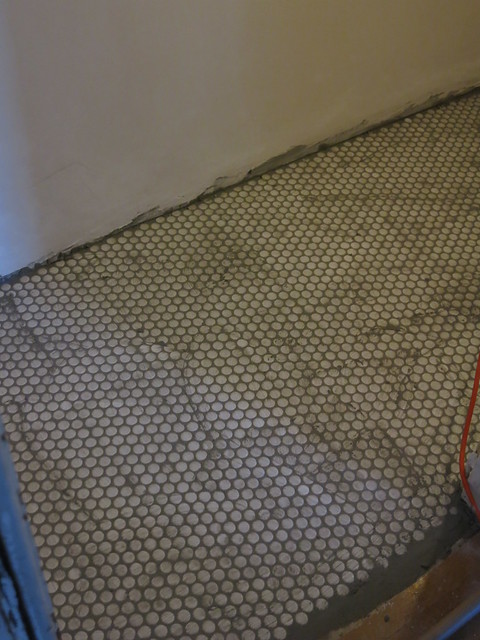
Step 4 through the end: wipe and wait, repeat until clean.
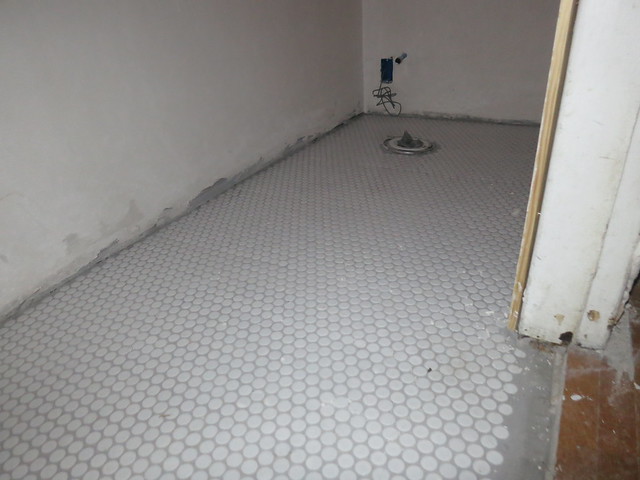
The grout we chose was a medium grey. I didn’t want to do white. I’m just not clean enough to keep it all white. The penny tile is a shiny penny tile and each penny is 3/4″ round. I LOVE LOVE LOVE the way it turned out. I had so much fun learning from my mother who has done so much tiling she’s practically a pro.
Sarah
-
Tiling the Bathroom Floor | | Craft, Decor, Art, Garden, and Dessert
[…] already posted some photos of the half bath and the master went very similarly but on a larger […]
Trackbacks & Pingbacks
Bathroom Floor Underlayment – Part 3
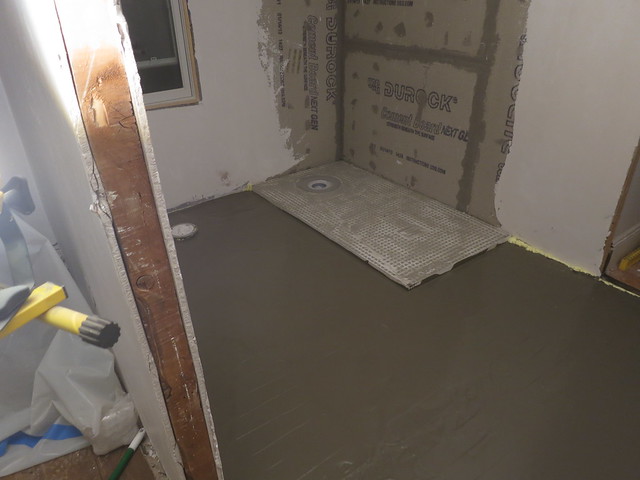
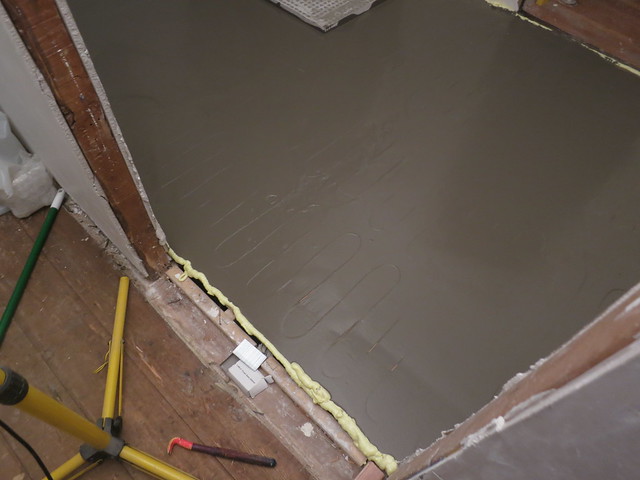
In part 2 of the bathroom floor underlayment, we poured a layer of self-leveling compound. I mentioned that it sets up really quick and you can’t keep touching it. Lesson learned. By the time it dried up it was a bit too wavy for our liking. So, back to Home Depot to pick up 3 more bags. This time Stefan and my Father went to town. We really learned how it works on the first go round and the second layer got nice and flat.
Here Stefan is caressing his dead flat, smooth floor. Between the Self Leveling compound and all the tiling, there was lots of floor caressing this weekend. It helps to show your house you love it. It will behave better if it knows you care.
Click here for Bathroom Floor Underlayment – Part 1: heating mat
and here for Bathroom Floor Underlayment – Part 2: SLC take 1
Sarah
-
Bathroom Floor Underlayment – Part 5 | | Craft, Decor, Art, Garden, and Dessert
[…] down the heating mats. Then we spread a layer of self leveling compound in Part 2 and another in Part 3. Part 4 discusses the curb and wall for the shower […]
-
Tiling the Bathroom Floor | | Craft, Decor, Art, Garden, and Dessert
[…] Part 1: heating mat and here for Bathroom Floor Underlayment – Part 2: SLC take 1 and here for Bathroom Floor Underlayment – Part 3: SLC take 2 and here for Bathroom Floor Underlayment – Part 4: Curb and Wall and here for Bathroom Floor […]
Trackbacks & Pingbacks
Bathroom Floor Underlayment – Part 2
In Part 1, I talked about laying down the heated mats. After the mats were down and ready, it was time for the self leveling compound. Self leveling compound is essentially just a really liquidy concrete that you pour over a floor to smooth out the surface and, in our case, encase the heated flooring wires. Since the concrete is so liquidy, we had to dam up the walls with a bead of spray foam. The Great Stuff. So handy!
After the foam was dried and cleaned up a bit, it was time to level. But, before the self leveling compound, we needed to prime.
This is the product used to prime the floor for the leveler.
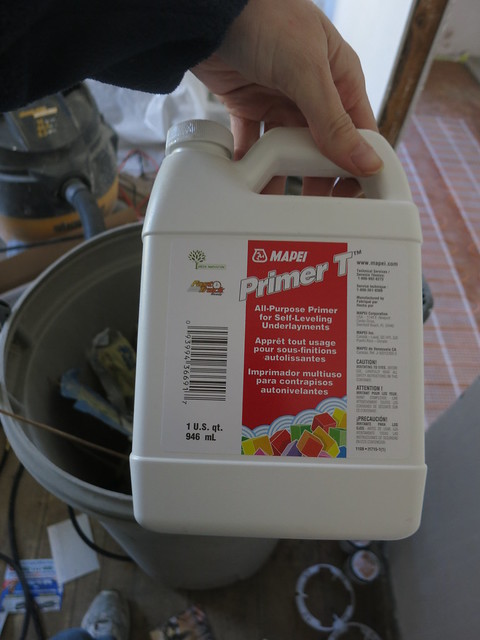
We rolled that on the floor with a 3/8 inch nap roller and a brush for the corners. The one bottle was just enough for the space which is about 11.5 x 6.5 feet less the 32″x60″ shower pan.
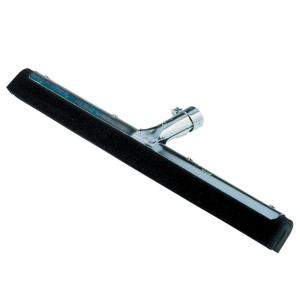
The Primer was supposed to dry for 2-4 hours but not more than 24 before adding the self leveling compound. If we were normal, we would have watched TV, relaxed, while waiting for the primer to dry. Instead, we put down a new floor. You know, since we were waiting. 3 exhausting hours later and it was time. We mixed up the self leveling compound. We used 2 bags which was just enough for the space though it would have been nice to have another half a bag or so. There is only a 10 min window for smooshing it over the surface so forgive the lack of in-progress pictures…I was busy. We used a big window washing squeegee which worked great.
The stuff is super liquidy so you basically want to push it around in to the corners etc. I’d also recommend mixing the whole amount all at once if you can. We did one bag at a time and the first was almost done with it’s 10 min by the time the second one was ready to be poured. The other thing we learned is to stop touching it. The “younger” it is when you are done the better. It’s wetter and much better at leveling itself.
Since you have to work so fast, it is a quick project and we were back to flooring in no time. I am very excited and looking forward to next steps, like installing residential glass. I have found a great contractor offering residential glass Houston Tx and cannot wait till they start the works.
The great stuff barriers worked great. After a day it’s dry and we were able to clean up any foam that is in the way of our tiling.
Stay tuned for Part 3 – Setting the Tile. My mother will be here to help. I’m excited!
Sarah
-
Bathroom Floor Underlayment – Part 3 | | Craft, Decor, Art, Garden, and Dessert
[…] part 2 of the bathroom floor underlayment, we poured a layer of self-leveling compound. I mentioned that it sets up really quick and you […]