
Bathroom Floor Underlayment – Part 5
Lets review the layers of stuff we have on this floor. First is the beams. We had to level them out in order to get the room flat. Then we layed down a nice 3/4″ plywood subfloor. In Part 1 I talked about laying down the heating mats. Then we spread a layer of self leveling compound in Part 2 and another in Part 3. Part 4 discusses the curb and wall for the shower boundaries.
Part 5 is the vapor barrier. The product we used was basically a big piece of fuzzy/felted rubber/plastic that is glued down and seamed with a solvent. The process involved cutting the material to size, spreading the glue and then using a rolling pin to really embed the material in the glue. It was a lot of work and Stefan and my Daddy didn’t stop to take many pictures. Boo.
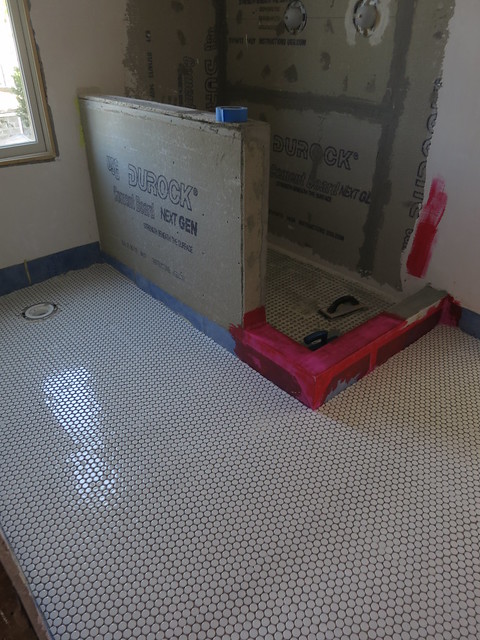
You can see that we put it up the walls a couple inches and seamed the corners to make essentially a big plastic pan that we tiled on top of.
Of course we don’t have a picture of it pre-tile but here you can see the sides of the “pan.” The blue piece along the bottom of the wall is the vapor barrier.
It installed very much like vinyl flooring using the same awkward single sheet laying process.
That glue dried fairly quickly and besides the fuzzing of the material, it was nice and smooth and flat which made it quite easy to tile.
Click here for Bathroom Floor Underlayment – Part 1: heating mat
and here for Bathroom Floor Underlayment – Part 2: SLC take 1
and here for Bathroom Floor Underlayment – Part 3: SLC take 2
and here for Bathroom Floor Underlayment – Part 4: Curb and Wall
Coming soon: Penny tile on the Master Bath Floor!!!! If you follow me on twitter, you saw a sneak peek this weekend.
Sarah
underlay
5/25/2013 | 3:26 am Permalink
Thats a very neat work, its looking good.
[WORDPRESS HASHCASH] The poster sent us ‘0 which is not a hashcash value.
Trackbacks & Pingbacks
[…] If you want to see what all we did to get ready for tile: Click here for Bathroom Floor Underlayment – Part 1: heating mat and here for Bathroom Floor Underlayment – Part 2: SLC take 1 and here for Bathroom Floor Underlayment – Part 3: SLC take 2 and here for Bathroom Floor Underlayment – Part 4: Curb and Wall and here for Bathroom Floor Underlayment – Part 5: Vapor Barrier […]